|
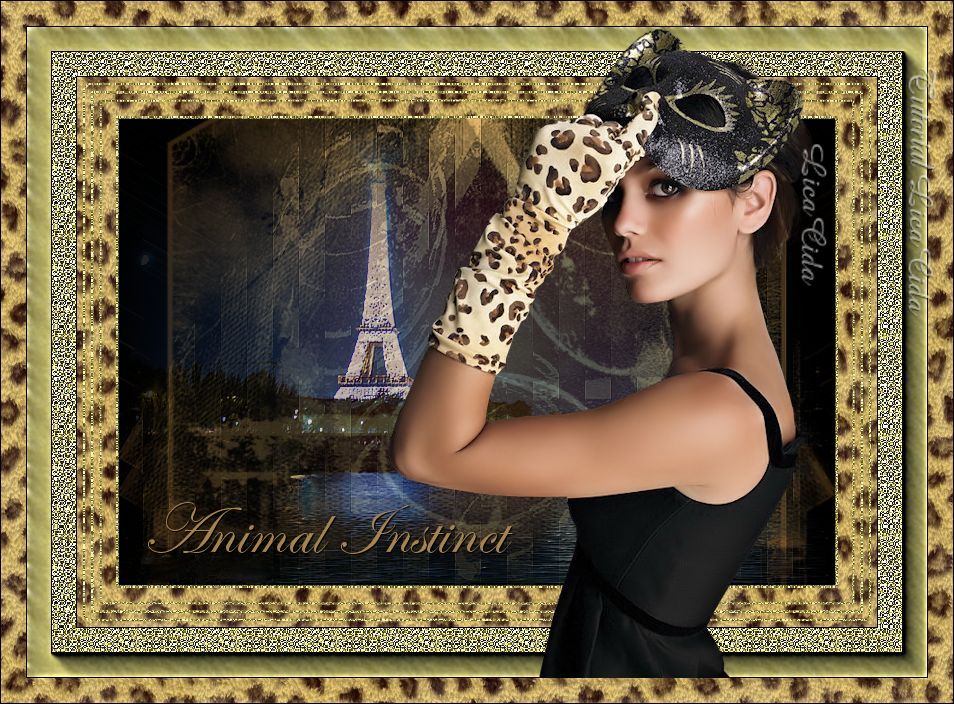
Animal Instinct
TRADUÇÕES

MATERIAL

Tubes: calguismistparis27129
calguis2portrait1349
Textura: Textura Winter
Pattern: Gold 49
Marca-d'água.
Efeitos do PSP.
Versão usada: PSP X2.
Refeita com a versão PSP X5.
PLUGINS
Plugin Alien Skin Eye Candy 5: Textures → Animal Fur
Plugin dsb flux → Linear Transmission
Plugin AAA Frames → Foto Frame
Plugin Xero → Clarity
Plugin FM Tile Tools → Blend Emboss

TUTORIAL

|
Esta seta marca sua linha
Clique e arraste para movê-la
|
1_.
Abra uma nova imagem transparente de 800 x 550 px.
Pinte com a cor #ffffff.
2_.
Plugin Alien Skin Eye Candy 5: Textures →
Animal Fur.
Settings: Leopard, Medium Spots.

Pattern: Leopard
—
29 / 25.83 / 50 / 50.
Draw Outside Selection marcado
—
Default.

Hairs: 123 / 6.00 / 21 / 43.06 / 50 / 85.

Lighting: 23 / 55 / 0 / 0 / 20.

3_.
Selections → Select All.
Selections → Modify → Contract: 15.
4_.
Selections → Modify →
Select Selection Borders.
Both Sides e Anti-alias marcados
—
Border: 1.

5_.
Layers → New Raster Layer.
Pinte com a Pattern Gold 49.
Pattern: Angle: 0 - Scale: 100
Mantenha selecionado.
6_.
Selections → Modify → Expand: 7.
7_.
Selections → Modify →
Select Selection Borders.
Both Sides e Anti-alias marcado
—
Border: 1.
Veja o print do item 4.
8_.
Layers → New Raster Layer.
Pinte com a Pattern Gold 49.
Pattern: Angle: 0 - Scale: 100
Selections → Select None.
Layers → Merge → Merge Visible.
9_.
Layers → New Raster Layer.
Selections → Select All.
Selections → Modify → Contract: 40.
10_.
Pinte com o gradiente formado pelas cores
#c8ac6b e #301b08.
Configure: Style: Sunburst -
Repeats: 0 -
Invert desmarcado -
Center Point: H: 50 / V: 50

11_.
Layers → New Raster Layer.
Edit → Copy na Textura Winter →
Edit → Paste Into Selection.
Mantenha selecionado.
12_.
Effects → Reflection Effects →
Rotating Mirror:
Horizontal: 60 -
Vertical: 45 -
Repeat marcado -
Angle: 120
13_.
Layers → Duplicate.
Image → Mirror.
Selections → Promote Selection to Layer.
Opacity: 50%.
14_.
Plugin dsb flux →
Linear Transmission:
8 / 8 / 45 / Vertical.
15_.
Effects → Edge Effects → Enhance.
Mantenha selecionado.
Layers:

Desative as layers Merged e Raster 1.
Layers → Merge → Merge Visible.
Layers:

Ative novamente as layers e altere o
Blend Mode da layer Merged para Overlay.
16_.
Selections → Modify →
Select Selection Borders.
Both Sides e Anti-alias marcados
—
Border: 1.
Veja o print do item 4.
17_.
Layers → New Raster Layer.
Pinte com a Pattern Gold 49.
Pattern: Angle: 0 - Scale: 100
Selections → Select None.
18_.
Image → Add Borders →
1 px, Symmetric marcado
—
Color: #000000.
19_.
Image → Add Borders →
50 px, Symmetric marcado
—
Color: #ffffff.
20_.
Selecione a borda.
Pinte com a Pattern Gold 49.
Pattern: Angle: 0 - Scale: 100.
21_.
Plugin AAA Frames →
Foto Frame
—
Width: 25.
22_.
Plugin Xero → Clarity → Default.
Aplique duas vezes.
Selections → Select None.
23_.
Edit → Copy no tube calguismistparis2712
Edit → Paste As New Layer.
Image → Resize: 80%
— Resize all layers desmarcado.
Opacity: use a gosto.
24_.
Plugin FM Tile Tools → Blend Emboss.
25_.
Edit → Copy no tube calguis2portrait1349
Edit → Paste As New Layer
Image → Resize: 90%
— Resize all layers desmarcado.
Posicione.
26_.
Image → Add Borders →
25 px, Symmetric marcado
—
Color: #ffffff.
Selecione a borda.
Selections → Promote Selection to Layer.
27_.
Repita o item 2.
Selections → Invert.
Pressione Delete.
Selections → Select None.
28_.
Image → Add Borders →
1 px, Symmetric marcado
—
Color: #000000.
Aplique a marca-d'água.
Assine e salve como JPG.
Tutorial criado por
Aparecida / LicaCida em abril de 2010.
Tutorial refeito em fevereiro de 2013.
Rio de Janeiro - Brasil.


VOLTAR
Copyright ©2020/2025 -
Web Design - Liriani Silva®
|

