|
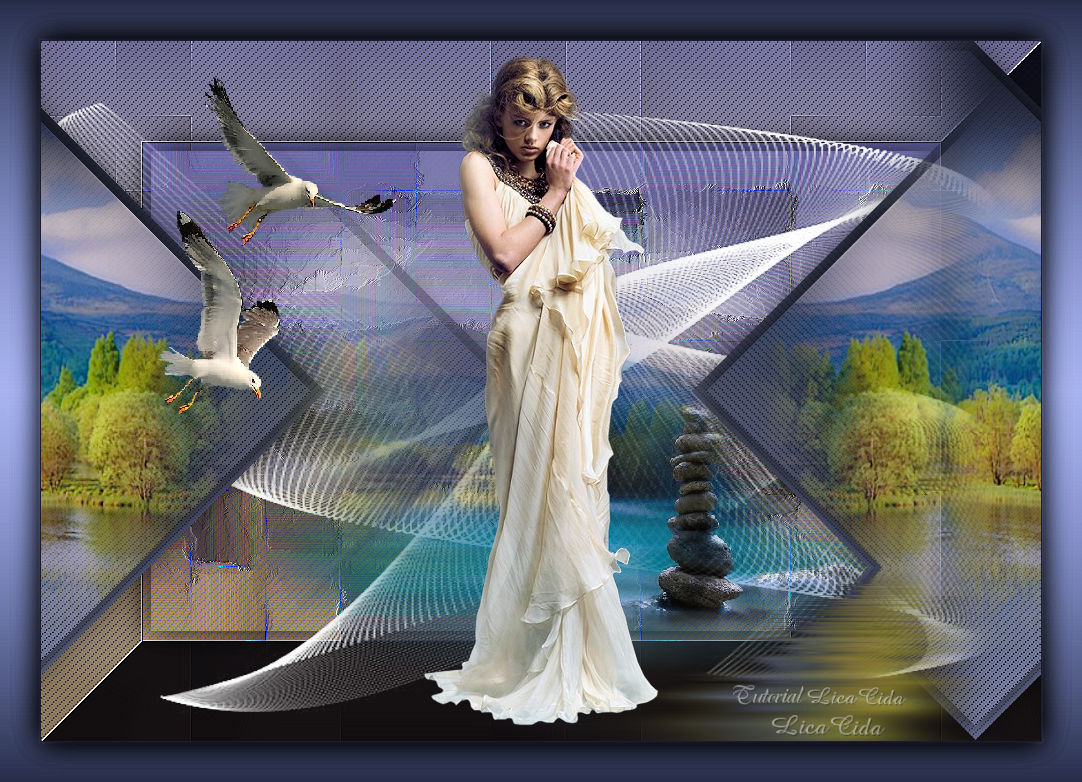
Balance of Nature
TRADUÇÕES

MATERIAL

Tubes: anna.br_tube1009
MR_Balance of Nature
Misted_ Mount Schiehallion Scotland_RM
MR_Shorebirds
Mask: nmimas_masks_76
Marca-d'água.
Efeitos do PSP.
Versão usada: PSP X8.
PLUGINS
Plugin Mehdi → Wavy Lab
Plugin Mehdi → Sorting Tiles
Plugin It@lian Editors Effect → Bordo con luci
Plugin VanDerLee → UnPlugged-X
Plugin Nik Software → Color Efex Pro 3.0 → Bi-Color User Defined
Plugin Flaming Pear → Flood
TUTORIAL
|
Esta seta marca sua linha
Clique e arraste para movê-la
|
|
Configure: Foreground: #1a1d2c — Background: #7b83aa.
1_.
Abra uma nova imagem transparente de 1000 x 700 px.
Plugin Mehdi → Wavy Lab.
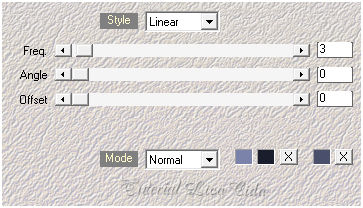
Plugin Mehdi → Sorting Tiles.
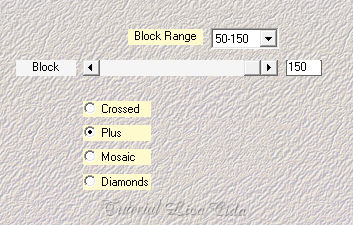
Plugin It@lian Editors Effect → Bordo con luci.
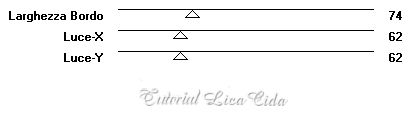
Effects → Edge Effects → Enhance More.
2_.
Ative a ferramenta Selection Tool (tecla S) → Custom Selection.
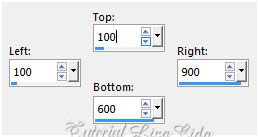
Selections → Promote Selection to Layer.
Edit → Copy no tube Misted_ Mount Schiehallion Scotland_RM
Edit → Paste Into Selection.
Selections → Modify → Contract: 10 px.
Effects → 3D Effects → Drop Shadow: 0 / 0 / 88 / 44,00 — Color: #000000.
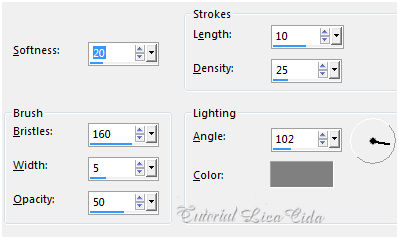
Effects → Art Media Effects → Brush Strokes — Color: #808080.
3_.
Edit → Paste As New Layer (o tube Misted_ Mount Schiehallion Scotland_RM deverá estar na memória).
Opacity: 51%.
Selections → Select None.
Adjust → Sharpness → Sharpen More.
4_.
Edit → Copy no tube MR_Balance of Nature
Edit → Paste As New Layer.
Image → Mirror.
Image → Resize: 80% — Resize all layers desmarcado (aplique duas vezes).
Posicione de acordo com a sua imagem.
Blend Mode: Overlay.
Layers → Arrange → Move Down.
Adjust → Sharpness → Sharpen More.
5_.
Layers → Duplicate.
Layers → Arrange → Move Up.
Blend Mode: Normal.
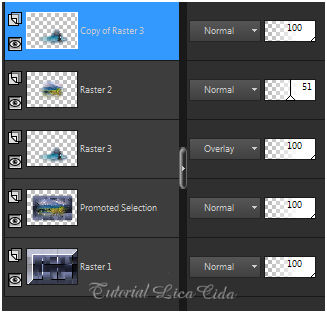
Layers → Merge → Merge Down.
6_.
Layers → New Raster Layer.
Plugin VanDerLee → UnPlugged-X.
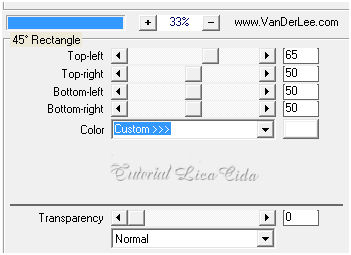
Com a ferramenta Magic Wand, selecione a parte externa do efeito.
Selections → Invert.
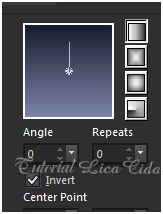
Pinte com o gradiente formado pelas cores acima.
Configure: Style: Linear — Angle: 0 — Repeats: 0 — Invert marcado.
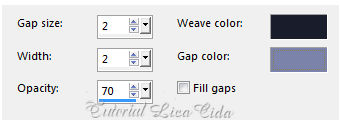
Effects → Texture Effects → Weave.
Selections → Modify → Contract: 10 px.
Edit → Copy no tube Misted_ Mount Schiehallion Scotland_RM
Edit → Paste Into Selection.
Adjust → Sharpness → Sharpen More.
Effects → 3D Effects → Drop Shadow: 0 / 0 / 88 / 44,00 — Color: #000000.
Selections → Select None.
Effects → Image Effects → Offset: H: -215 / V: 0 — Custom e Transparent marcados.
7_.
Layers → Duplicate.
Image → Mirror.
Effects → Image Effects → Offset: H: 135 / V: 0 — Custom e Transparent marcados.
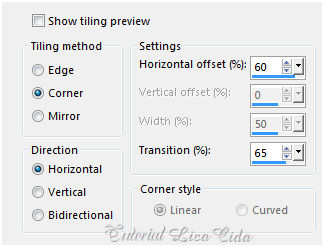
Effects → Image Effects → Seamless Tiling.
Repita na layer inferior (Raster 4).
8_.
Duplique a Raster 1.
Plugin Nik Software → Color Efex Pro 3.0 → Bi-Color User Defined (use a gosto, opcional).
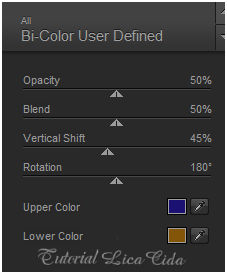
Effects → Texture Effects → Weave (print do item 6).
LAYERS
Altere os Blend Modes e a Opacity das layers.
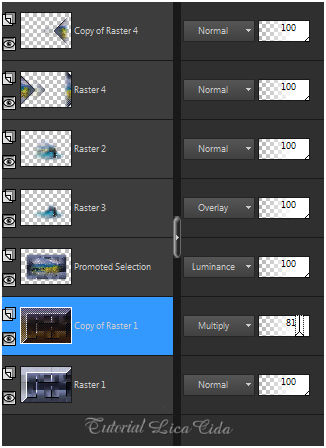
9_.
Ative a layer Promoted Selection.
Layers → New Raster Layer.
Pinte com a cor #ffffff.
Layers → New Mask Layer → From Image: nmimas_masks_76.
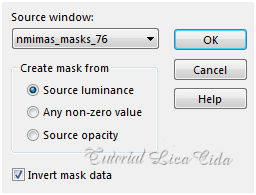
Layers → Merge → Merge Group.
Adjust → Sharpness → Sharpen More.
Na layer superior, aplique o Plugin Flaming Pear → Flood.
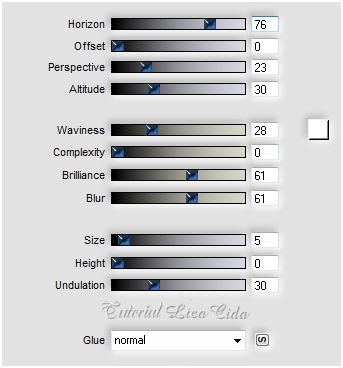
10_.
Edit → Copy nos tubes anna.br_tube1009 e MR_Shorebirds
Edit → Paste As New Layer.
Posicione e redimensione a gosto.
11_.
Image → Add Borders: 1 px, Symmetric marcado — Color: #1a1d2c.
Aplique a marca-d'água.
Assine e salve.
Espero que gostem.
Aparecida / LicaCida, julho de 2017.
Rio de Janeiro - Brasil.

VOLTAR
Copyright ©2026 - Web Design - Naise Minas
|

