|
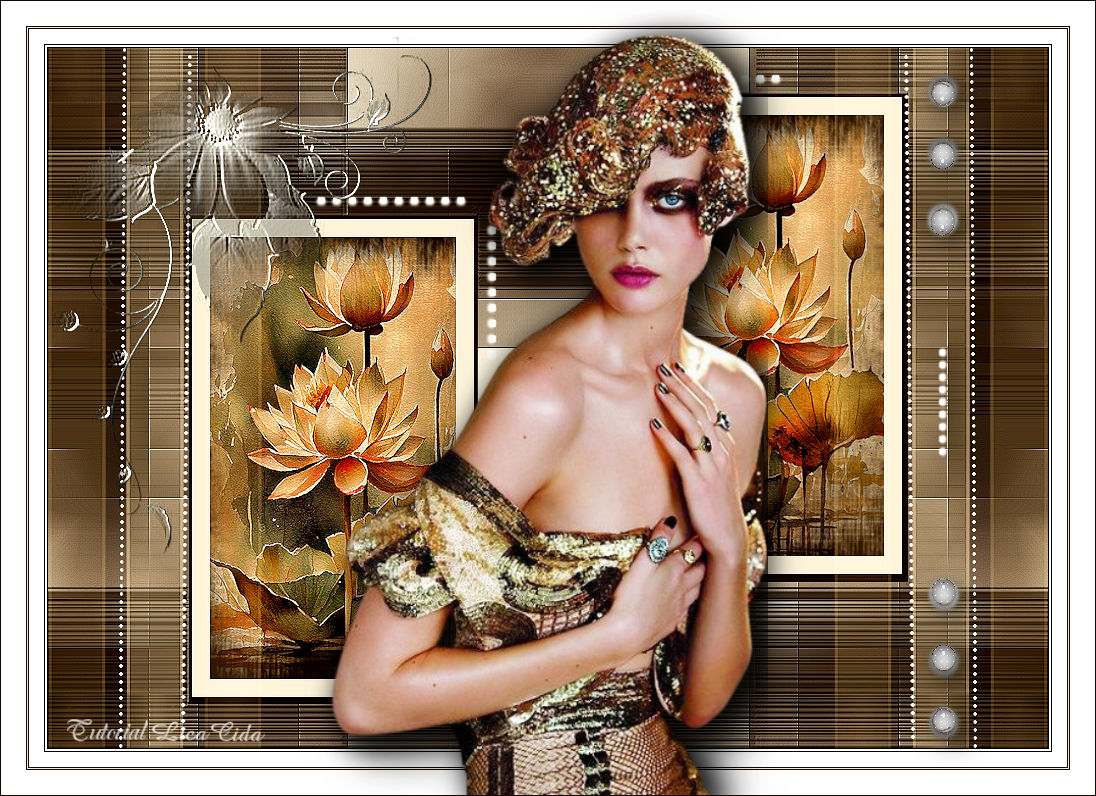
Beauty
TRADUÇÕES

MATERIAL

Imagem: alphabeauty-bylica --
Seleções #1, #2 e #3 guardadas no Alpha Channel da imagem.
Tubes: 975MulherByPqnaAlice
Callitubes-801flores
Masks: NarahsMasks_1755
creation.tine_masque238
Decor: decoriscos_lc
pontilhado laterais_lc
decofinal_lc
Marca-d'água.
Efeitos do PSP.
PLUGINS
Plugin Mehdi → Sorting Tiles
Plugin Simple → 4 Way Average
Plugin Filters Unlimited 2.0 → &<BKg Designer sf10 II> → DIS Refractor 1
Plugin MuRa's Seamless → Emboss at Alpha
Plugin L en K's → Mayra
Plugin Toadies → What Are You?
Plugin AAA Filters → Custom
TUTORIAL
|
Esta seta marca sua linha
Clique e arraste para movê-la
|
|
1_.
Abra o material no PSP, duplique e feche o original.
Escolha duas cores para trabalhar: Foreground: #160704 — Background: #f5eedf.
2_.
Abra o arquivo alphabeauty-bylica.
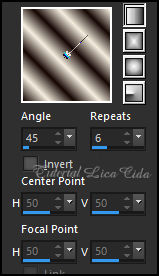
Pinte com o gradiente formado pelas cores em uso.
Configure: Style: Linear — Angle: 45 — Repeats: 6.
3_.
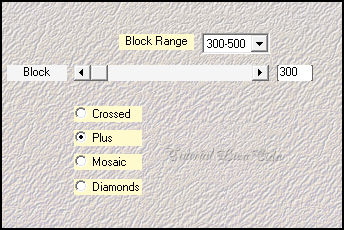
Plugin Mehdi → Sorting Tiles.
4_.
Plugin Simple → 4 Way Average.
Effects → Edge Effects → Enhance More.
5_.
Plugin Filters Unlimited 2.0 → &<BKg Designer sf10 II> → DIS Refractor 1.

Repita o efeito.
Layers → Duplicate.
Blend Mode: Hard Light — Opacity: 100%.
6_.
Layers → New Raster Layer.
Pinte com a cor do Foreground: #160704.
7_.
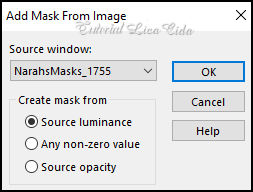
Layers → New Mask Layer → From Image: NarahsMasks_1755.
Effects → Edge Effects → Enhance.
Layers → Merge → Merge Group.
Plugin MuRa's Seamless → Emboss at Alpha — Default.
Blend Mode: Darken — Opacity: 100%.
8_.
Selections → Load/Save Selection → Load Selection From Alpha Channel → Selection #1.
9_.
Selections → Modify → Contract: 3.
Layers → New Raster Layer.
Pinte com a cor do Foreground: #160704.
Selections → Modify → Contract: 18.
Pressione a tecla Delete.
10_.
Edit → Copy no Callitubes-801flores
Edit → Paste As New Layer.
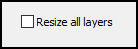
Image → Resize: 80% — Resize all layers desmarcado (aplique duas vezes).
Posicione.
Selections → Invert.
Pressione a tecla Delete.
Selections → Invert.
Selections → Select None.
Layers → Merge → Merge Down.
Adjust → Sharpness → Sharpen.
11_.
Selections → Load/Save Selection → Load Selection From Alpha Channel → Selection #2.
Repita os passos anteriores feitos com a Selection #1.
12_.
Ative a layer inferior, da mask: Group-Raster 2.
Selections → Modify → Contract: 3.
Layers → New Raster Layer (Raster 3).
Pinte com a cor do Foreground: #160704.
Selections → Modify → Contract: 18.
Pressione a tecla Delete.
13_.
Edit → Copy no Callitubes-801flores
Edit → Paste As New Layer.
Image → Resize: 80% — Resize all layers desmarcado (aplique duas vezes).
Posicione.
Selections → Invert.
Pressione a tecla Delete.
Selections → Invert.
Selections → Select None.
Layers → Merge → Merge Down.
Adjust → Sharpness → Sharpen.
14_.
Ative a layer do topo.
Layers → Merge → Merge Down.
15_.
Selections → Load/Save Selection → Load Selection From Alpha Channel → Selection #3.
16_.
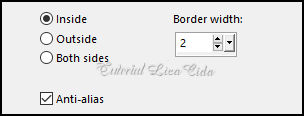
Selections → Modify → Select Selection Borders.
17_.
Layers → New Raster Layer.
Pinte com a cor do Foreground: #160704 — Opacity: 100%.
Selections → Select None.
18_.
Com a ferramenta Magic Wand (Default), selecione a parte interna do retângulo.
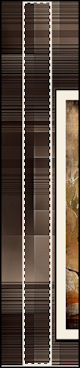
19_.
Com a ferramenta Flood Fill — Opacity: 50%, pinte com a cor do Foreground: #160704.
Volte a Opacity para 100%.
20_.
Plugin L en K's → Mayra — Default.
Selections → Select None.
Effects → Edge Effects → Enhance.
21_.
Plugin Toadies → What Are You?
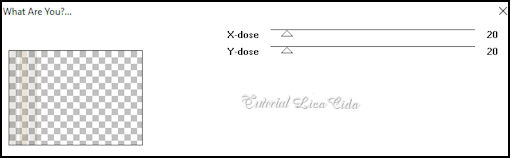
Repita o efeito.
Layers → Duplicate.
Image → Mirror → Mirror Horizontal.
Layers → Merge → Merge Down.
22_.
Edit → Copy no decoriscos_lc
Edit → Paste As New Layer (Raster 4).
Com a ferramenta Pick Tool: Position X: 69 — Position Y: -1.
Layers → Duplicate.
Image → Mirror → Mirror Horizontal.
Layers → Merge → Merge Down.
Blend Mode: Screen — Opacity: 100%.
23_.
Edit → Copy no pontilhado laterais_lc
Edit → Paste As New Layer (Raster 5).
Posicione.
Layers → Duplicate.
Image → Mirror → Mirror Horizontal.
Posicione.
Layers → Merge → Merge Down.
24_.
Edit → Copy no decofinal_lc
Edit → Paste As New Layer (Raster 6).
Observe o modelo e posicione.
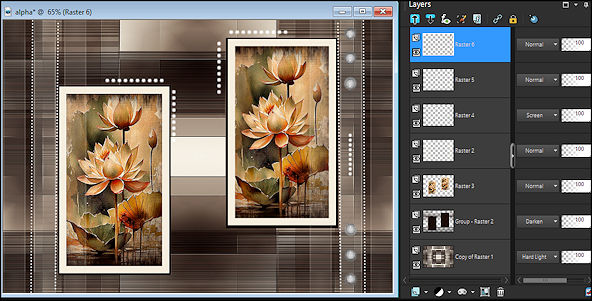
25_.
Image → Add Borders: 1 px, Symmetric marcado — Color: #160704 (Foreground).
26_.
Plugin AAA Filters → Custom → Landscape — Default.
Repita (opcional).
27_.
Edit → Copy no creation.tine_masque238
Edit → Paste As New Layer.
Effects → User Defined Filter → Emboss_3.
Repita o Emboss_3.
Posicione.
BORDAS
28_.
Image → Add Borders: 3 px, Symmetric marcado — Color: #f5eedf (Background).
Image → Add Borders: 1 px, Symmetric marcado — Color: #160704 (Foreground).
Image → Add Borders: 15 px, Symmetric marcado — Color: #ffffff.
Image → Add Borders: 1 px, Symmetric marcado — Color: #160704 (Foreground).
Image → Add Borders: 3 px, Symmetric marcado — Color: #f5eedf (Background).
Image → Add Borders: 1 px, Symmetric marcado — Color: #160704 (Foreground).
Image → Add Borders: 25 px, Symmetric marcado — Color: #ffffff.
29_.
Edit → Copy no tube 975MulherByPqnaAlice
Edit → Paste As New Layer.
Adjust → One Step Photo Fix.
Aplique um Drop Shadow a gosto.
Aplique a marca-d'água.
Assine e salve.
File → Export → JPEG Optimizer.
Aparecida / LicaCida, abril de 2024.
Rio de Janeiro - Brasil.

VOLTAR
Copyright ©2026 - Web Design - Naise Minas
|


