|
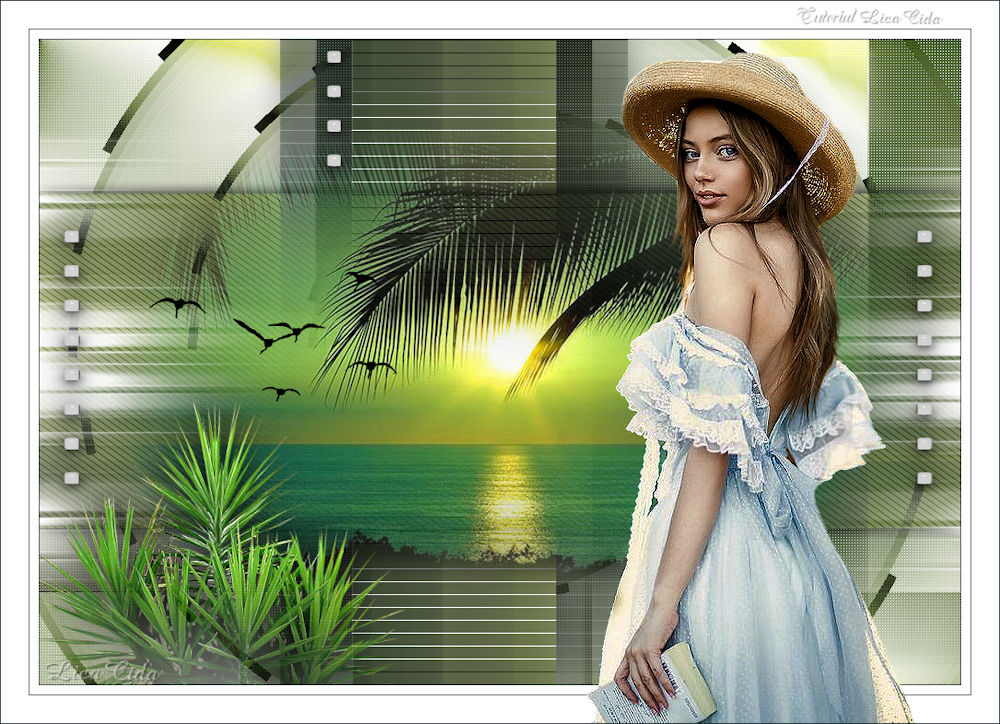
Clara
TRADUÇÕES

MATERIAL

Seleções: clara1lc
clara2lc --
Salvar na pasta Selections do PSP.
Tubes: tube3231_mulher_mara_pontes
calguismistsecenery29610
spiky_cordyline_by_lilipilyspirit-d4zkex2
aves
Deco: decoclaralc
Mask: Narah_Mask_1392
Marca-d'água.
Efeitos do PSP.
Versão usada: PSP X8.
PLUGINS
Plugin FM Tile Tools → Blend Emboss
Plugin Mehdi → Sorting Tiles
Plugin Mehdi → Weave
Plugin Graphics Plus → Vertical Mirror
Plugin L en K's → Mayra
Plugin Toadies → What Are You?
Plugin AP [Line] Lines → SilverLining
Plugin AAA Filters → Custom
Plugin Flaming Pear → Flexify 2
Plugin Cybia → AlphaWorks
Plugin FFFB → Spinner
TUTORIAL
|
Esta seta marca sua linha
Clique e arraste para movê-la
|
|
Configure: Foreground: #d0bd84 — Background: #172a31.
1_.
Abra uma nova imagem transparente de 1000 x 700 px.
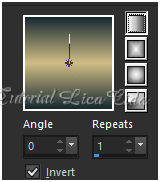
Pinte com o gradiente formado pelas cores acima.
Configure: Style: Linear — Angle: 0 — Repeats: 1 — Invert marcado.
2_.
Selections → Select All.
Edit → Copy no tube calguismistsecenery29610
Edit → Paste Into Selection.
Selections → Select None.
Effects → Image Effects → Seamless Tiling: Default — Transition: 100%.
3_.
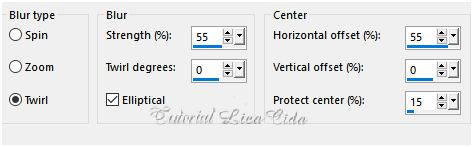
Adjust → Blur → Radial Blur.
Adjust → Add/Remove Noise → JPEG Artifact Removal — Maximum — C: 78.
Plugin FM Tile Tools → Blend Emboss — Default.
4_.
Plugin Mehdi → Sorting Tiles.
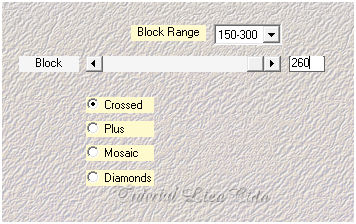
5_.
Effects → Reflection Effects → Rotating Mirror.
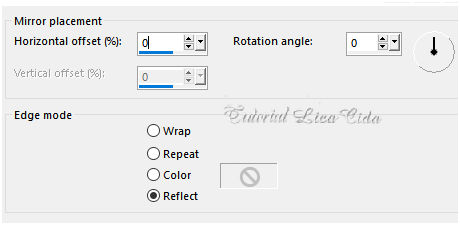
6_.
Plugin Graphics Plus → Vertical Mirror — Default (128 / 0).
7_.
Plugin Mehdi → Sorting Tiles.
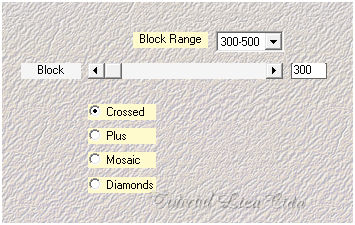
8_.
Plugin Mehdi → Weave.
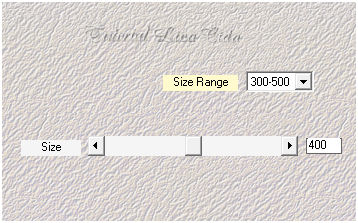
9_.
Selections → Load/Save Selection → Load Selection From Disk → clara1lc.
Selections → Promote Selection to Layer.
10_.
Plugin L en K's → Mayra — Default (0 / 149 / 76 / 2).
Selections → Select None.
11_.
Plugin Toadies → What Are You?: 20 / 0.
Effects → 3D Effects → Drop Shadow: -10 / -1 / 75 / 50,00 — Color: #000000.
12_.
Layers → New Raster Layer.
Pinte com a cor #ffffff.
Layers → New Mask Layer → From Image: Narah_Mask_1392.
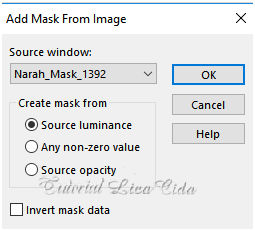
Layers → Merge → Merge Group.
Adjust → Sharpness → Sharpen More.
13_.
Ative a Raster 1.
Selections → Load/Save Selection → Load Selection From Disk → clara2lc.
Selections → Promote Selection to Layer.
Layers → Arrange → Move Up.
14_.
Plugin AP [Line] Lines → SilverLining.
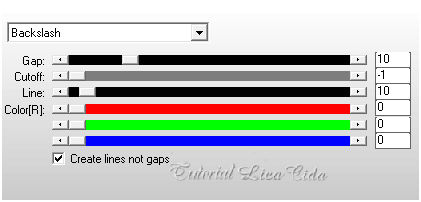
Selections → Select None.
Effects → 3D Effects → Drop Shadow: -10 / -1 / 75 / 50,00 — Color: #000000.
15_.
Edit → Copy no tube calguismistsecenery29610
Edit → Paste As New Layer.
Adjust → Sharpness → Sharpen More.
Opcional: Plugin AAA Filters → Custom — Landscape (Default).
16_.
Selecione as layers Group-Raster 2 e Promoted Selection 1.
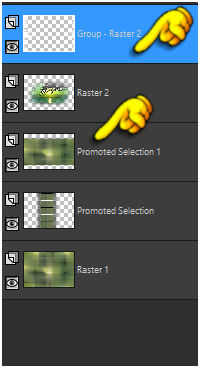
Aplique o Plugin Flaming Pear → Flexify 2.
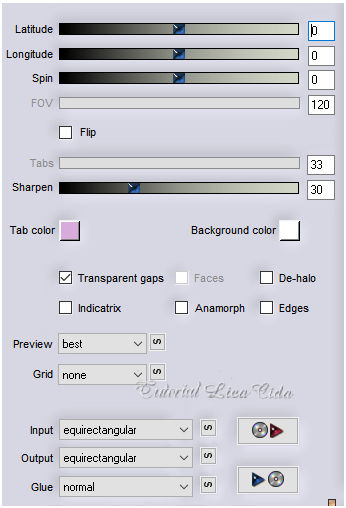
17_.
Ative a Raster 1.
Effects → Texture Effects → Weave.
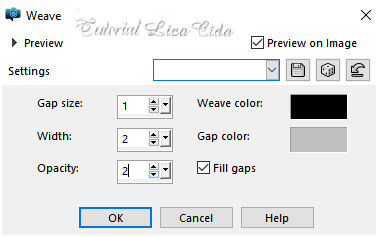
Layers → Duplicate.
18_.
Plugin Cybia → AlphaWorks.
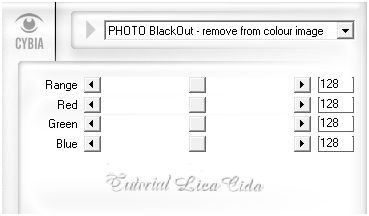
19_.
Plugin FFFB → Spinner.
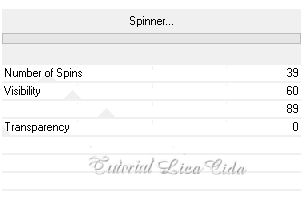
LAYERS
Altere os Blend Modes e a Opacity das layers.
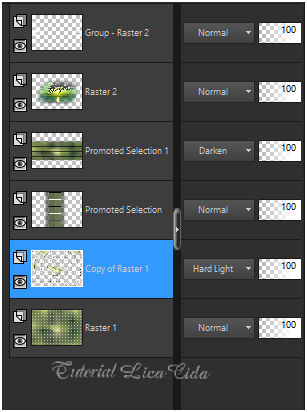
20_.
Ative a layer superior (Group-Raster 2).
Edit → Copy no tube spiky_cordyline_by_lilipilyspirit-d4zkex2
Edit → Paste As New Layer.
Posicione a gosto.
21_.
Edit → Copy no tube aves
Edit → Paste As New Layer.
Posicione a gosto (Raster 4).
22_.
Edit → Copy no decoclaralc
Edit → Paste As New Layer.
Retire quatro quadradinhos e posicione-os em uma nova layer (veja o modelo).
23_.
Image → Add Borders: 1 px, Symmetric marcado — Color: #172a31 (cor do Background).
Image → Add Borders: 10 px, Symmetric marcado — Color: #ffffff.
Image → Add Borders: 1 px, Symmetric marcado — Color: #172a31 (cor do Background).
24_.
Image → Add Borders: 30 px, Symmetric marcado — Color: #ffffff.
25_.
Edit → Copy no tube tube3231_mulher_mara_pontes
Edit → Paste As New Layer.
Posicione.
26_.
Image → Add Borders: 1 px, Symmetric marcado — Color: #172a31 (cor do Background).
Image → Resize — Width: 1000 px.
Aplique a marca-d'água.
Assine e salve.
Espero que gostem.
Aparecida / LicaCida, outubro de 2019.
Rio de Janeiro - Brasil.

VOLTAR
Copyright ©2026 - Web Design - Naise Minas
|


