|
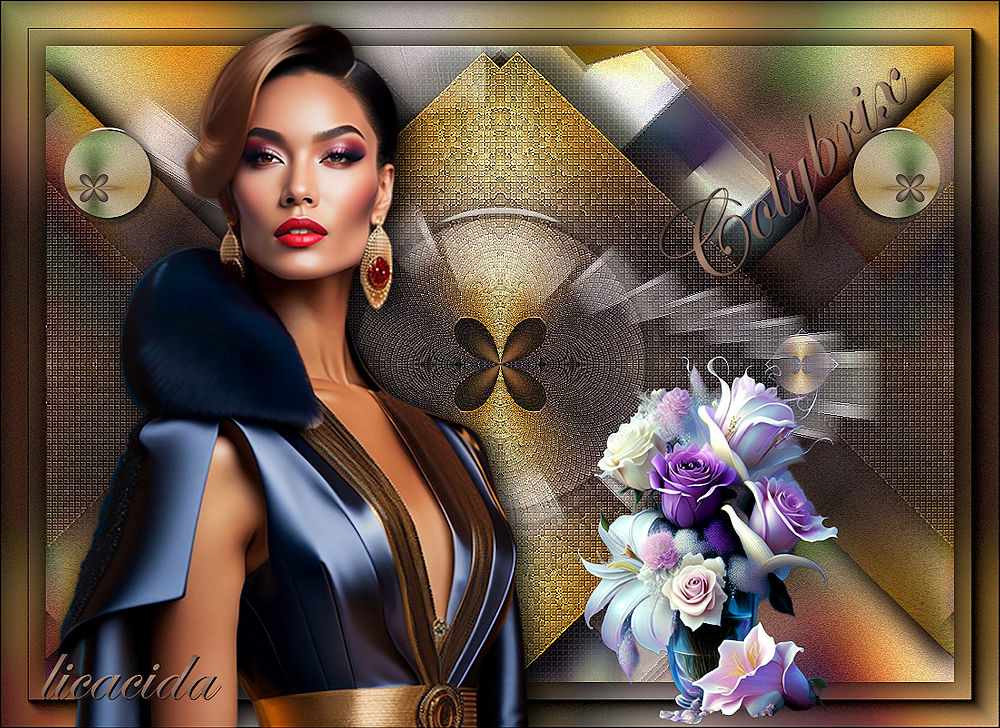
Colybrix
DEDICATÓRIA
Carinhosamente.
TRADUÇÕES

MATERIAL

Tubes: femme892-coly
vase95-coly
5156-luzcristina
Seleção: selcirculolc --
Salvar na pasta Selections do PSP (My PSP Files).
Preset: flowers --
Preset do Plugin Alien Skin Eye Candy 5: Impact → Glass. Dê duplo clique sobre o preset para importá-lo ao Plugin.
Decor: decor1_bylc
decor2_bylc
Back: free_back_ildiko
Título: titulobylc
Marca-d'água.
Efeitos do PSP.
PLUGINS
Plugin Filters Unlimited 2.0 → Andrew's Filters 3 → Radial Shoved...
Plugin FM Tile Tools → Blend Emboss
Plugin Mehdi → Edges FX
Plugin Graphics Plus → Vertical Mirror
Plugin Simple → Diamonds
Plugin Simple → Blintz
Plugin Xero → Fritillary
Plugin Alien Skin Eye Candy 5: Impact → Glass
Plugin AAA Frames → Foto Frame
TUTORIAL
|
Esta seta marca sua linha
Clique e arraste para movê-la
|
|
Configure: Foreground: #20191a — Background: #b08972.
Abra o material no PSP, duplique e feche o original.
1_.
Abra uma nova imagem transparente de 1000 x 700 px.
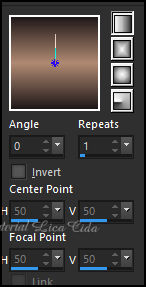
Pinte com o gradiente formado pelas cores em uso.
Configure: Style: Linear — Angle: 0 — Repeats: 1.
2_.
Escolha um gráfico ou misted com cores que combinem com as cores em uso (5156-luzcristina).
3_.
Selections → Select All.
Edit → Copy no misted 5156-luzcristina
Edit → Paste Into Selection.
Selections → Select None.
4_.
Effects → Image Effects → Seamless Tiling — Default.
5_.
Adjust → Blur → Gaussian Blur — Radius: 38,00.
6_.
Adjust → Add/Remove Noise → Add Noise: 15% — Uniform — Monochrome.
Plugin FM Tile Tools → Blend Emboss — Default.
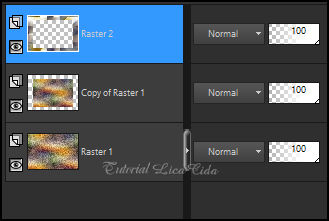
Layers → Duplicate.
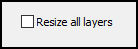
Image → Resize: 80% — Resize all layers desmarcado.
7_.
Com a ferramenta Magic Wand (Default), selecione a parte externa da imagem.
8_.
Layers → New Raster Layer.
Edit → Copy no free_back_ildiko
Edit → Paste Into Selection.
Selections → Select None.
Adjust → Sharpness → Sharpen More.
Effects → 3D Effects → Drop Shadow: 0 / 0 / 80 / 40,00 — Color: #000000.
Layers → Merge → Merge Down.
9_.
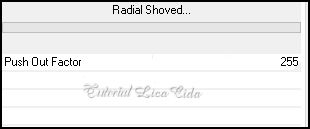
Plugin Filters Unlimited 2.0 → Andrew's Filters 3 → Radial Shoved...

10_.
Plugin Simple → Diamonds.
11_.
Ative a ferramenta Freehand Selection.
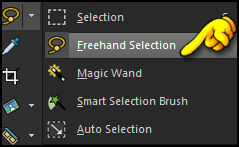
Configure:

Selecione a parte interna da imagem. Observe o print:
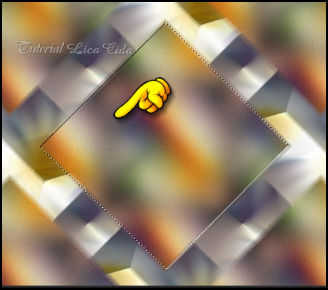
Selections → Promote Selection to Layer.
Selections → Select None.
12_.
Effects → Reflection Effects → Rotating Mirror — Default.
13_.
Plugin Graphics Plus → Vertical Mirror — Default.
14_.
Effects → Image Effects → Seamless Tiling.
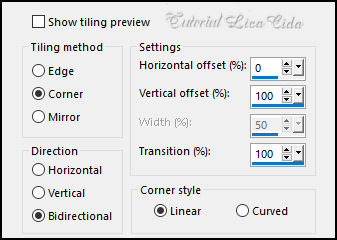
15_.
Plugin Mehdi → Edges FX.
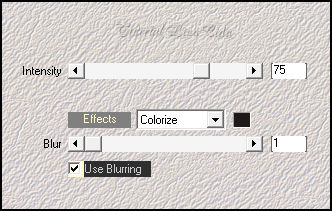
Effects → 3D Effects → Drop Shadow: 0 / 0 / 80 / 40,00 — Color: #000000.
Edit → Repeat Drop Shadow.
Layers → Duplicate.
16_.
Plugin Simple → Blintz.
Edit → Repeat Blintz.
Effects → 3D Effects → Drop Shadow: 2 / 22 / 80 / 30,00 — Color: #000000.
17_.
Plugin Xero → Fritillary — Default.
Adjust → Sharpness → Sharpen.
18_.
Effects → Reflection Effects → Kaleidoscope.
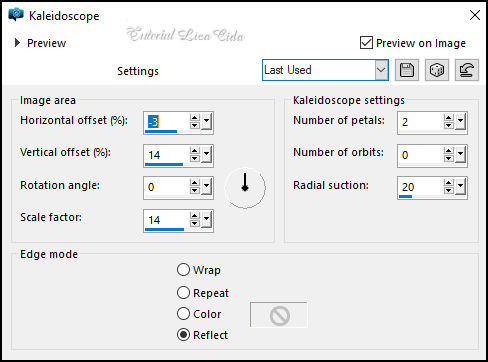
19_.
Selections → Load/Save Selection → Load Selection From Disk → selcirculolc.
Selections → Promote Selection to Layer.
20_.
Plugin Alien Skin Eye Candy 5: Impact → Glass — Preset: flowers.
Effects → 3D Effects → Drop Shadow: 0 / 0 / 80 / 40,00 — Color: #000000.
Selections → Select None.
21_.
Layers → Duplicate.
Image → Resize: 20% — Resize all layers desmarcado.
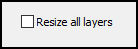
Posicione do lado esquerdo (veja o modelo).
22_.
Effects → Reflection Effects → Rotating Mirror: 0 / 180.
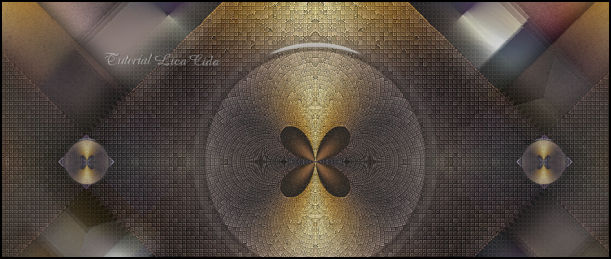
23_.
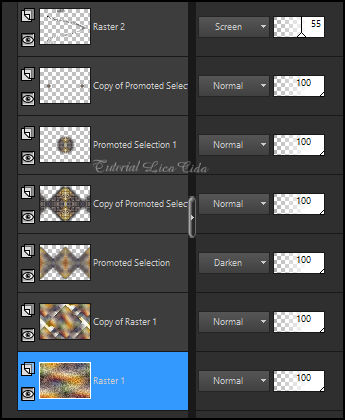
Edit → Copy no decor1_bylc
Edit → Paste As New Layer.
Blend Mode: Screen — Opacity: 55%.
Altere os Blend Modes e a Opacity das layers.
Fique à vontade para mudar os Blend Modes de acordo com as cores que estiver usando.
24_.
Edit → Copy no decor2_bylc
Edit → Paste As New Layer.
Suba um pouco o efeito, veja o modelo.

25_.
Edit → Copy Special → Copy Merged.
Selections → Select All.
Image → Add Borders: 50 px, Symmetric marcado — Color: #ffffff.
Selections → Invert.
Edit → Paste Into Selection.
Adjust → Blur → Gaussian Blur — Radius: 38,00.
Plugin AAA Frames → Foto Frame: Width: 30 — demais valores Default.
Selections → Invert.
Effects → 3D Effects → Drop Shadow: 0 / 0 / 80 / 40,00 — Color: #000000.
Selections → Select None.
26_.
Edit → Copy no tube femme892-coly
Edit → Paste As New Layer.
Posicione.
27_.
Edit → Copy no tube vase95-coly
Edit → Paste As New Layer.
Posicione.
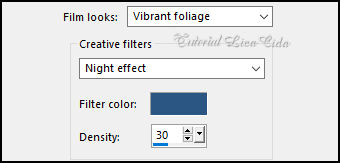
Effects → Photo Effects → Film and Filters.
28_.
Edit → Copy no titulobylc
Edit → Paste As New Layer.
Posicione.
Aplique o Drop Shadow como desejar nos três itens (26, 27 e 28).
Image → Add Borders: 1 px, Symmetric marcado — Color: #000000.
Image → Resize: Width 1000 px.
Aplique a marca-d'água.
Assine e salve.
File → Export → JPEG Optimizer.
Aparecida / LicaCida, setembro de 2023.
Rio de Janeiro - Brasil.

VOLTAR
Copyright ©2026 - Web Design - Naise Minas
|


