|
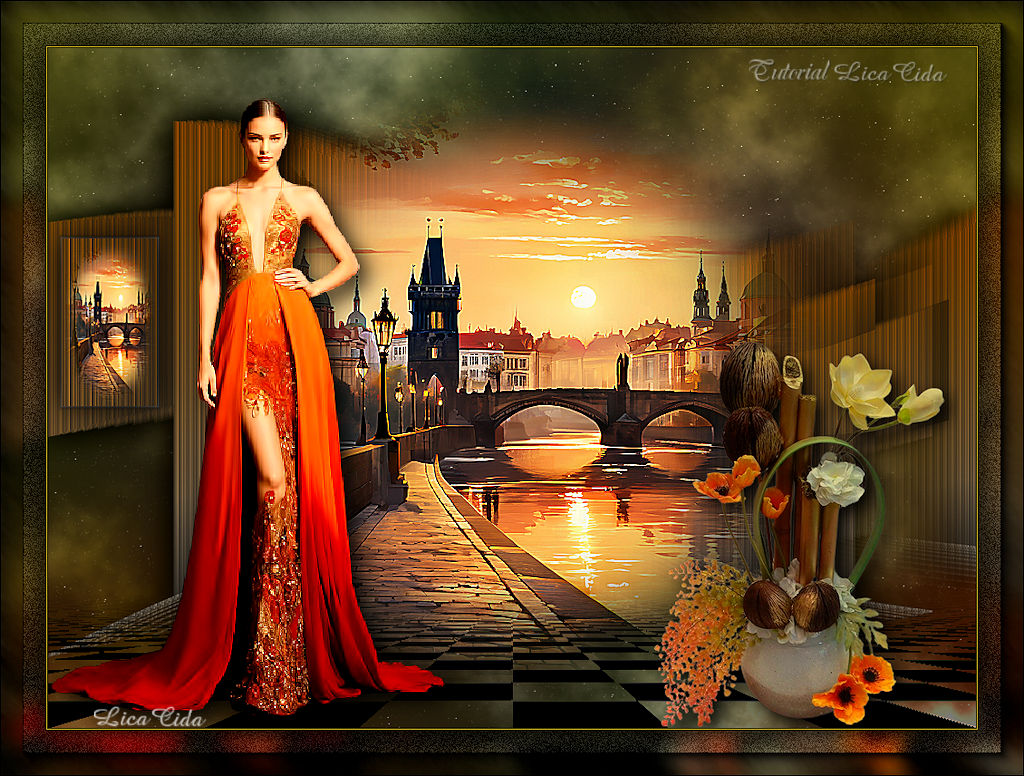
Come Back
TRADUÇÕES

MATERIAL

Tubes: Callitubes-3511mulheres
mentali-misted3109
TUBE_NAISEM_FLORES_122
Back: BACK9-RB
Marca-d'água.
Efeitos do PSP.
PLUGINS
Plugin Filter Factory Gallery A → Weave
Plugin MuRa's Meister → Copies
Plugin MuRa's Meister → Perspective Tiling
Plugin MuRa's Seamless → Checks with Gradation
Plugin Flaming Pear → Glitterato
Plugin Nik Software → Color Efex Pro 3.0 → Brilliance/Warmth
Plugin AAA Frames → Foto Frame
TUTORIAL
|
Esta seta marca sua linha
Clique e arraste para movê-la
|
|
1_.
Abra o material no PSP, duplique e feche o original.
Escolha duas cores para trabalhar: Foreground: #7a7a7a — Background: #7a4a00.
2_.
Abra uma nova imagem transparente de 1024 x 600 px.
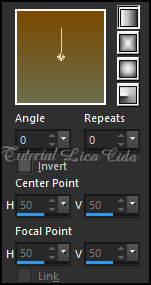
Pinte com o gradiente Linear formado pelas cores em uso.
3_.
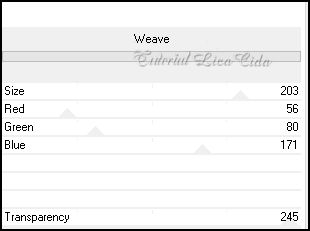
Plugin Filter Factory Gallery A → Weave.
4_.
Com a ferramenta Magic Wand (Default), selecione a parte lisa.
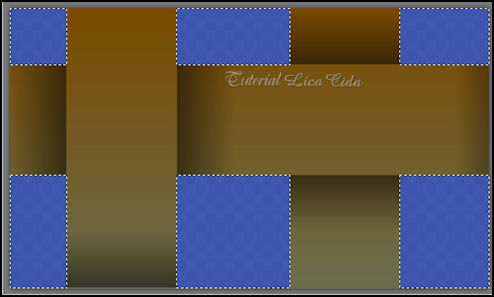
Aperte a tecla Delete.
Selections → Select None.
5_.
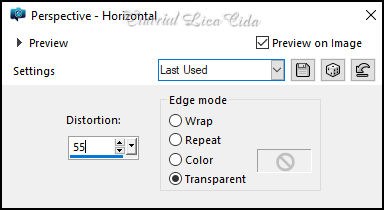
Effects → Geometric Effects → Perspective - Horizontal.
6_.
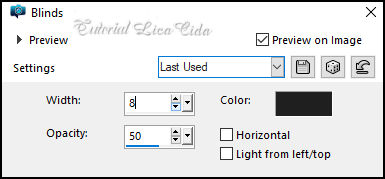
Effects → Texture Effects → Blinds — Color: #202020.
7_.
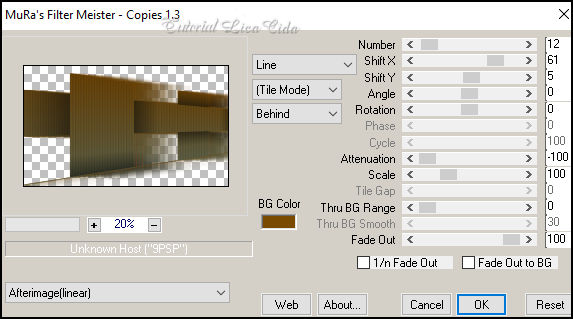
Plugin MuRa's Meister → Copies.
Adjust → Sharpness → Sharpen.
Layers → Duplicate.
Image → Resize: 80% — Resize all layers desmarcado.
8_.
Effects → Image Effects → Seamless Tiling: Side by Side.
Image → Mirror.
9_.
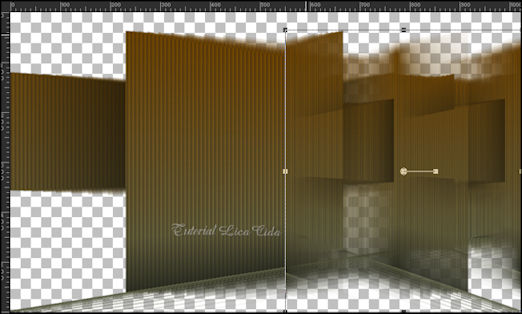
Ative a régua (Rulers). Com a ferramenta Pick Tool, da esquerda para a direita, leve o efeito até 550 px.
10_.
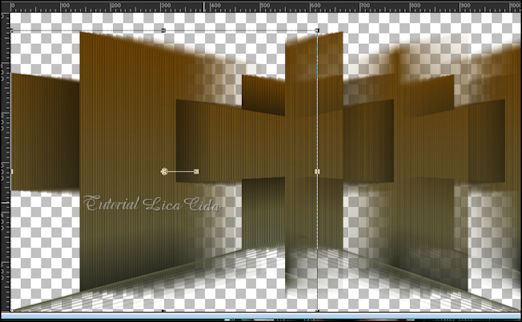
Na Raster 1, da direita para a esquerda, leve o efeito até 610 px.
LAYERS
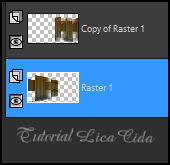
Ative a layer do topo (Copy of Raster 1).
Layers → Merge → Merge Down.
11_.
Effects → Texture Effects → Blinds (mesmos valores do item 6).
12_.
Image → Canvas Size: 1024 x 750 — Bottom: 150.
13_.
Effects → Distortion Effects → Wave.
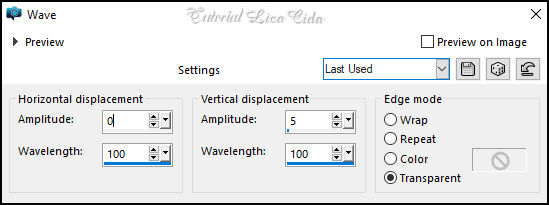
Objects → Align → Center in Canvas.
14_.
Layers → New Raster Layer.
Pinte com a cor usada no Foreground.
15_.
Plugin MuRa's Seamless → Checks with Gradation.
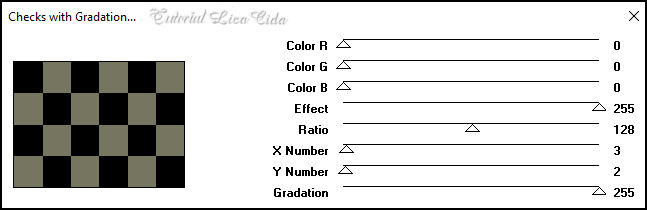
16_.
Plugin MuRa's Meister → Perspective Tiling.
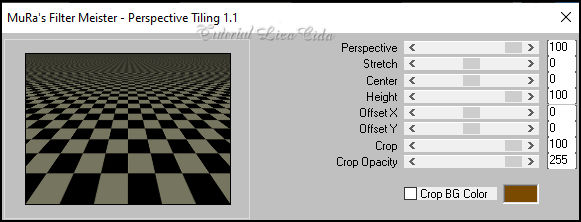
Com a régua ainda ativada, leve o efeito até 600 px.
Effects → User Defined Filter → Emboss_3.
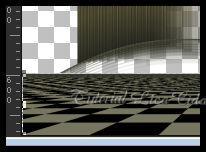
Com a ferramenta Magic Wand (Tolerance: 0 — Feather: 80), clique na parte transparente.
Aperte a tecla Delete 6 ou 7 vezes.
Selections → Select None.
Aperte a tecla Delete 6 ou 7 vezes.
Selections → Select None.
Desative a régua.
17_.
Layers → New Raster Layer.
Layers → Arrange → Send to Bottom.
Selections → Select All.
Edit → Copy no BACK9-RB
Edit → Paste Into Selection.
Selections → Select None.
18_.
Layers → New Raster Layer.
Plugin Flaming Pear → Glitterato.
Cores (use a gosto): #b7693b / #ffffff — #a8951e / #ffffff.
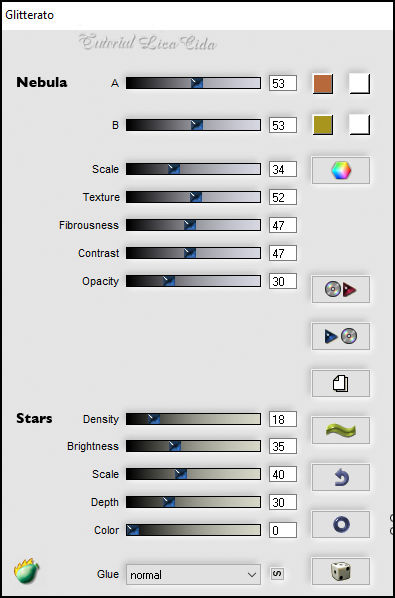
Aplique na Raster 1:
Effects → 3D Effects → Drop Shadow: 0 / 0 / 100 / 50,00 — Color: #000000.
Layers → Duplicate.
19_.
Plugin Nik Software → Color Efex Pro 3.0 → Brilliance/Warmth.
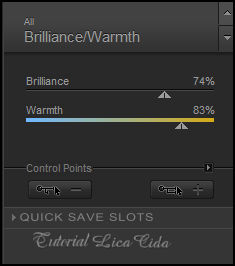
Altere os Blend Modes e a Opacity das layers.
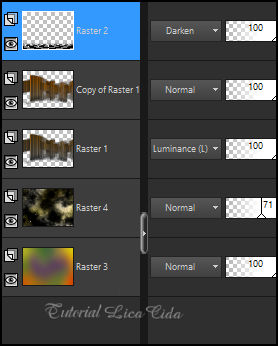
20_.
Ative a layer Copy of Raster 1.
Edit → Copy no mentali-misted3109
Edit → Paste As New Layer.
Adjust → Sharpness → Sharpen More.
21_.
Ainda na layer Copy of Raster 1, selecione com a ferramenta Selection Tool (tecla S). Observe o print:
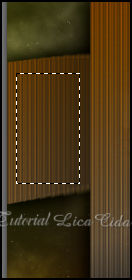
Selections → Promote Selection to Layer.
22_.
Edit → Paste Into Selection (o mentali-misted3109).
Adjust → Sharpness → Sharpen More.
23_.
Effects → 3D Effects → Chisel — Color: cor do Foreground.
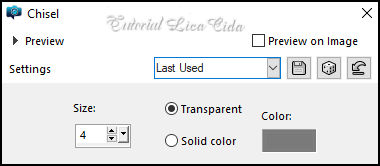
Effects → 3D Effects → Drop Shadow: 0 / 0 / 100 / 50,00 — Color: #000000.
Selections → Select None.
24_.
Edit → Copy no tube Callitubes-3511mulheres
Edit → Paste As New Layer.
Use a gosto. Posicione.
25_.
Edit → Copy no tube TUBE_NAISEM_FLORES_122
Edit → Paste As New Layer.
Use a gosto. Posicione.
BORDAS
Image → Add Borders: 1 px, Symmetric marcado — Color: #000000.
Image → Add Borders: 1 px, Symmetric marcado — Color: #a8951e.
Image → Add Borders: 1 px, Symmetric marcado — Color: #000000.
Edit → Copy.
Selections → Select All.
Image → Add Borders: 50 px, Symmetric marcado — Color: #ffffff.
Selections → Invert.
Edit → Paste Into Selection.
Adjust → Blur → Gaussian Blur — Radius: 10,00.
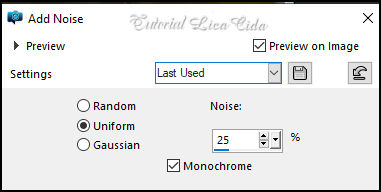
Adjust → Add/Remove Noise → Add Noise.
Plugin AAA Frames → Foto Frame: Width: 25 — demais valores Default.
Effects → 3D Effects → Drop Shadow: 0 / 0 / 100 / 50,00 — Color: #000000.
Selections → Select None.
Image → Resize: Width 1024 px.
Aplique a marca-d'água.
Assine e salve.
File → Export → JPEG Optimizer.
Aparecida / LicaCida, abril de 2024.
Rio de Janeiro - Brasil.

VOLTAR
Copyright ©2026 - Web Design - Naise Minas
|


