|
Date
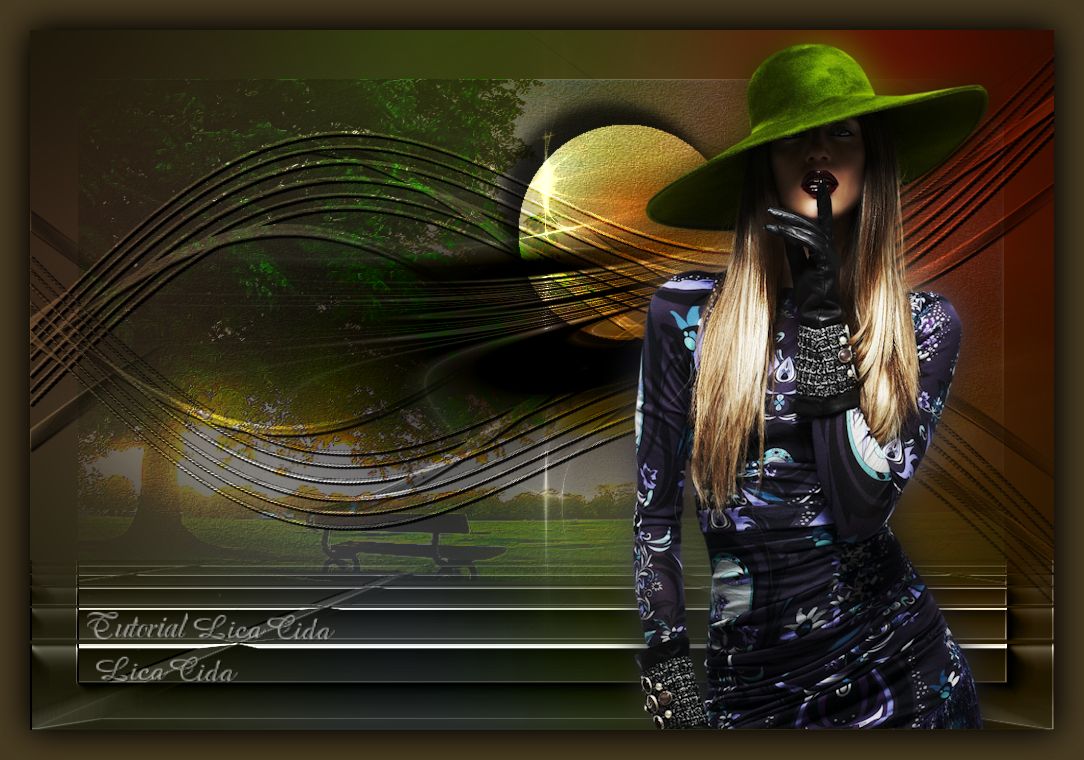
Meu carinho à Lyly pelo aniversário!
TRADUÇÕES

MATERIAL

Preset: Preset_Lights_Flood
Salvar na pasta Presets do My PSP Files.
Tubes: radi_paisaje_0119
lunapaisagem5907
Gabry-woman-747
Gradiente: lv-5-oranges
Elemento: elementoencontrolc
Back: backrb — Regina Barbeiro
Marca-d'água.
Efeitos do PSP.
Versão usada: PSP X6.
PLUGINS
Plugin Almathera → A Beveller
Plugin MuRa's Meister → Perspective Tiling
Plugin AAA Frames → Foto Frame
Plugin FM Tile Tools → Blend Emboss
TUTORIAL
|
Esta seta marca sua linha
Clique e arraste para movê-la
|
|
1_.
Abra uma nova imagem transparente de 1024 x 600 px.
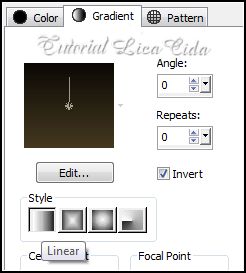
Pinte com o gradiente formado pelas cores #0c0a06 e #453820.
Configure: Style: Linear — Angle: 0 — Repeats: 0 — Invert marcado.
2_.
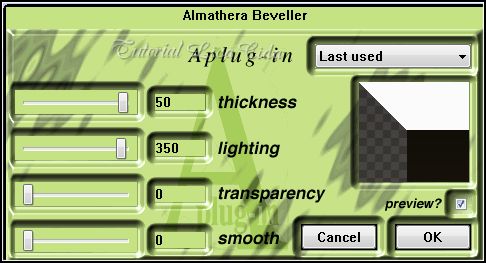
Plugin Almathera → A Beveller.
3_.
Layers → New Raster Layer.
Selections → Select All.
Edit → Copy no tube radi_paisaje_0119
Edit → Paste Into Selection.
Selections → Select None.
Blend Mode: Luminance (L).
4_.
Effects → Distortion Effects → Pinch — Strength: 100.
5_.
Layers → New Raster Layer.
Pinte com o gradiente lv-5-oranges. Configure:
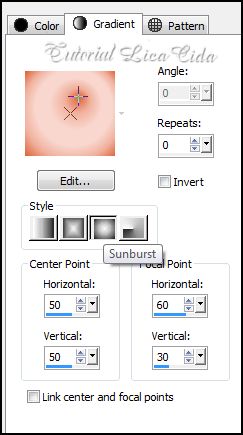
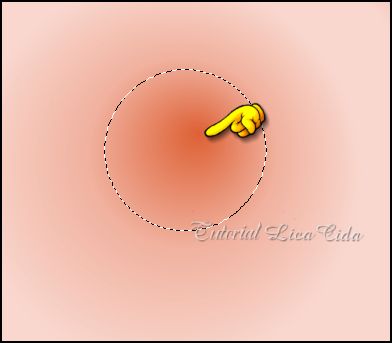
Com a ferramenta Magic Wand (Default), clique sobre a parte mais escura do círculo criado pelo gradiente (veja a indicação).
Segure a tecla Shift e clique 3 vezes; formará um círculo (veja o print).
Selections → Invert.
Pressione Delete.
Selections → Select None.
6_.
Effects → Illumination Effects → Lights → Preset: Preset_Lights_Flood.
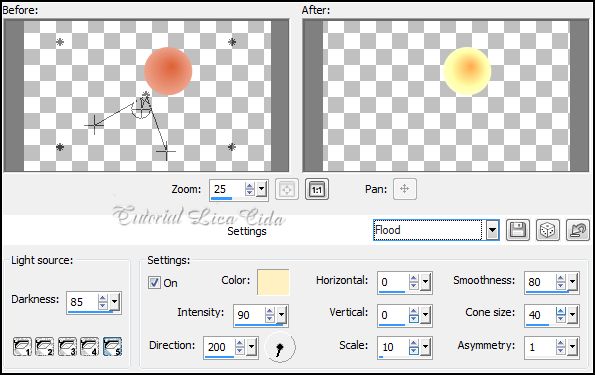
Blend Mode: Overlay.
7_.
Effects → 3D Effects → Drop Shadow: 21 / 18 / 50 / 20,00 — Color: #000000.
Repita o Drop Shadow com os valores negativos: -21 / -18.
8_.
Edit → Copy no elementoencontrolc
Edit → Paste As New Layer.
Blend Mode: Overlay.
9_.
Ative a Raster 1.
Layers → New Raster Layer.
Ative a ferramenta Clone Brush e configure:
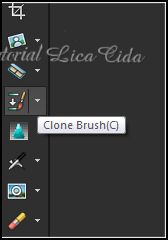

Clique com o botão direito sobre a paisagem escolhida (lunapaisagem5907) e passe nesta layer suavemente com o botão esquerdo.
Acerte esta paisagem com a ferramenta Pick; ela deverá ficar certa dentro do retângulo formado pelo efeito do Plugin Almathera → A Beveller.
10_.
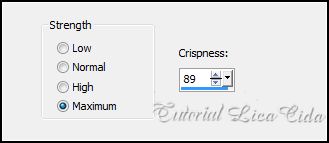
Adjust → Add/Remove Noise → JPEG Artifact Removal.
11_.
Plugin FM Tile Tools → Blend Emboss → Default.
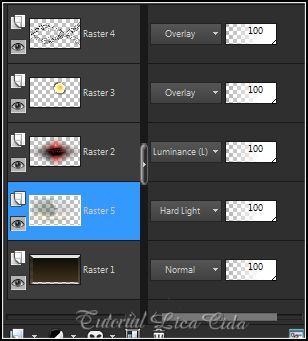
Altere os Blend Modes e a Opacity das layers a gosto.
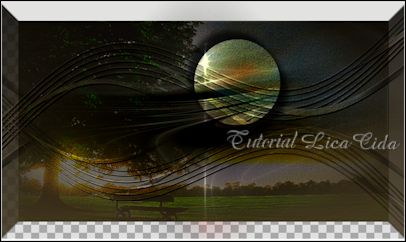
A TELA
12_.
Image → Canvas Size: 1024 x 700 — Bottom: 100.
13_.
Layers → New Raster Layer.
Layers → Arrange → Send to Bottom.
Selections → Select All.
Edit → Copy no backrb
Edit → Paste Into Selection.
Selections → Select None.
14_.
Ative a Raster 1 novamente.
Plugin MuRa's Meister → Perspective Tiling → Default.
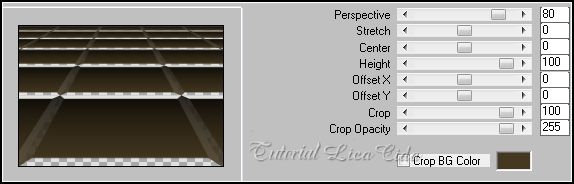
Desça o efeito até 530 px.
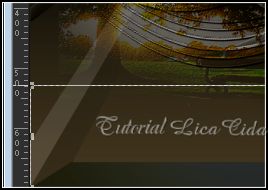
Com a ferramenta Magic Wand (Default), selecione a parte transparente.
Selections → Modify → Feather: 70 px.
Pressione Delete três ou quatro vezes (vai ficar bem próximo à paisagem).
Selections → Select None.
Effects → User Defined Filter → Emboss_3.
15_.
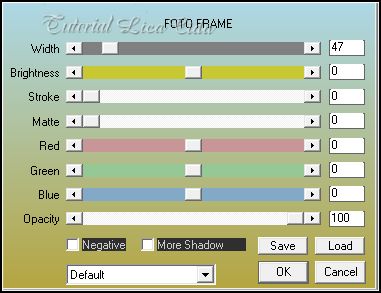
Plugin AAA Frames → Foto Frame.
16_.
Ative a layer superior.
Edit → Copy no tube Gabry-woman-747
Edit → Paste As New Layer.
Redimensione e posicione a gosto.
LAYERS
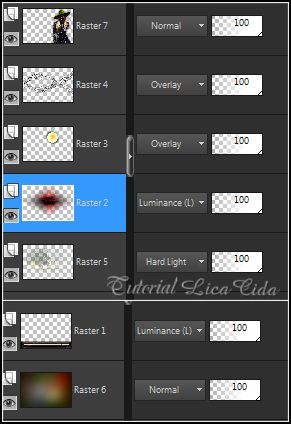
Faça o acabamento do seu Top a gosto.
Aplique a marca-d'água.
Assine e salve.
Espero que gostem.
Aparecida / LicaCida, maio de 2014.
Rio de Janeiro - Brasil.

VOLTAR
Copyright ©2026 - Web Design - Naise Minas
|

