|
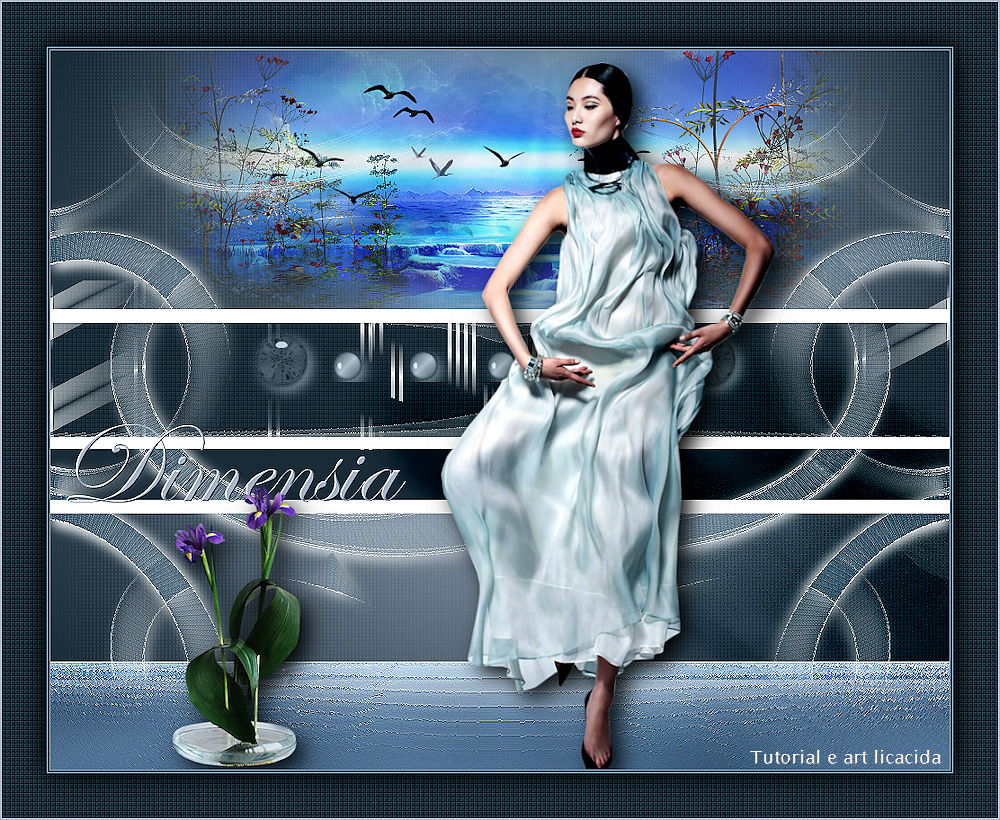
Dimensia
TRADUÇÕES

MATERIAL

Imagem: Alpha_ Channel_dimensialc --
Seleções (Selection #1, #2, #3 e #4) guardadas no Alpha Channel da imagem.
Tubes: verlaine c 149
nicole-nature8-2022
SvB Iris stukje
aves-arquivo net
Mask: !!!!.mask.ket01
Deco: deco-dimensia-lc
deco-dimensia1-lc
deco-dimensia2-lc
Elemento: elementodimensia-lc
Texto: texto_nome-lc
Marca-d'água.
Efeitos do PSP.
Versão usada: PSP X9.
PLUGINS
Plugin L en K's → Katharina
Plugin Filters Unlimited 2.0 → FFG_D → Dimensia
Plugin Xero → Fritillary
Plugin MuRa's Meister → Pole Transform
Plugin MuRa's Meister → Perspective Tiling
Plugin AlphaWorks → Horizontal FadeOut
TUTORIAL
|
Esta seta marca sua linha
Clique e arraste para movê-la
|
|
Configure: Foreground: #1b2b37 — Background: #abb6c9.
1_.
Abra o Alpha_ Channel_dimensialc.
Window → Duplicate.
Feche a original. Vamos trabalhar na cópia.
2_.
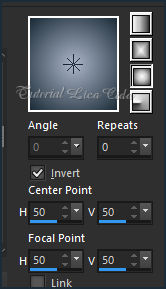
Pinte com o gradiente formado pelas cores configuradas acima.
Configure: Style: Sunburst — Repeats: 0 — Invert marcado — Center Point: H: 50 / V: 50 — Focal Point: H: 50 / V: 50.
3_.
Plugin L en K's → Katharina — Default (4 / 0).
Adjust → Sharpness → Sharpen.
4_.
Selections → Load/Save Selection → Load Selection From Alpha Channel → Selection #1.
5_.
Layers → New Raster Layer.
Na ferramenta Flood Fill, Opacity: 60%.
Pinte com o mesmo gradiente.
6_.
Plugin L en K's → Katharina — Default (4 / 0).
7_.
Edit → Copy no tube nicole-nature8-2022
Edit → Paste As New Layer.
Posicione.
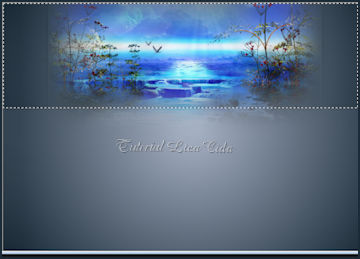
Adjust → Sharpness → Sharpen.
Layers → Merge → Merge Down.
Selections → Invert.
8_.
Selections → Load/Save Selection → Load Selection From Alpha Channel → Selection #2.
9_.
Layers → New Raster Layer.
Na ferramenta Flood Fill, Opacity: 100% (permanece).
Pinte com a cor do Foreground.
Selections → Select None.
10_.
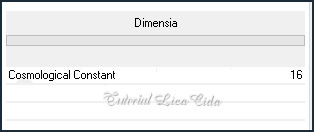
Plugin Filters Unlimited 2.0 → FFG_D → Dimensia — Default (16).
Effects → Edge Effects → Enhance.
Plugin Xero → Fritillary — Default.
11_.
Selections → Load/Save Selection → Load Selection From Alpha Channel → Selection #3.
12_.
Layers → New Raster Layer.
Pinte com a cor #ffffff.
Selections → Select None.
Layers → Duplicate.
13_.
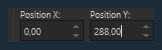
Com a ferramenta Pick Tool, posicione: Position X: 0,00 — Position Y: 288,00.
Layers → Merge → Merge Down.
14_.
Selections → Load/Save Selection → Load Selection From Alpha Channel → Selection #4.
15_.
Layers → New Raster Layer.
Pinte com a cor do Foreground.
Selections → Select None.
16_.
Plugin L en K's → Katharina — Default (4 / 0).
Adjust → Sharpness → Sharpen.
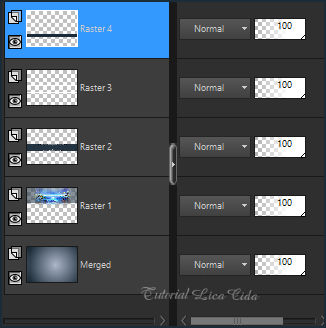
Organize as layers:
LAYERS
17_.
Repita:
Selections → Load/Save Selection → Load Selection From Alpha Channel → Selection #3.
18_.
Layers → New Raster Layer.
Pinte com a cor #ffffff.
Selections → Select None.
19_.
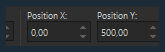
Com a ferramenta Pick Tool, posicione: Position X: 0,00 — Position Y: 500,00.
Layers → Merge → Merge Down.
Duplique a Raster 2 (Layers → Duplicate).
Layers → Arrange → Bring to Top.
20_.
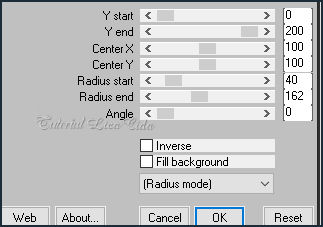
Plugin MuRa's Meister → Pole Transform.
21_.
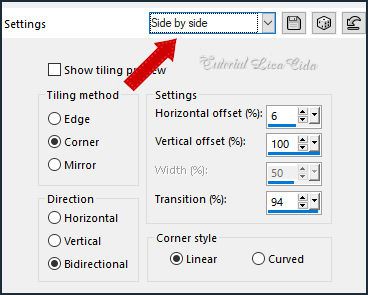
Effects → Image Effects → Seamless Tiling: Side by side.
22_.
Effects → Geometric Effects → Perspective - Horizontal — Distortion: -60 — Edge mode: Wrap.
23_.
Plugin AlphaWorks → Horizontal FadeOut — Min...Max: 255.

Image → Mirror → Mirror Vertical (nessa layer).
24_.
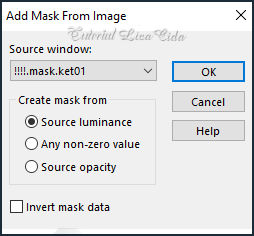
Layers → New Mask Layer → From Image: !!!!.mask.ket01.
Layers → Merge → Merge Group.
Effects → Edge Effects → Enhance.
Image → Mirror → Mirror Vertical.
Effects → 3D Effects → Drop Shadow: 5 / 5 / 50 / 20,00 — Color: #ffffff.
Effects → Reflection Effects → Rotating Mirror: 0 / 180 — Reflect.
Blend Mode: Lighten.
Layers → Duplicate.
Blend Mode: Screen.
25_.
Edit → Copy no deco-dimensia-lc
Edit → Paste As New Layer (já posicionado).
26_.
Edit → Copy no deco-dimensia1-lc
Edit → Paste As New Layer (já posicionado).
27_.
Edit → Copy no deco-dimensia2-lc
Edit → Paste As New Layer (já posicionado).
28_.
Edit → Copy no tube aves-arquivo net
Edit → Paste As New Layer.
Use a gosto (tirei algumas) e posicione.
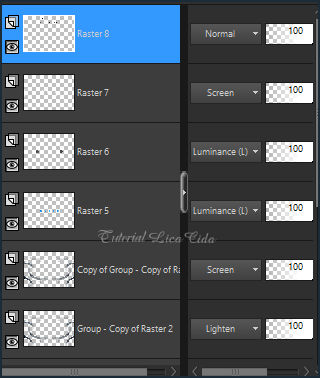
Altere os Blend Modes e a Opacity das layers.
29_.
Edit → Copy no elementodimensia-lc
Edit → Paste As New Layer.
Objects → Align → Bottom.
Objects → Align → Right.
Blend Mode: Burn — Opacity: 34%.
30_.
Edit → Copy no texto_nome-lc
Edit → Paste As New Layer.
Posicione a gosto.
Layers → Merge → Merge Visible.
31_.
Image → Canvas Size: 1000 x 800 — Bottom: 100.
Layers → Duplicate.
32_.
Effects → Image Effects → Seamless Tiling: Side by side (print do item 21).
Adjust → Blur → Gaussian Blur — Radius: 35,00.
33_.
Plugin MuRa's Meister → Perspective Tiling — Default, Height: 15 (demais valores iguais).
Blend Mode: Hard Light.
Effects → Edge Effects → Enhance.
34_.
Plugin Filters Unlimited 2.0 → FFG_D → Dimensia — Default (16) (print do item 10).
Effects → Edge Effects → Enhance.
35_.
Repita:
Plugin Filters Unlimited 2.0 → FFG_D → Dimensia — Default (16).
Effects → Edge Effects → Enhance.
36_.
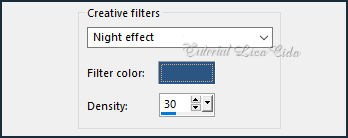
Effects → Photo Effects → Film and Filters — Film Looks a gosto (usei Glamour).
37_.
Edit → Copy no tube verlaine c 149
Edit → Paste As New Layer.
Redimensione e posicione.
38_.
Edit → Copy no tube SvB Iris stukje
Edit → Paste As New Layer.
Redimensione e posicione.
BORDAS
Image → Add Borders: 1 px, Symmetric marcado — cor do Background.
Image → Add Borders: 2 px, Symmetric marcado — cor do Foreground.
Image → Add Borders: 1 px, Symmetric marcado — cor do Background.
Selections → Select All.
Image → Add Borders: 50 px, Symmetric marcado — Color: #ffffff.
Selections → Invert.
Pinte com o gradiente.
Plugin Xero → Fritillary — Default.
Adjust → Sharpness → Sharpen More.
Selections → Invert.
Effects → 3D Effects → Drop Shadow: 0 / 0 / 80 / 40,00 — Color: #000000.
Selections → Select None.
Image → Add Borders: 2 px, Symmetric marcado — cor do Background.
Image → Add Borders: 1 px, Symmetric marcado — cor do Foreground.
Image → Resize: Width 1000 px.
Aplique a marca-d'água.
Assine e salve.
Espero que gostem.
Aparecida / LicaCida, março de 2022.
Rio de Janeiro - Brasil.

VOLTAR
Copyright ©2026 - Web Design - Naise Minas
|


