|
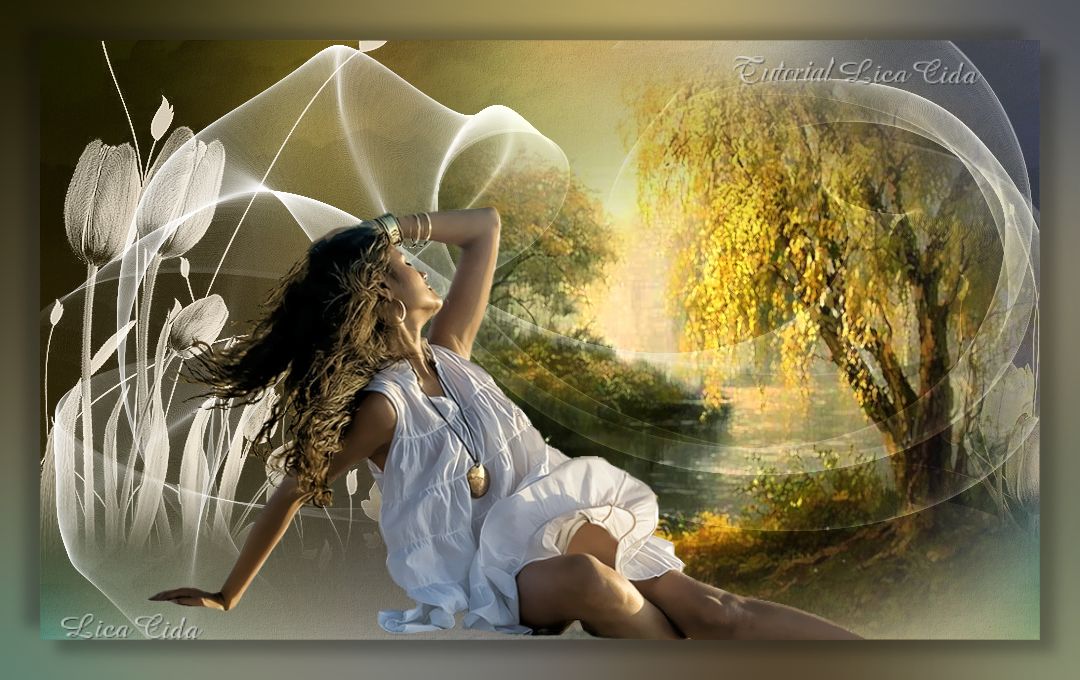
Estela Fonseca
DEDICATÓRIA
Abraços especiais pelo seu aniversário.
Com carinho, dedico o tutorial!
TRADUÇÕES

MATERIAL

Imagem: imagem deviantart
Arquivos: DWtulipasarquivo
Revnart_Smoke_2_19
Backs: BACK6-RB
back1-tuto estela
back2-tuto estela
back3 - tuto estela
Tubes: PSPCYBERTUBES-tube2011-568
merydesign_paysage349
Marca-d'água.
Efeitos do PSP.
Versão usada: PSP X6.
PLUGINS
Plugin FM Tile Tools → Blend Emboss
Plugin VanDerLee → UnPlugged-X
TUTORIAL
|
Esta seta marca sua linha
Clique e arraste para movê-la
|
|
1_.
Abra uma nova imagem transparente de 1000 x 700 px.
Pinte com a cor #ceb694 (configure no Foreground).
Abra seu material no PSP.
2_.
Layers → New Raster Layer.
Selections → Select All.
Edit → Copy na imagem deviantart
Edit → Paste Into Selection.
Selections → Select None.
3_.
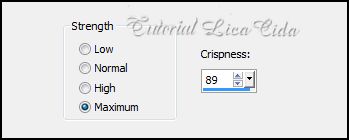
Adjust → Add/Remove Noise → JPEG Artifact Removal.
4_.
Plugin FM Tile Tools → Blend Emboss.
Blend Mode: Multiply.
5_.
Edit → Copy no arquivo DWtulipasarquivo
Edit → Paste As New Layer.
6_.
Ative a ferramenta Change to Target.
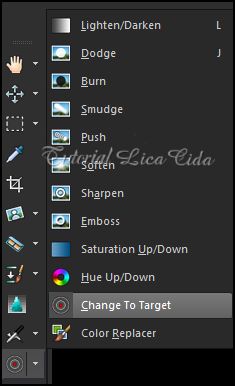
Configure como no print.
Passe (pincele) no arquivo DWtulipasarquivo, usando a cor #ceb694 (a cor escolhida deve estar no Foreground).

7_.
Edit → Copy no arquivo Revnart_Smoke_2_19
Edit → Paste As New Layer.
Image → Negative Image.
8_.
Plugin VanDerLee → UnPlugged-X → Shimmer White: Default.
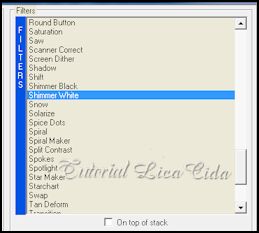
Repita.
9_.
Ative a Raster 1.
Layers → New Raster Layer.
Selections → Select All.
Edit → Copy no BACK6-RB
Edit → Paste Into Selection.
Selections → Select None.
10_.
Ative a Raster 2.
Layers → New Raster Layer.
Selections → Select All.
Edit → Copy no back1-tuto estela
Edit → Paste Into Selection.
Selections → Select None.
11_.
Layers → New Raster Layer.
Selections → Select All.
Edit → Copy no back2-tuto estela
Edit → Paste Into Selection.
Selections → Select None.
Layers → Arrange → Move Down.
12_.
Layers → New Raster Layer.
Selections → Select All.
Edit → Copy no back3 - tuto estela
Edit → Paste Into Selection.
Selections → Select None.
Altere os Blend Modes e a Opacity das layers.
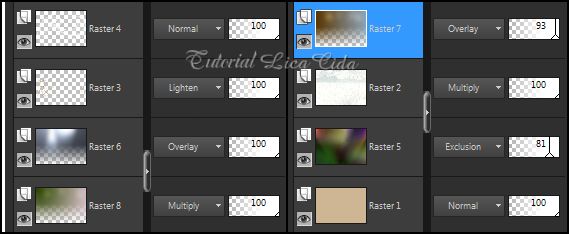
13_.
Ative a Raster 3.
Edit → Copy no tube merydesign_paysage349
Edit → Paste As New Layer.
Posicione.
14_.
Plugin VanDerLee → UnPlugged-X → Shimmer White: Default (print do item 8).
15_.
Layers → Duplicate.
Layers → Arrange → Move Up.
Altere os Blend Modes e a Opacity das layers.
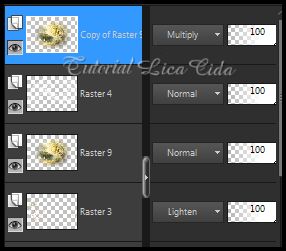
16_.
Edit → Copy no tube PSPCYBERTUBES-tube2011-568
Edit → Paste As New Layer.
Posicione.
Aplique a marca-d'água.
Assine e salve.
Espero que gostem.
Aparecida / LicaCida, agosto de 2014.
Rio de Janeiro - Brasil.

VOLTAR
Copyright ©2026 - Web Design - Naise Minas
|
