|
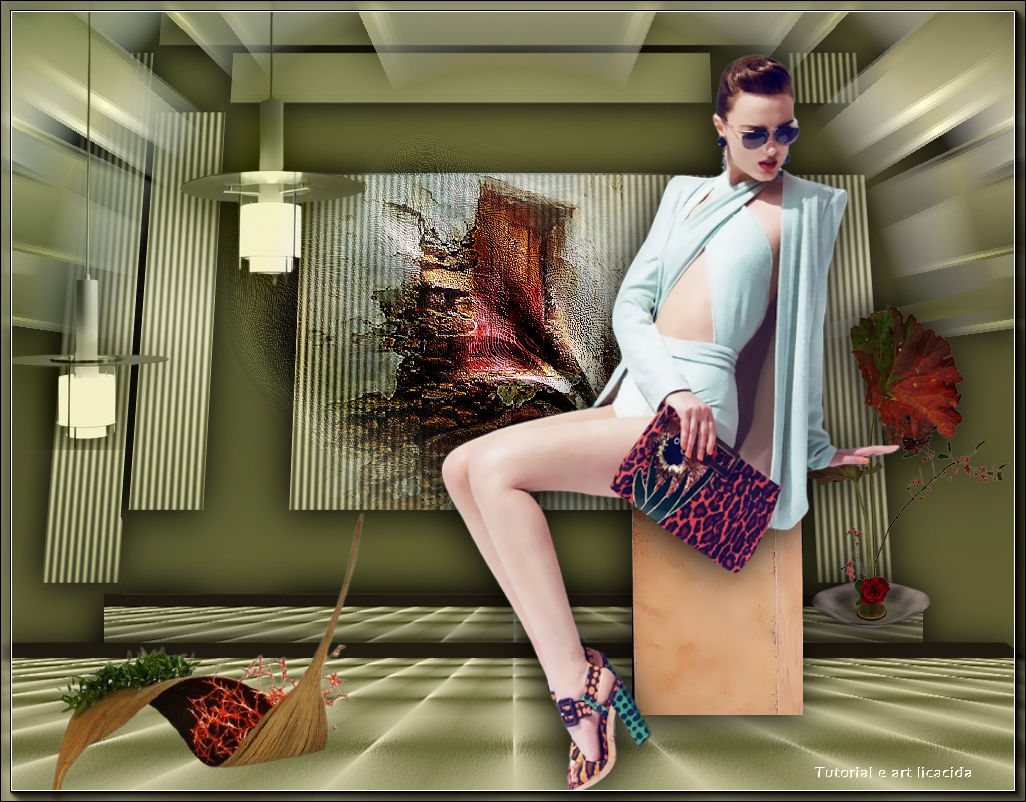
For a Dream
TRADUÇÕES

MATERIAL

Seleção: zoomblur_lc --
Salvar na pasta Selections do PSP.
Tubes: SuizaBella_Ref_AG-001419
SuizaBella_Ref_AG-003024
SuizaBella_Ref_AG-003037 ( o banco )
Mask: cd5mask22dw
Deco: Callitubes-133flores
Callitubes-141flores
Callitubes-163decor
decora_acabamento_lc
Elementos: elementozoomblur_lc
colorido_lc
Marca-d'água.
Efeitos do PSP.
Versão usada: PSP X9.
PLUGINS
Plugin Tramages → Wee Scratches
Plugin MuRa's Meister → Perspective Tiling
Plugin Alien Skin Eye Candy 5: Impact → Extrude
Plugin Alien Skin Eye Candy 5: Impact → Perspective Shadow
Plugin Andromeda → Designs
Plugin VM Stylize → Zoom Blur
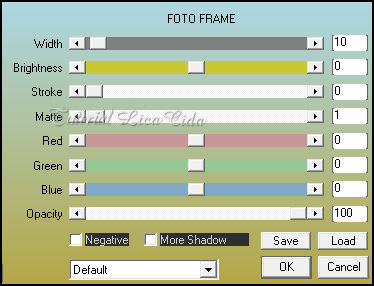
Plugin AAA Frames → Foto Frame
TUTORIAL

|
Esta seta marca sua linha
Clique e arraste para movê-la
|
|
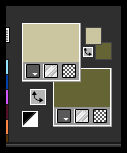
Configure: Foreground: #cbc6a0 — Background: #656436.
1_.
Abra uma nova imagem transparente de 1024 x 800 px.
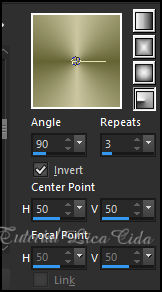
Pinte com o gradiente Radial formado pelas cores configuradas acima.
Layers → Duplicate.
2_.
Plugin Tramages → Wee Scratches — Default (255).
3_.
Plugin MuRa's Meister → Perspective Tiling.
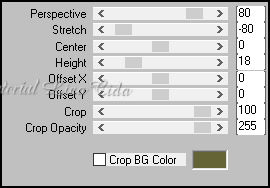
Effects → User Defined Filter → Emboss_3.
4_.
Plugin Alien Skin Eye Candy 5: Impact → Extrude — Color: #2f271b.
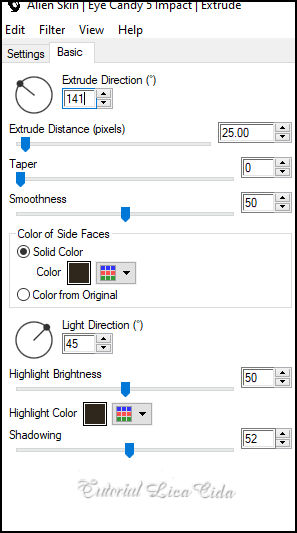
Layers → Duplicate.
Image → Resize: 80% — Resize all layers desmarcado.
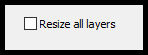
Layers → Arrange → Move Down.
Plugin Alien Skin Eye Candy 5: Impact → Perspective Shadow — use a gosto, nas duas layers.
Na layer do topo:
Layers → Merge → Merge Down.
5_.
Layers → New Raster Layer.
Pinte com a cor do Background (escura).
6_.
Layers → New Raster Layer.
Pinte com o gradiente Linear formado pelas cores configuradas acima.
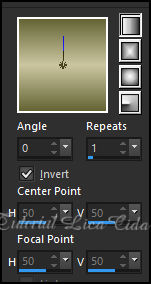
7_.
Layers → New Mask Layer → From Image: cd5mask22dw.
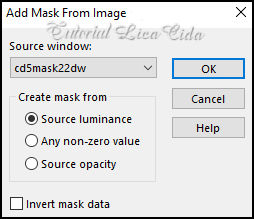
Effects → Edge Effects → Enhance.
Layers → Merge → Merge Group.
Plugin Alien Skin Eye Candy 5: Impact → Perspective Shadow — use a gosto.
8_.
Com a ferramenta Magic Wand (Default), selecione partes da mask como mostra o print.
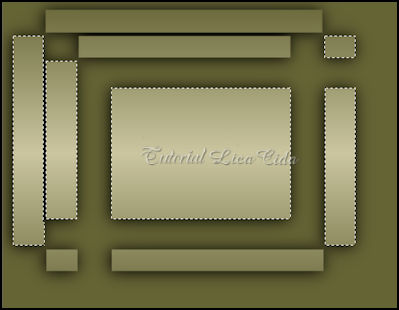
9_.
Layers → New Raster Layer.
Na ferramenta Flood Fill, Opacity: 50%.
Pinte as partes selecionadas com o mesmo gradiente formado no item 6.
Selections → Select None.
10_.
Plugin Andromeda → Designs.
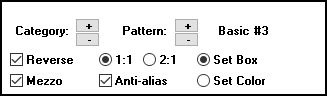
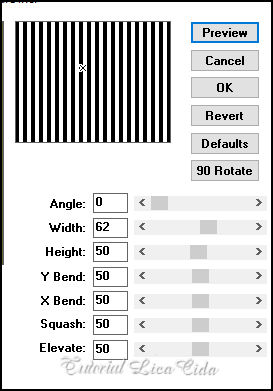
Layers → Merge → Merge Down.
11_.
Effects → Geometric Effects → Perspective - Vertical — Distortion: -14 — Repeat.
LAYERS
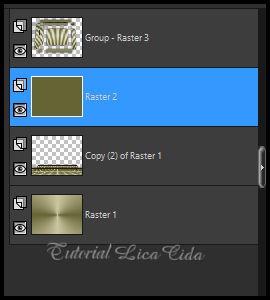
12_.
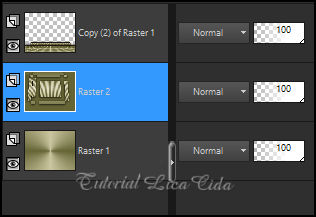
Ative o piso (Copy (2) of Raster 1).
Layers → Arrange → Bring to Top.
13_.
Ative a Group-Raster 3.
Com a ferramenta Pick Tool, posicione: Position X: -2,00 — Position Y: -35,00.
Layers → Merge → Merge Down.
LAYERS
14_.
Ative a layer do topo.
Selections → Load/Save Selection → Load Selection From Disk → zoomblur_lc.
Layers → New Raster Layer.
15_.
Na ferramenta Flood Fill, Opacity: 100% (permanece).
Pinte a seleção com o gradiente Linear formado no item 6.
16_.
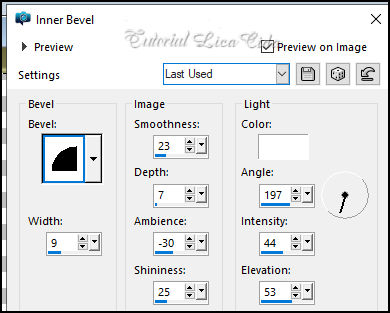
Effects → 3D Effects → Inner Bevel.
Selections → Select None.
17_.
Plugin VM Stylize → Zoom Blur — Default (39 / 60).
18_.
Edit → Copy no elementozoomblur_lc
Edit → Paste As New Layer.
Objects → Align → Top.
Layers → Merge → Merge Down.
Plugin Alien Skin Eye Candy 5: Impact → Perspective Shadow — use a gosto.
19_.
Edit → Copy no tube SuizaBella_Ref_AG-001419
Edit → Paste As New Layer.
Adjust → Sharpness → Sharpen.
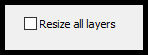
Image → Resize: 80% — Resize all layers desmarcado.
20_.
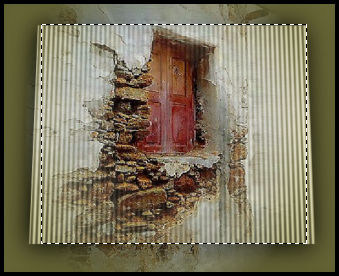
Com a ferramenta Pick Tool, posicione: Position X: 284,00 — Position Y: 50,00.
Com a ferramenta Selection Tool, selecione como mostra o print.
Selections → Invert.
Tecle Delete.
Selections → Select None.
21_.
Edit → Copy no decora_acabamento_lc
Edit → Paste As New Layer.
Adjust → Sharpness → Sharpen.
22_.
Com a ferramenta Pick Tool, posicione: Position X: 164,00 — Position Y: 118,00.
23_.
Edit → Copy no tube SuizaBella_Ref_AG-003024
Edit → Paste As New Layer.
Redimensione e posicione.
Use a gosto o banco do tube SuizaBella_Ref_AG-003037 ( o banco ).
24_.
Edit → Copy nos decos Callitubes-133flores, Callitubes-141flores e Callitubes-163decor
Edit → Paste As New Layer.
Redimensione e posicione a gosto.
Plugin Alien Skin Eye Candy 5: Impact → Perspective Shadow — use a gosto.
25_.
Ative a layer do topo.
Layers → New Raster Layer.
Selections → Select All.
Edit → Copy no colorido_lc
Edit → Paste Into Selection.
Selections → Select None.
Blend Mode: Overlay — Opacity a gosto.
Image → Add Borders: 1 px, Symmetric marcado — cor do Foreground.
26_.
Plugin AAA Frames → Foto Frame.
Aplique a marca-d'água.
Assine e salve.
Espero que gostem.
Aparecida / LicaCida, março de 2022.
Rio de Janeiro - Brasil.


VOLTAR
Copyright ©2026 - Web Design - Naise Minas
|


