|
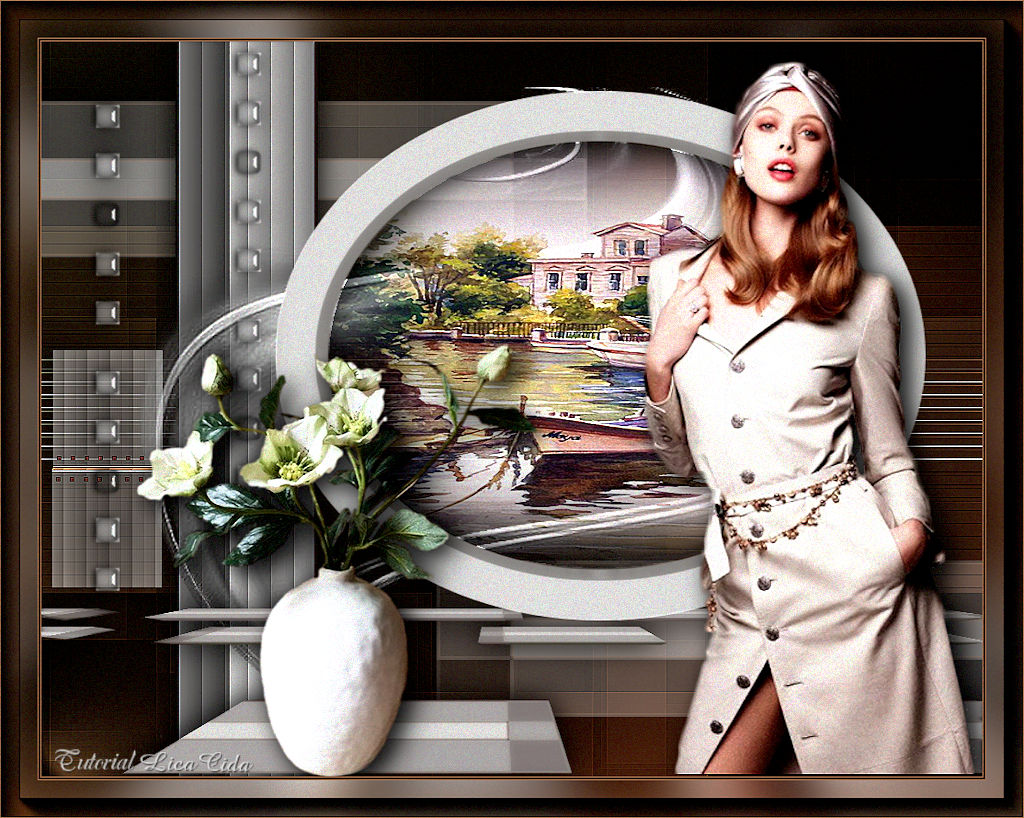
Franie Margot
DEDICATÓRIA
Carinhosamente.
TRADUÇÕES

MATERIAL

Seleção: franie --
Salvar na pasta Selections do PSP.
Preset: Illumination → Lights → Preset_Lights_intuition --
Salvar na pasta Presets do PSP (My PSP Files).
Tubes: woman-1179-franiemargot
paysage-482-franiemargot
fleurs-610-franiemargot
(Agradeço)
Mask: Narah_mask_Abstract271
Decor: decorfranie-lc
decorfranie1-lc
Marca-d'água.
Efeitos do PSP.
PLUGINS
Plugin Mehdi → Sorting Tiles
Plugin L en K's → Mayra
Plugin Transparency → Eliminate Black
Plugin Simple → 4Way Average
Plugin Toadies → What Are You?
Plugin MuRa's Meister → Perspective Tiling
Plugin Alien Skin Eye Candy 5: Impact → Extrude
Plugin AAA Frames → Foto Frame
TUTORIAL
|
Esta seta marca sua linha
Clique e arraste para movê-la
|
|
1_.
Abra o material no PSP, duplique e feche o original.
Escolha duas cores para trabalhar: Foreground: #1a130e — Background: #9c7154.
2_.
Abra uma nova imagem transparente de 1024 x 800 px.
3_.
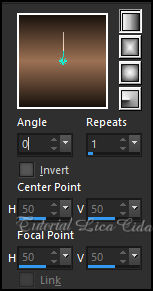
Pinte com o gradiente Linear formado pelas cores em uso.
4_.
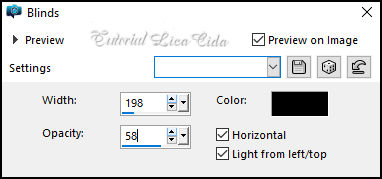
Effects → Texture Effects → Blinds — Color: #000000.
5_.
Effects → Texture Effects → Blinds — Color: #000000.
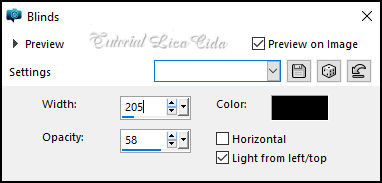
6_.
Plugin Mehdi → Sorting Tiles.
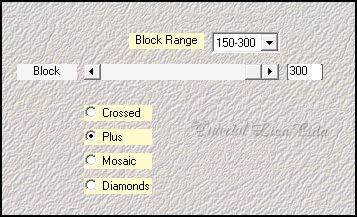
Effects → Edge Effects → Enhance.
7_.
Ative a ferramenta Selection Tool (tecla S) → Custom Selection 1.
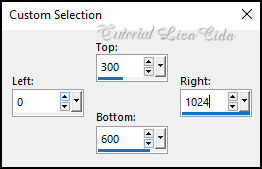
8_.
Plugin L en K's → Mayra — Default (0 / 149 / 76 / 2).
Selections → Promote Selection to Layer.
9_.
Plugin Transparency → Eliminate Black.
Selections → Select None.
Effects → 3D Effects → Drop Shadow: 0 / 0 / 100 / 50,00 — Color: #000000.
Ative a Raster 1.
10_.
Plugin Simple → 4Way Average.
Adjust → Sharpness → Sharpen More.
11_.
Effects → Illumination Effects → Lights → Preset_Lights_intuition.
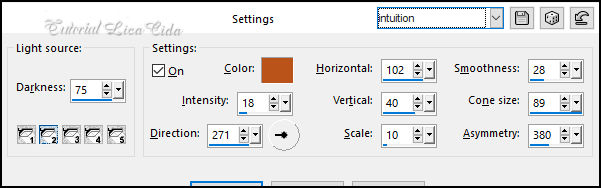
Ative a layer do topo.
12_.
Ative a ferramenta Selection Tool (tecla S) → Custom Selection 2.
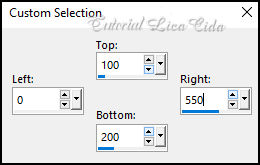
Layers → New Raster Layer.
Com o Flood Fill em Opacity 50%, pinte com a cor #ffffff (mantenha a Opacity em 50%).
13_.
Effects → 3D Effects → Chisel — Color: #9c7154 (Background).
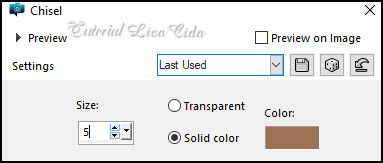
Selections → Select None.
14_.
Plugin Toadies → What Are You?.
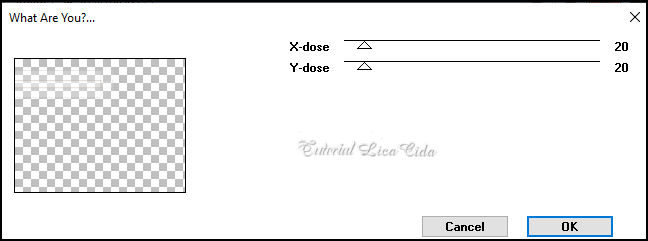
Layers → Duplicate.
Image → Mirror → Mirror Horizontal.
Image → Mirror → Mirror Vertical.
Layers → Merge → Merge Down.
Layers → Duplicate.
15_.
Plugin MuRa's Meister → Perspective Tiling — Height: 30, restante Default.
16_.
Plugin Alien Skin Eye Candy 5: Impact → Extrude.
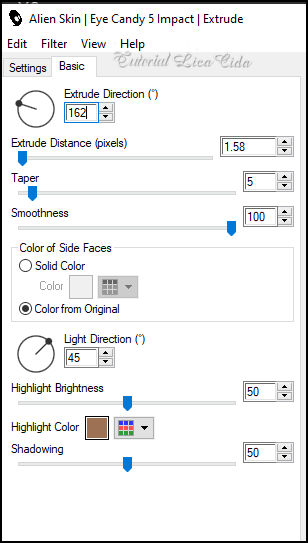
Image → Mirror → Mirror Horizontal.
17_.
Effects → Image Effects → Offset.
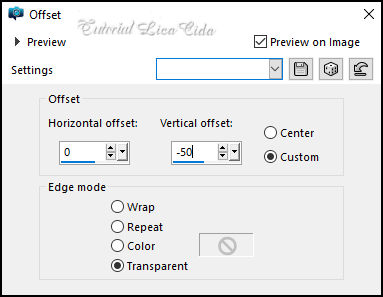
Effects → 3D Effects → Drop Shadow: 0 / 0 / 100 / 50,00 — Color: #000000.
18_.
Selections → Load/Save Selection → Load Selection From Disk → franie.
Layers → New Raster Layer.
19_.
Com o Flood Fill em Opacity 50%, pinte com a cor #ffffff.
20_.
Selections → Modify → Contract.
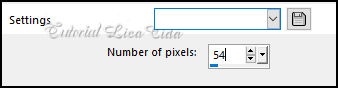
Aperte a tecla Delete.
Selections → Select None.
21_.
Plugin Alien Skin Eye Candy 5: Impact → Extrude — mesmos valores.
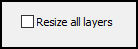
Image → Resize: 80% — Resize all layers desmarcado.
22_.
Com a ferramenta Magic Wand (Default), selecione o centro do círculo.
Layers → New Raster Layer.
23_.
Edit → Copy no paysage-482-franiemargot
Edit → Paste Into Selection.
Adjust → Sharpness → Sharpen More.
Layers → New Raster Layer.
24_.
Effects → 3D Effects → Cutout.
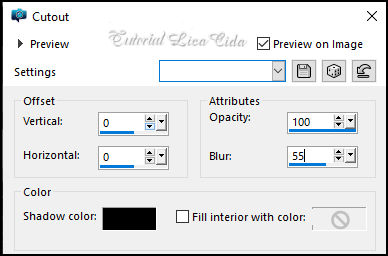
Selections → Select None.
Layers → Merge → Merge Down (aplique duas vezes).
25_.
Effects → Image Effects → Offset.
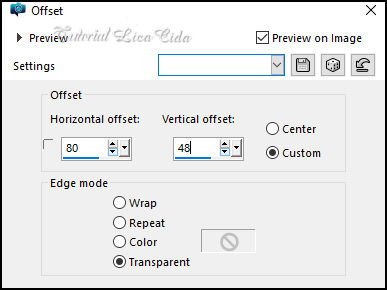
Effects → 3D Effects → Drop Shadow: 0 / 0 / 100 / 50,00 — Color: #000000.
26_.
Ative a ferramenta Selection Tool (tecla S) → Custom Selection 3.
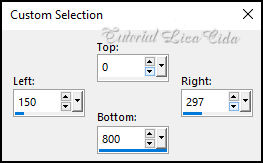
Layers → New Raster Layer.
Com o Flood Fill em Opacity 50%, pinte com a cor #ffffff.
27_.
Effects → 3D Effects → Chisel (mesmos valores).
Selections → Select None.
Volte a Opacity do Flood Fill para 100%.
28_.
Effects → Texture Effects → Blinds (mesmos valores do item 5).
29_.
Plugin Alien Skin Eye Candy 5: Impact → Extrude — mesmos valores.
30_.
Effects → Texture Effects → Blinds — Color: #000000.
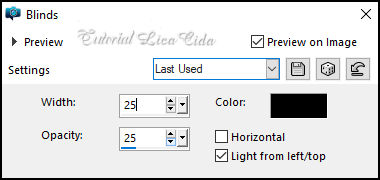
Effects → Edge Effects → Enhance.
Layers → Arrange → Move Down (aplique duas vezes).
Effects → 3D Effects → Drop Shadow: 0 / 0 / 100 / 50,00 — Color: #000000.
Confira as layers:
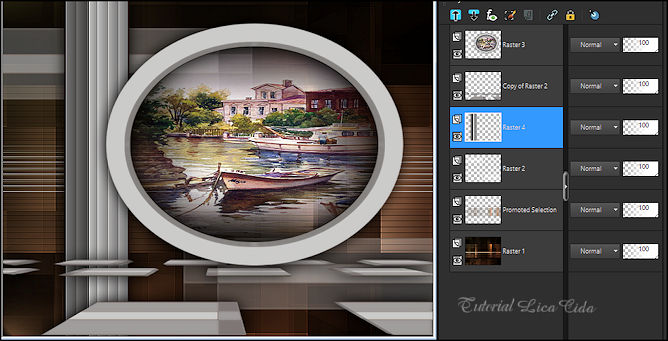
Ative a layer do topo.
31_.
Edit → Copy no decorfranie-lc
Edit → Paste As New Layer.
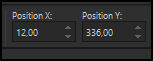
Com a ferramenta Pick Tool: Position X: 12,00 — Position Y: 336,00.
Effects → 3D Effects → Drop Shadow: 0 / 0 / 100 / 50,00 — Color: #000000.
32_.
Edit → Copy no decorfranie1-lc
Edit → Paste As New Layer.
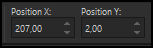
Com a ferramenta Pick Tool: Position X: 207,00 — Position Y: 2,00.
Effects → 3D Effects → Drop Shadow: 0 / 0 / 100 / 50,00 — Color: #000000.
33_.
Layers → Duplicate.
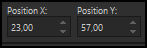
Com a ferramenta Pick Tool: Position X: 23,00 — Position Y: 57,00.
Ative a Raster 4.
34_.
Edit → Copy na Narah_mask_Abstract271
Edit → Paste As New Layer.
Image → Resize: 140% — Resize all layers desmarcado.
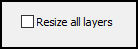
Layers → Duplicate.
Ative a layer do topo.
35_.
Edit → Copy no tube woman-1179-franiemargot
Edit → Paste As New Layer.
Posicione e use a gosto.
36_.
Edit → Copy no tube fleurs-610-franiemargot
Edit → Paste As New Layer.
Posicione e use a gosto.
Image → Add Borders: 1 px, Symmetric marcado — Color: #1a130e (Foreground).
Image → Add Borders: 2 px, Symmetric marcado — Color: #9c7154 (Background).
Image → Add Borders: 1 px, Symmetric marcado — Color: #1a130e (Foreground).
Selections → Select All.
Edit → Copy.
Image → Add Borders: 40 px, Symmetric marcado — Color: #ffffff.
Selections → Invert.
Edit → Paste Into Selection.
Adjust → Blur → Gaussian Blur — Radius: 28,00.
37_.
Plugin AAA Frames → Foto Frame.
Edit → Repeat.
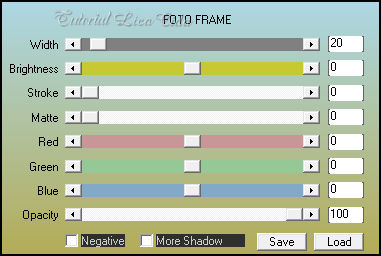
Selections → Invert.
Effects → 3D Effects → Drop Shadow: 0 / 0 / 100 / 50,00 — Color: #000000.
Selections → Select None.
Image → Add Borders: 1 px, Symmetric marcado — Color: #1a130e (Foreground).
Image → Resize: Width 1024 px.
Aplique a marca-d'água.
Assine e salve.
File → Export → JPEG Optimizer.
Espero que gostem.
Aparecida / LicaCida, agosto de 2024.
Rio de Janeiro - Brasil.

VOLTAR
Copyright ©2026 - Web Design - Naise Minas
|


