|
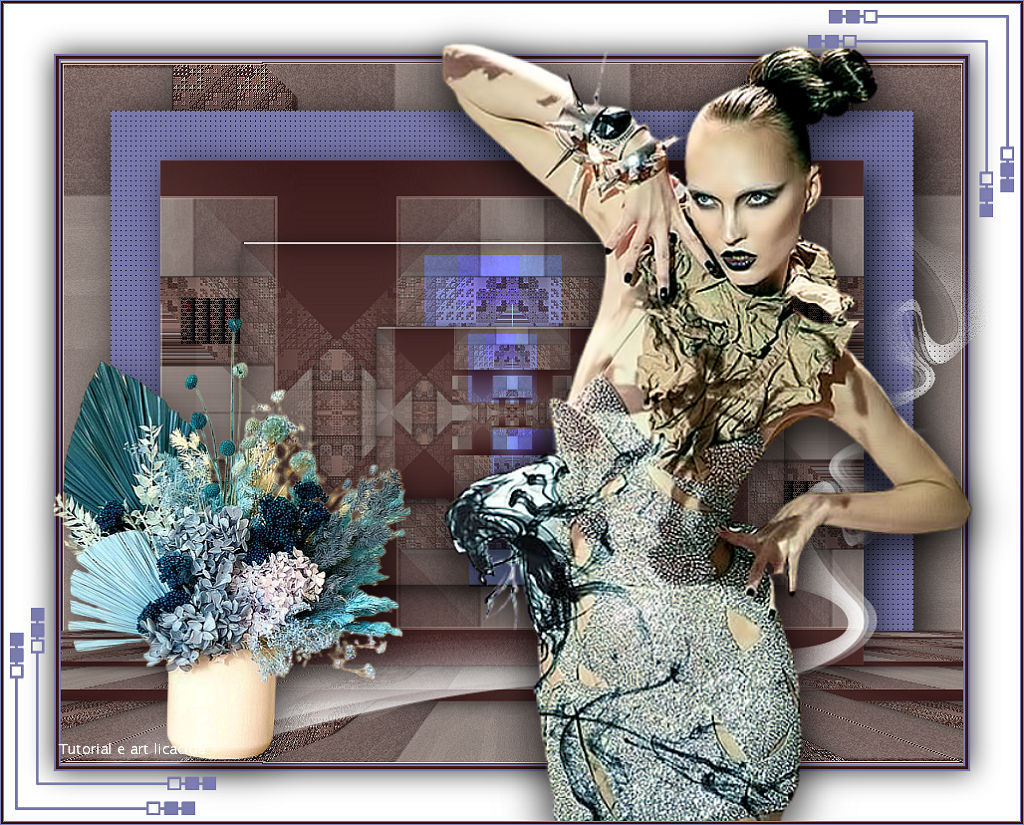
Intensity
TRADUÇÕES

MATERIAL

Preset: katrina (Eye Candy 5: Impact → Glass) --
Dê duplo clique no preset para importá-lo ao plugin.
Seleções: sel_intensidade_lc
sel_intensidade1_lc --
Salvar na pasta Selections do PSP.
Arquivo inicial: arquivointensidade _lc
Tubes: Callitubes-2876mulheres
Callitubes-268flores
Vários: elementointensidade1-lc
deco_arquivo pessoal
designal brushes 3_12
Marca-d'água.
Efeitos do PSP.
PLUGINS
Plugin Alien Skin Eye Candy 5: Impact → Glass
Plugin Alien Skin Eye Candy 5: Impact → Perspective Shadow
Plugin Simple → Pizza Slice Mirror
Plugin Screen Works → Chain Link
Plugin MuRa's Meister → Perspective Tiling
Plugin AAA Filters → Custom (opcional)
Plugin AAA Frames → Foto Frame
TUTORIAL
|
Esta seta marca sua linha
Clique e arraste para movê-la
|
|
Configure: Foreground: #797aad — Background: #3a1a1a.
1_.
Abra o arquivointensidade _lc.
2_.
Plugin Simple → Pizza Slice Mirror.
3_.
Effects → Reflection Effects → Rotating Mirror: 0 / 0 — Reflect.
4_.
Selections → Select All.
Selections → Modify → Contract: 50 px.
5_.
Layers → New Raster Layer.
Pinte com uma cor que combine com as usadas (#797aad).
Usei uma cor que combinasse com o deco_arquivo pessoal; você pode mudar a cor, colorizando a gosto.
6_.
Selections → Modify → Contract: 50 px.
7_.
Layers → New Raster Layer.
Pinte com a cor usada no Background.
Observe a cor usada na Raster 2: ela poderá alterar o tom do elementointensidade1-lc, por causa da transparência.
8_.
Edit → Copy no elementointensidade1-lc
Edit → Paste Into Selection.
Selections → Select None.
Plugin Alien Skin Eye Candy 5: Impact → Perspective Shadow, a gosto, nas duas layers acima (Raster 2 e Raster 3).
Layers → Duplicate (Raster 3).
Adjust → Sharpness → Sharpen.
9_.
Selections → Select All.
Selections → Modify → Contract: 180 px.
Selections → Promote Selection to Layer.
10_.
Plugin Alien Skin Eye Candy 5: Impact → Glass — Settings: katrina (use a gosto).
Selections → Select None.
Plugin Alien Skin Eye Candy 5: Impact → Perspective Shadow, a gosto.
11_.
Ative a Copy of Raster 3.
Layers → New Raster Layer.
Selections → Load/Save Selection → Load Selection From Disk → sel_intensidade_lc.
12_.
Com o Flood Fill em Opacity: 50%, pinte com a cor #ffffff.
13_.
Selections → Modify → Contract: 10 px.
Pressione a tecla Delete.
14_.
Selections → Modify → Contract: 10 px.
15_.
Com o Flood Fill em Opacity: 100%, pinte com a cor #ffffff.
16_.
Plugin Screen Works → Chain Link.
17_.
Effects → Texture Effects → Blinds — Color: #000000.
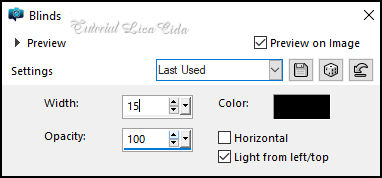
Selections → Select None.
18_.
Layers → Duplicate.
Image → Mirror → Mirror Vertical.
Layers → Merge → Merge Down.
Blend Mode: Darken (use a gosto).
19_.
Ative a layer do topo.
Edit → Copy no deco_arquivo pessoal
Edit → Paste As New Layer.
Blend Mode: Dodge.
Layers → Merge → Merge Down.
Layers → Duplicate.
Image → Resize: 50% — Resize all layers desmarcado.
20_.
Ative a Raster 2.
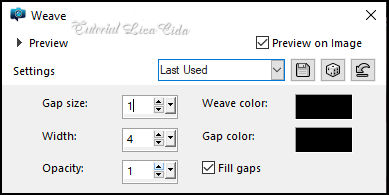
Effects → Texture Effects → Weave — Color: #000000.
LAYERS
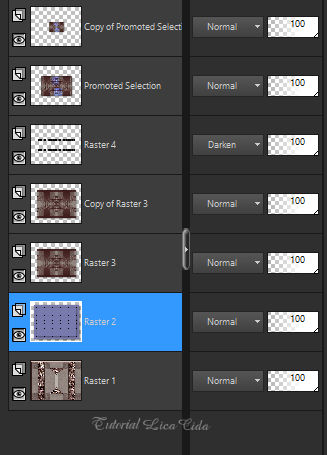
Retire a visibilidade das layers, deixando visíveis somente a Raster 1 e a Raster 3.
21_.
Ative a layer do topo.
Edit → Copy Special → Copy Merged.
22_.
Layers → New Raster Layer.
Selections → Load/Save Selection → Load Selection From Disk → sel_intensidade1_lc.
Edit → Paste Into Selection.
23_.
Plugin MuRa's Meister → Perspective Tiling — Default.
Selections → Select None.
Adjust → Sharpness → Sharpen.
Posicione esta layer acima da Raster 3.
Ative novamente a visibilidade das layers.
24_.
Ative a Copy of Raster 3.
Edit → Copy no designal brushes 3_12
Edit → Paste As New Layer (em duas layers).
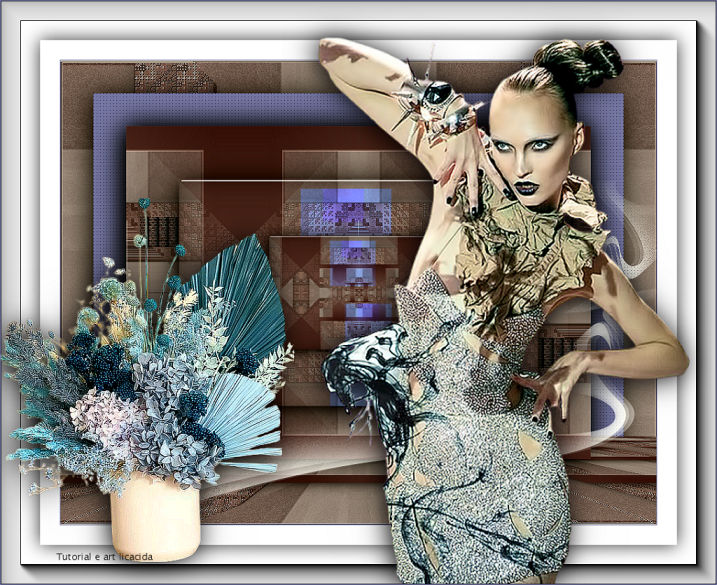
Use a gosto (observe o modelo).
Image → Add Borders: 1 px, Symmetric marcado — Color: cor do Foreground.
Opcional: Plugin AAA Filters → Custom → Landscape.
BORDAS
25_.
Image → Add Borders: 30 px, Symmetric marcado — Color: #ffffff.
Selections → Select All.
Image → Add Borders: 60 px, Symmetric marcado — Color: #ffffff.
Selections → Invert.
26_.
Plugin AAA Frames → Foto Frame: Width: 30 — demais valores Default.
Selections → Invert.
Effects → 3D Effects → Drop Shadow: 0 / 0 / 80 / 40,00 — Color: #000000.
Selections → Select None.
27_.
Edit → Copy no tube Callitubes-2876mulheres
Edit → Paste As New Layer.
Posicione a gosto. Aplique Drop Shadow como preferir.
28_.
Edit → Copy no Callitubes-268flores
Edit → Paste As New Layer.
Posicione a gosto. Aplique Drop Shadow como preferir.
Image → Add Borders: 1 px, Symmetric marcado — Color: cor do Foreground.
Aplique a marca-d'água.
Assine e salve.
Image → Resize: Width 1024 px.
Espero que apreciem.
Aparecida / LicaCida, abril de 2023.
Rio de Janeiro - Brasil.
OUTRO MODELO


VOLTAR
Copyright ©2026 - Web Design - Naise Minas
|


