|
Irene Rene DEDICATÓRIA Carinhosamente. TRADUÇÕES
MATERIAL
Seleção: circle-lc --
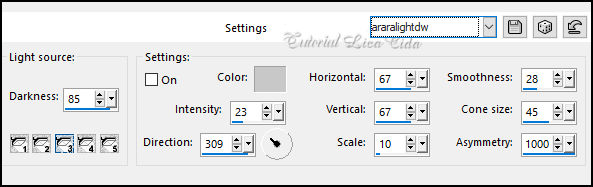
Preset: Illumination → Lights → Preset_Lights_araralightdw --
Tubes: ns-woman3212
Back: backcolorido-rb
Decor: 3605 - Déco - LB TUBES
Premade: chao natureza 004 dworisch
Marca-d'água.
PLUGINS
Plugin Mehdi → Sorting Tiles
TUTORIAL
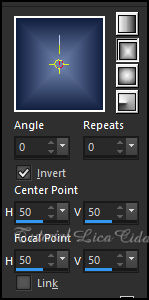
1_. Abra o material no PSP, duplique e feche o original. Escolha duas cores para trabalhar: Foreground: #101e3e — Background: #7387b1. 2_. Abra uma nova imagem transparente de 1000 x 700 px. 3_. Pinte com o gradiente formado pelas cores em uso. Configure: Style: Rectangular — Angle: 0 — Repeats: 0 — Invert marcado.
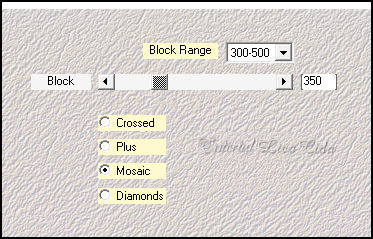
Layers → Duplicate. 4_. Plugin Mehdi → Sorting Tiles.
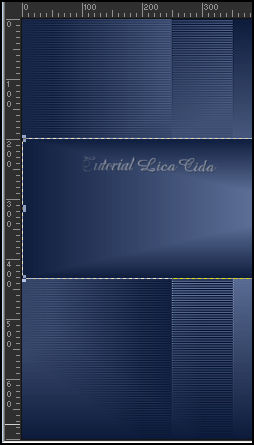
5_. Effects → Reflection Effects → Rotating Mirror — Default. 6_. Plugin Convolution Filter → Emboss (light) — Emboss: 191. 7_. Plugin Distortion Filters → Scanline Shifter — Default: 9 / 23 (aplique três vezes). Adjust → Sharpness → Sharpen. 8_. Ative a Raster 1. Habilite a régua. Com a ferramenta Pick Tool (K), reduza para 200 x 430 px.
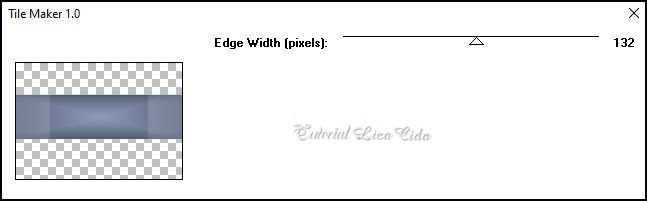
Desabilite a régua. Layers → Arrange → Bring to Top. 9_. Plugin ECWS → Tile Maker 1.0.
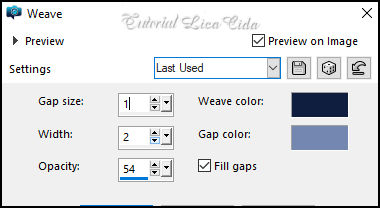
Effects → Edge Effects → Enhance. 10_. Effects → Texture Effects → Weave (cores em uso).
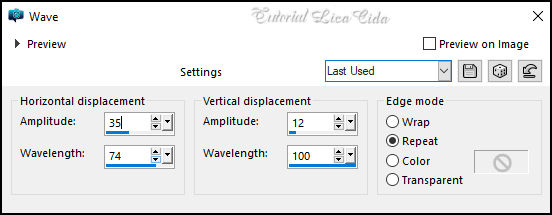
11_. Effects → Distortion Effects → Wave.
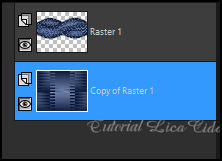
Effects → 3D Effects → Drop Shadow: 0 / 0 / 80 / 40,00 — Color: #000000. Layers → Duplicate. Image → Mirror → Mirror Horizontal. Effects → 3D Effects → Drop Shadow: 0 / 0 / 80 / 40,00 — Color: #000000. Layers → Merge → Merge Down. 12_. Image → Canvas Size: 1000 x 800 — Bottom: 100. Ative a Copy of Raster 1. Com a ferramenta Pick Tool (K), traga o efeito para baixo.
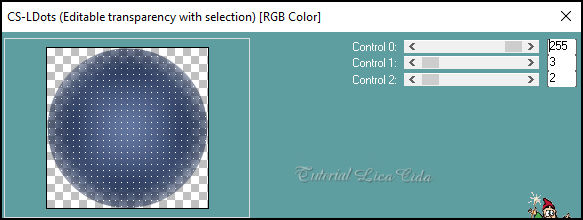
13_. Ative a layer do topo. Selections → Load/Save Selection → Load Selection From Disk → circle-lc. 14_. Layers → New Raster Layer. Pinte com o gradiente em uso. 15_. Adjust → Blur → Gaussian Blur — Radius: 39,00. 16_. Plugin Carolaine and Sensibility → CS-LDots.
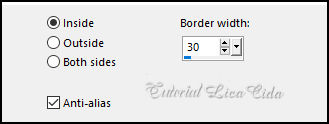
Effects → Edge Effects → Enhance. Ainda selecionado: 17_. Edit → Copy no tube ns-paisagem1174 Edit → Paste As New Layer. Posicione. Selections → Invert. Pressione a tecla Delete. Selections → Invert. Adjust → Sharpness → Sharpen More. Layers → Merge → Merge Down. 18_. Selections → Modify → Select Selection Borders.
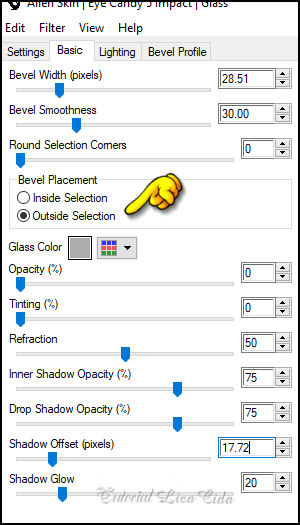
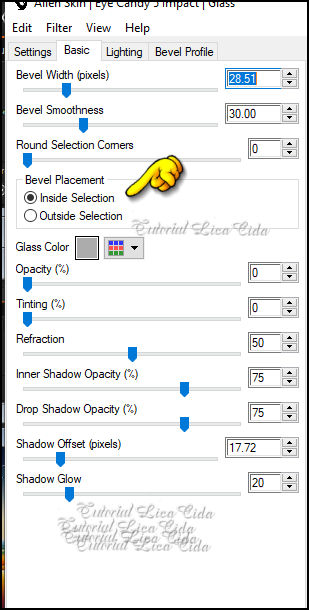
Layers → New Raster Layer. Pinte com o gradiente em uso. 19_. Plugin Alien Skin Eye Candy 5: Impact → Glass — Settings: Clear. Basic: use as configurações abaixo, com Outside Selection marcado.
20_. Plugin Alien Skin Eye Candy 5: Impact → Glass — Settings: Clear. Basic: use as configurações abaixo, com Inside Selection marcado.
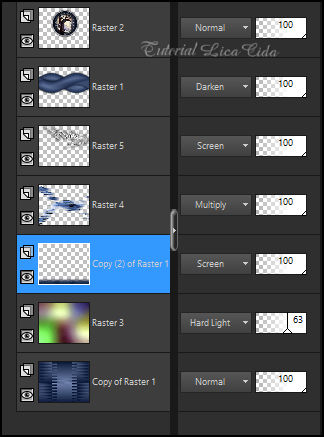
Blend Mode: Multiply — Opacity: 100%. Selections → Select None. Effects → 3D Effects → Drop Shadow: 0 / 0 / 80 / 40,00 — Color: #000000. Layers → Merge → Merge Down. 21_. Ative a Copy of Raster 1. Layers → Duplicate. Plugin MuRa's Meister → Perspective Tiling: Height: 15 — demais valores Default. 22_. Effects → Reflection Effects → Rotating Mirror: 0 / 180. Effects → User Defined Filter → Emboss_3. Com a ferramenta Magic Wand — Tolerance: 0 — Feather: 60, clique na parte transparente. Pressione a tecla Delete 4 ou 5 vezes. Selections → Select None. 23_. Edit → Copy no backcolorido-rb Edit → Paste As New Layer. Layers → Arrange → Move Down. Blend Mode: Hard Light — Opacity: 63%. 24_. Edit → Copy no decorazul-lc Edit → Paste As New Layer. Layers → Arrange → Move Up. Blend Mode: Multiply — Opacity: 100%. 25_. Edit → Copy no Silvie_Mask (Raster 1) Edit → Paste As New Layer. Blend Mode: Screen — Opacity: 100%. Observe os Blend Modes e use a gosto. LAYERS
Altere os Blend Modes e a Opacity das layers. 26_. Ative a layer do topo. Edit → Copy no tube ns-paisagem1174 Edit → Paste As New Layer. Deverá estar posicionado. Adjust → Sharpness → Sharpen More. 27_. Edit → Copy no chao natureza 004 dworisch Edit → Paste As New Layer. Posicione. 28_. Effects → Illumination Effects → Lights → Preset_Lights_araralightdw.
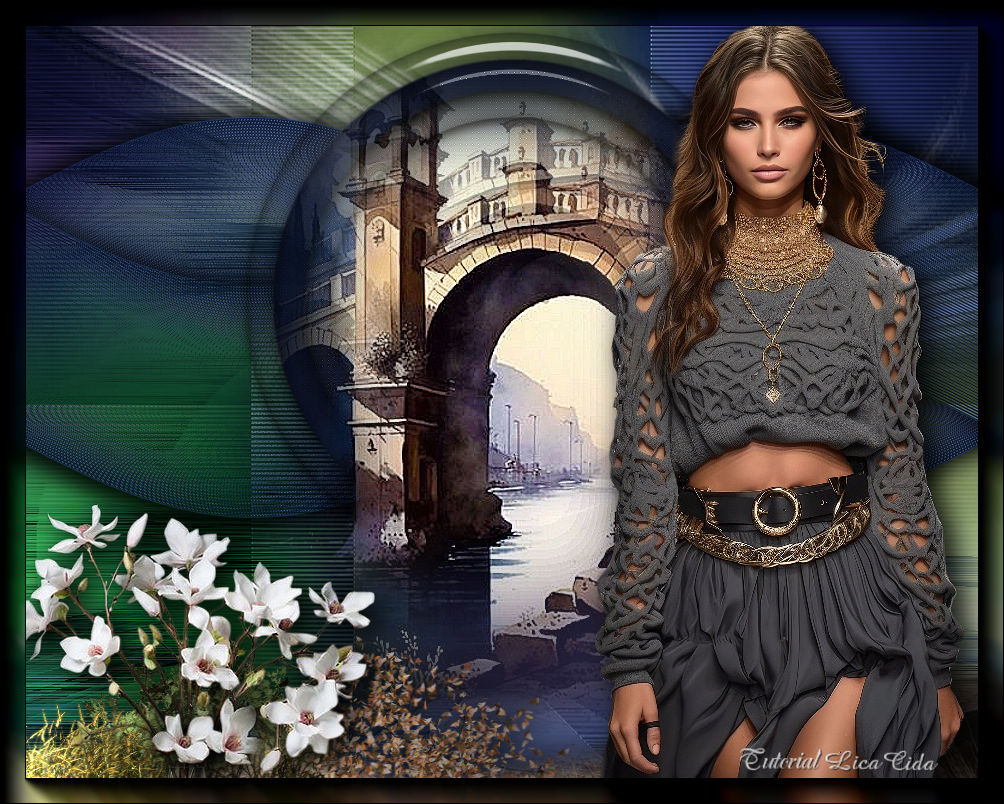
29_. Edit → Copy no 3605 - Déco - LB TUBES Edit → Paste As New Layer. Posicione a gosto; usei as flores caídas como destaque. 30_. Edit → Copy no tube ns-woman3212 Edit → Paste As New Layer. Posicione e use a gosto. Image → Add Borders: 2 px, Symmetric marcado — Color: #000000. Plugin AAA Frames → Foto Frame — Width: 25, demais valores Default. Edit → Repeat. Aplique a marca-d'água. Assine e salve. File → Export → JPEG Optimizer.
Aparecida / LicaCida, setembro de 2024.
Copyright ©2026 - Web Design - Naise Minas |