|
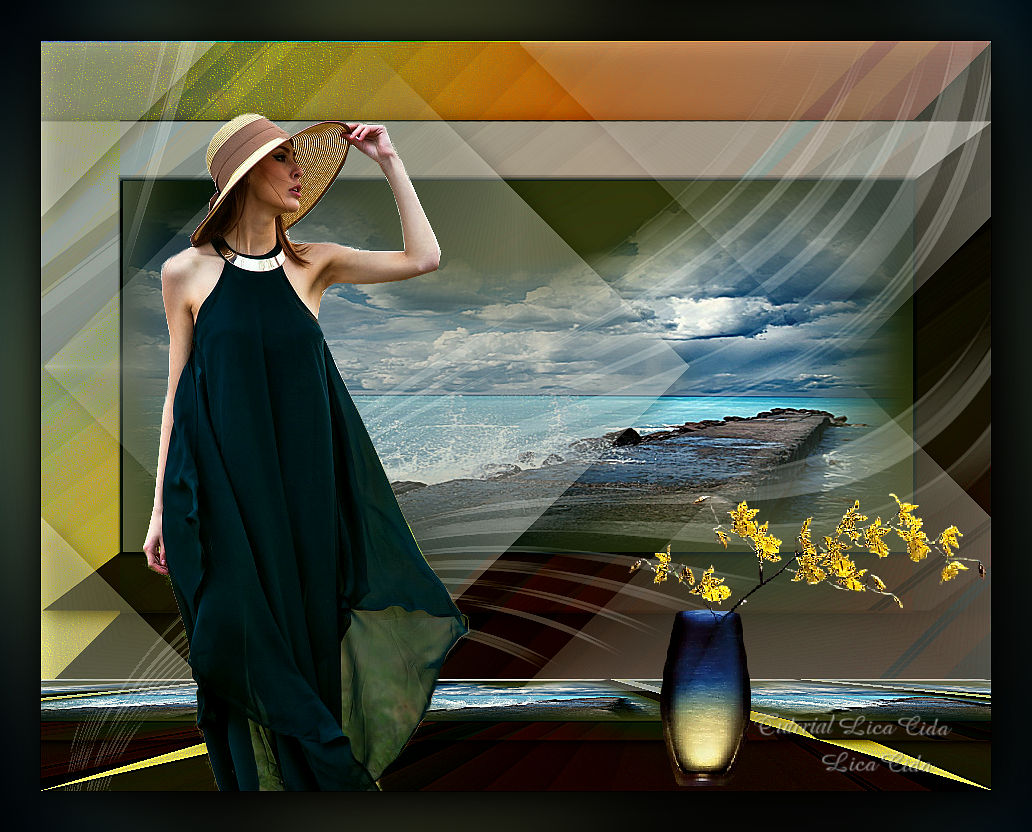
Isaura
TRADUÇÕES

MATERIAL

Tubes: tube3074_mulher_mara_pontes
SvB Vaas tak Orchideen
Mina@.4182.MISTPAESAGGIO.07.16
Deco: decolc1
Back: backlc1
Marca-d'água.
Efeitos do PSP.
Versão usada: PSP X8.
PLUGINS
Plugin Backgroundmaniac → Stripes n' More
Plugin It@lian Editors Effect → Bordo con luci
Plugin MuRa's Meister → Perspective Tiling
Plugin VanDerLee → UnPlugged-X
Plugin Carolaine & Sensibility → CS-DLines
Plugin Carolaine & Sensibility → CS-LDots
Plugin AAA Filters → Custom
Plugin Graphics Plus → Cross Shadow
TUTORIAL

|
Esta seta marca sua linha
Clique e arraste para movê-la
|
|
1_.
Abra uma nova imagem transparente de 950 x 650 px.
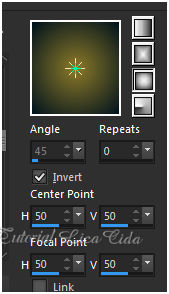
Pinte com o gradiente formado pelas cores #00121d e #8b7929.
Configure: Style: Sunburst — Repeats: 0 — Invert marcado — Center Point: H: 50 / V: 50 — Focal Point: H: 50 / V: 50.
2_.
Plugin Backgroundmaniac → Stripes n' More: 125 / 125.
3_.
Plugin It@lian Editors Effect → Bordo con luci: 62 / 62 / 62.
Layers → Duplicate.
4_.
Effects → Geometric Effects → Perspective - Horizontal: 25 — Transparent.
Image → Mirror.
Repita o item 4.
5_.
Image → Mirror.
Effects → 3D Effects → Drop Shadow: 0 / 0 / 80 / 40,00 — Color: #000000.
6_.
Ative a ferramenta Selection Tool (tecla S) → Custom Selection.
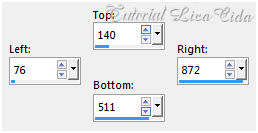
Selections → Promote Selection to Layer.
Adjust → Blur → Gaussian Blur — Radius: 30,00.
7_.
Edit → Copy no tube Mina@.4182.MISTPAESAGGIO.07.16
Edit → Paste Into Selection.
Adjust → Sharpness → Sharpen More.
8_.
Effects → 3D Effects → Chisel: Size: 6 — Transparent — Color: a usada no Foreground (ainda com a seleção ativa).
9_.
Duplique a Raster 1.
Layers → New Raster Layer.
Selections → Select All.
Edit → Copy no backlc1
Edit → Paste Into Selection.
Selections → Select None.
Layers → Arrange → Move Down.
10_.
Ative a layer duplicada.
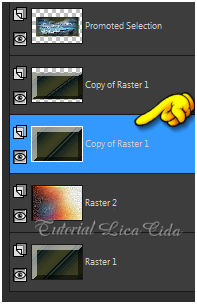
Aplique:
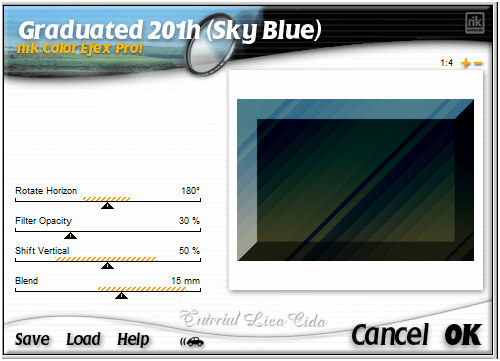
OBSERVAÇÕES
Image → Mirror na Raster 2.
Na layer superior (Promoted Selection): diminuí levemente o retângulo formado, com a ferramenta Pick Tool.
Altere os Blend Modes e a Opacity das layers.
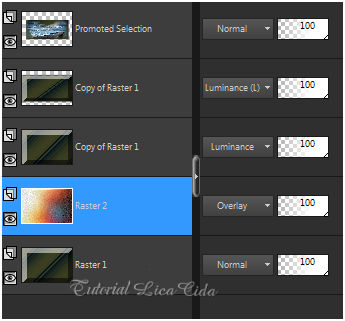
Layers → Merge → Merge Visible.
11_.
Layers → New Raster Layer.
Plugin VanDerLee → UnPlugged-X.
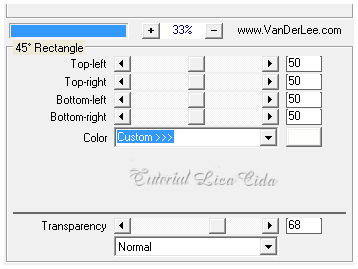
Effects → Image Effects → Seamless Tiling: Transition: 100.
12_.
Plugin Carolaine & Sensibility → CS-DLines: 40 / 5.
13_.
Plugin Carolaine & Sensibility → CS-LDots: 50 / 3 / 2.
Adjust → Sharpness → Sharpen More.
Effects → 3D Effects → Drop Shadow: 0 / 0 / 80 / 40,00 — Color: #000000.
14_.
Ative a layer Merged.
Layers → Duplicate.
Image → Canvas Size: 950 x 750 — Bottom: 100.
15_.
Plugin MuRa's Meister → Perspective Tiling.
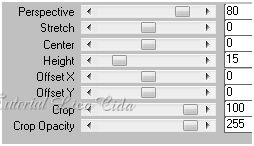
Adjust → Sharpness → Sharpen More.
16_.
Edit → Copy no decolc1
Edit → Paste As New Layer.
Layers → Arrange → Bring to Top (deverá estar com Opacity: 22% — Blend Mode: Screen).
Adjust → Sharpness → Sharpen More.
17_.
Edit → Copy no tube tube3074_mulher_mara_pontes
Edit → Paste As New Layer.
Posicione.
18_.
Edit → Copy no SvB Vaas tak Orchideen
Edit → Paste As New Layer.
Redimensione e posicione a gosto.
Image → Add Borders: 1 px, Symmetric marcado — Color: a gosto.
Plugin AAA Filters → Custom → Landscape.
Image → Add Borders: 40 px, Symmetric marcado — Color: a gosto.
Selecione a borda e pinte com o gradiente formado acima.
Plugin Graphics Plus → Cross Shadow → Default.
Selections → Invert.
Effects → 3D Effects → Drop Shadow: 0 / 0 / 80 / 40,00 — Color: #000000.
Selections → Select None.
Aplique a marca-d'água.
Assine e salve.
Aparecida / LicaCida.
Rio de Janeiro - Brasil.


VOLTAR
Copyright ©2026 - Web Design - Naise Minas
|

