|
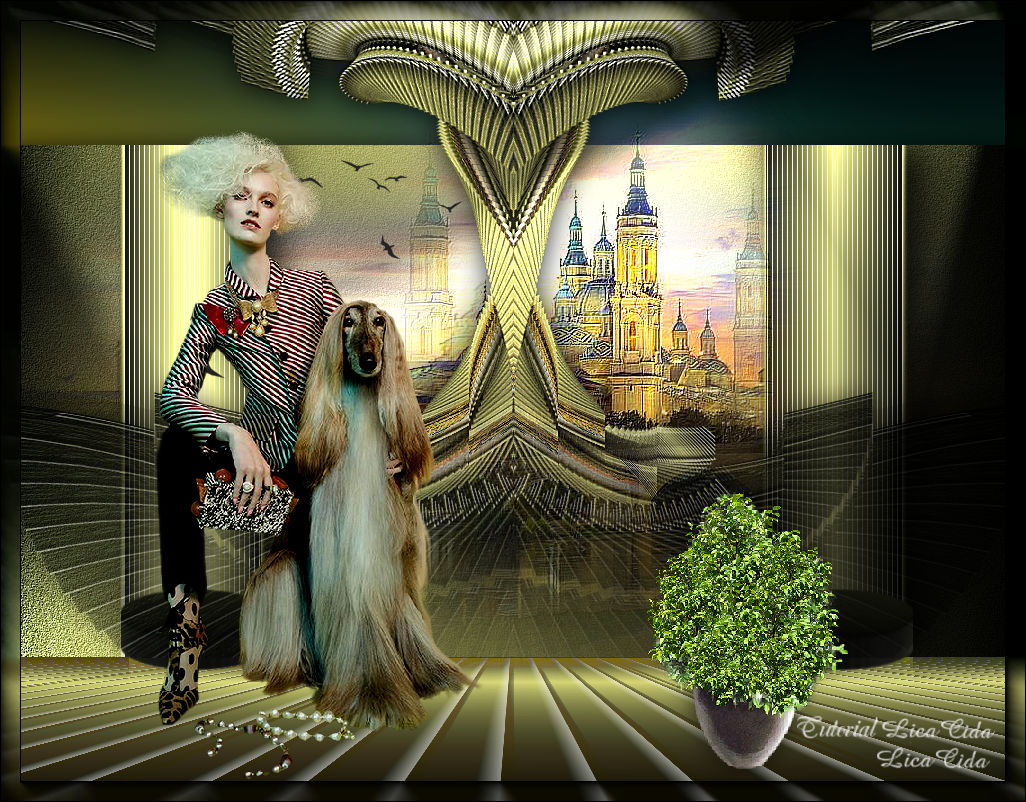
It Arise
TRADUÇÕES

MATERIAL

Preset: Illumination → Lights → Preset_Lights_2bllc --
Salvar na pasta Presets do PSP.
Seleção: elipse9mara --
Salvar na pasta Selections do PSP.
Tubes: 4633-luzcristina
4650-luzcristina
TUBE SUDAM 852
passarosnet
Mask: !!!!gradientedworisch
Marca-d'água.
Efeitos do PSP.
Versão usada: PSP X8.
PLUGINS
Plugin AP [Lines] → Lines - SilverLining
Plugin dsb flux → Linear Transmission
Plugin MuRa's Meister → Copies
Plugin MuRa's Meister → Perspective Tiling
Plugin Filter Factory Gallery G → Panel Stripes
Plugin FM Tile Tools → Blend Emboss
Plugin Alien Skin Eye Candy 5: Impact → Extrude
Plugin Nik Software → Color Efex Pro 3.0 → Bi-Color Filters
Plugin AAA Frames → Foto Frame
TUTORIAL
|
Esta seta marca sua linha
Clique e arraste para movê-la
|
|
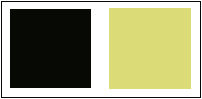
Configure: Foreground: #070904 — Background: #dbdb78.
1_.
Abra uma nova imagem transparente de 1024 x 512 px.
Ative a ferramenta Selection Tool (tecla S) → Custom Selection.
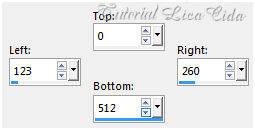
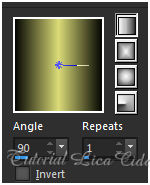
Pinte com o gradiente formado pelas cores acima.
Configure: Style: Linear — Angle: 90 — Repeats: 1 — Invert desmarcado.
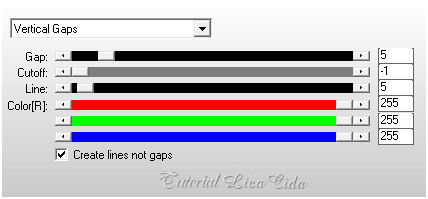
Plugin AP [Lines] → Lines - SilverLining → Vertical Gaps.
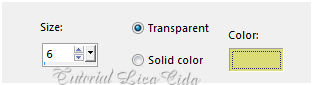
Effects → 3D Effects → Chisel — Color: #dbdb78 (Background).
Selections → Select None.
Effects → Reflection Effects → Rotating Mirror: Horizontal Offset: 0 — Rotation Angle: 180 — Repeat.
Effects → 3D Effects → Drop Shadow: 0 / 20 / 78 / 46,00 — Color: #000000.
2_.
Layers → New Raster Layer.
Pinte com o mesmo gradiente formado no item 1.
Layers → Arrange → Move Down.
Selections → Select All.
Edit → Copy no tube misted 4650-luzcristina
Edit → Paste Into Selection.
Selections → Select None.
Adjust → Add/Remove Noise → JPEG Artifact Removal — Strength: Maximum — Crispness: 82.
Plugin FM Tile Tools → Blend Emboss.
Layers → Merge → Merge Visible.
3_.
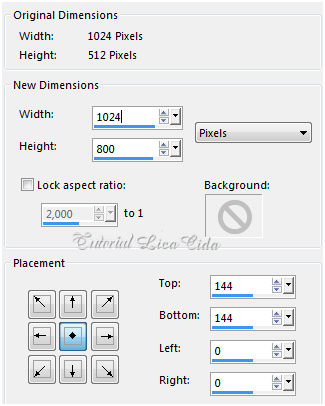
Image → Canvas Size.
4_.
Layers → Duplicate.
Effects → Geometric Effects → Perspective - Horizontal: -70 — Transparent.
Image → Mirror → Mirror Horizontal.
Repita: Effects → Geometric Effects → Perspective - Horizontal: -70 — Transparent.
Effects → Distortion Effects → Pinch — Strength: 100%.
Repita o Pinch.
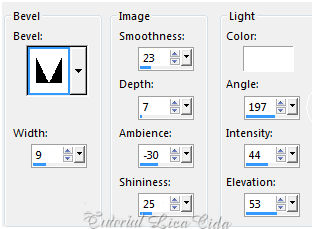
Effects → 3D Effects → Inner Bevel.
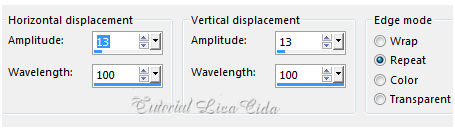
Effects → Texture Effects → Weave.
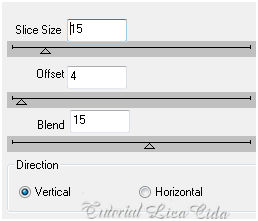
Plugin dsb flux → Linear Transmission.
Effects → Distortion Effects → Pinch — Strength: 100%.
Plugin MuRa's Meister → Copies.
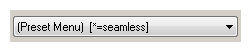
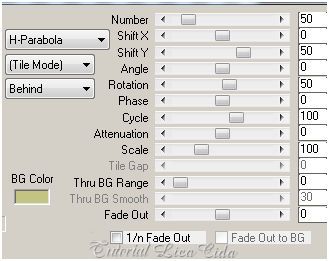
Image → Mirror → Mirror Vertical.
Effects → Reflection Effects → Rotating Mirror: Horizontal Offset: 0 — Rotation Angle: 180 — Repeat.
Layers → New Mask Layer → From Image: !!!!gradientedworisch.
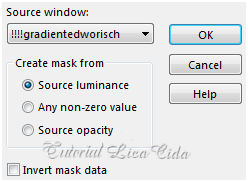
Layers → Merge → Merge Group.
Adjust → Sharpness → Sharpen More.
5_.
Edit → Copy no tube misted 4650-luzcristina (deverá estar na memória)
Edit → Paste As New Layer.
Adjust → Sharpness → Sharpen More.
Posicione a gosto.
Layers → Arrange → Move Down.
ATENÇÃO
Não cubra os efeitos das laterais.
Effects → Illumination Effects → Lights → Preset_Lights_2bllc.
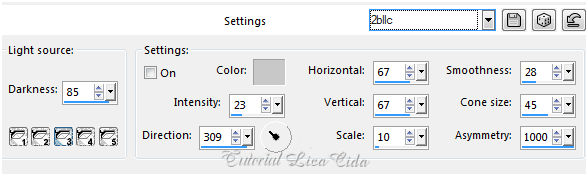
Aplique o preset Lights nas três layers.
Effects → 3D Effects → Drop Shadow: 0 / 0 / 80 / 40,00 — Color: #000000.
Aplique na layer Group-Copy of Raster 1 e na layer Merged.
6_.
Layers → New Raster Layer.
Layers → Arrange → Send to Bottom.
Pinte com o gradiente linear formado no item 1, mudando: Angle: 0.
7_.
Layers → Duplicate.
Plugin Filter Factory Gallery G → Panel Stripes.
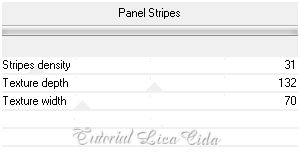
Plugin MuRa's Meister → Perspective Tiling.
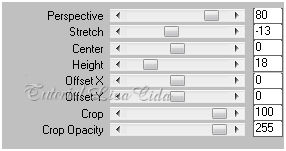
8_.
Ative a layer Merged.
Selections → Load/Save Selection → Load Selection From Disk → elipse9mara.
Layers → New Raster Layer.
Pinte com o mesmo gradiente do item 6.
Selections → Select None.
Plugin Alien Skin Eye Candy 5: Impact → Extrude.
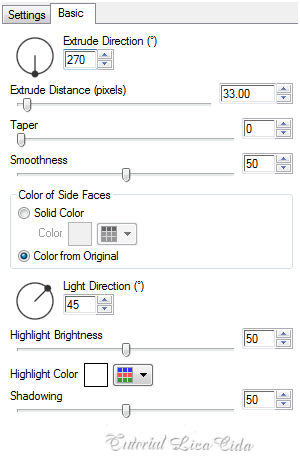
Effects → Image Effects → Offset: H: 15 / V: -34 — Custom e Transparent marcados.
Layers → Duplicate.
Image → Mirror → Mirror Horizontal (se necessário, acerte a posição).
Layers → Merge → Merge Down.
9_.
Ative a Raster 2.
Layers → Duplicate.
Plugin Nik Software → Color Efex Pro 3.0 → Bi-Color Filters — Color Set: Cool/Warm.
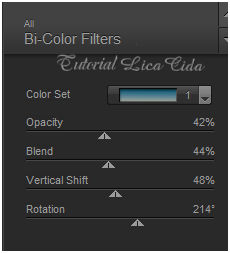
Altere os Blend Modes e a Opacity das layers.
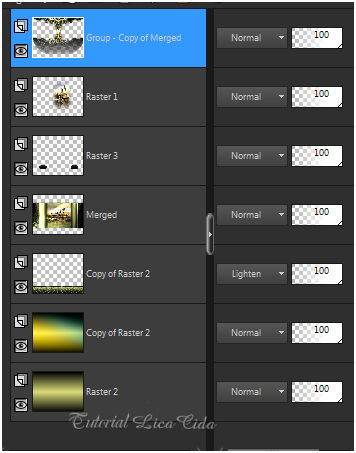
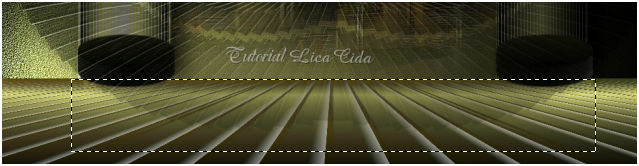
Ative a layer superior e apague a sombra do efeito, como mostra o print.
10_.
Edit → Copy nos tubes 4633-luzcristina, TUBE SUDAM 852 e passarosnet
Edit → Paste As New Layer.
Posicione a gosto.
11_.
Image → Add Borders: 1 px, Symmetric marcado — Color: #070904.
12_.
Plugin AAA Frames → Foto Frame — Width: 20 (demais valores Default).
Aplique a marca-d'água.
Assine e salve.
Espero que gostem. Obrigada!
Aparecida / LicaCida, junho de 2017.
Rio de Janeiro - Brasil.

VOLTAR
Copyright ©2026 - Web Design - Naise Minas
|

