|
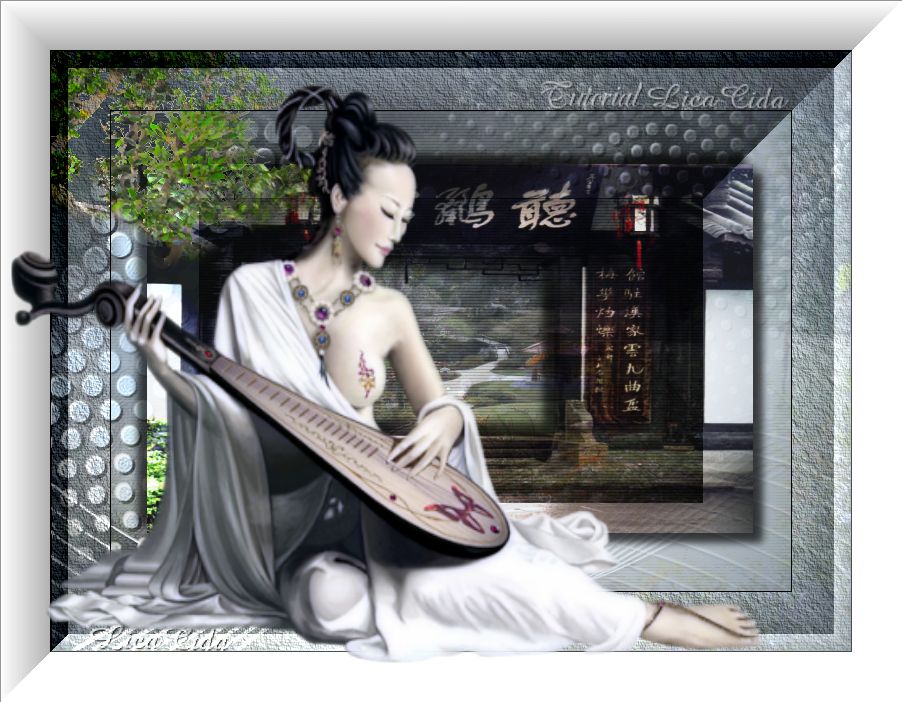
Japanese Beauty
TRADUÇÕES

MATERIAL

Imagem: imagem japanese beauty --
Seleções (Selection #1 e Selection #2) guardadas no Canal Alfa.
Mask: Narah_mask_Abstract63
Tubes: sonja-tube-temple_bonsai
Mtm_Anime
Imagem JPG: japanese-beauty jpg
Marca-d'água.
Efeitos do PSP.
Versão usada: PSP X3.
Refeito no PSP X5.
PLUGINS
Plugin Unplugged Colors → Pastel
Plugin PhotoEffex → Scanlines
Plugin MuRa's Seamless → Emboss at Alpha
Plugin Filters Unlimited 2.0 → Buttons & Frames → 3D Glass Frame 3
Plugin AAA Frames → Texture Frame
TUTORIAL

|
Esta seta marca sua linha
Clique e arraste para movê-la
|
|
1_.
Abra a imagem imagem japanese beauty, anexada ao material.
Pinte com o gradiente formado pelas cores #ffffff e #b4c0ce.
Configure: Style: Sunburst — Repeats: 0 — Invert desmarcado — Center Point: H: 50 / V: 50.

2_.
Layers → New Raster Layer.
Selections → Select All.
Edit → Copy na imagem japanese-beauty jpg
Edit → Paste Into Selection.
Selections → Select None.
3_.
Plugin Unplugged Colors → Pastel: Default.
Blend Mode: Multiply — Opacity: 75%.
4_.
Plugin PhotoEffex → Scanlines.

5_.
Plugin Filters Unlimited 2.0 → Buttons & Frames → 3D Glass Frame 3: 126 / 192.

6_.
Layers → New Raster Layer.
Pinte com a cor mais escura #b4c0ce (Background).
Layers → New Mask Layer → From Image: Narah_mask_Abstract63.
Layers → Merge → Merge Group.
Effects → 3D Effects → Drop Shadow: 1 / 1 / 100 / 1,00 — Color: #000000.
Repita com os valores negativos: -1 / -1 / 100 / 1,00.
Plugin MuRa's Seamless → Emboss at Alpha: Default.
Blend Mode: Screen.
Adjust → One Step Photo Fix.
7_.
Selections → Load/Save Selection → Load Selection From Alpha Channel → Selection #1.
Layers → New Raster Layer.
Edit → Copy na imagem japanese-beauty jpg
Edit → Paste Into Selection.
Selections → Select None.
Plugin PhotoEffex → Scanlines (veja o print do item 4).
Blend Mode: Multiply — Opacity: 79%.
8_.
Selections → Load/Save Selection → Load Selection From Alpha Channel → Selection #2.
Layers → New Raster Layer.
Edit → Copy no tube sonja-tube-temple_bonsai
Edit → Paste Into Selection.
Selections → Select None.
Effects → 3D Effects → Drop Shadow: 9 / 9 / 60 / 12,00 — Color: #000000.
Repita com os valores negativos: -9 / -9 / 60 / 12,00.
Blend Mode: Hard Light — Opacity: 87%.
LAYERS

9_.
Image → Add Borders: 1 px, Symmetric marcado — Color: #b4c0ce.
10_.
Plugin AAA Frames → Texture Frame.

11_.
Image → Add Borders: 50 px, Symmetric marcado — Color: #ffffff.
12_.
Plugin Filters Unlimited 2.0 → Buttons & Frames → 3D Glass Frame 3: Default.
13_.
Edit → Copy no tube Mtm_Anime
Edit → Paste As New Layer.
14_.
Posicione, redimensione e decore a gosto.
Layers → Merge → Merge All (Flatten).
Aplique a marca-d'água.
Assine e salve como JPG.
Espero que gostem.
Aparecida / LicaCida, julho de 2011.
Revisado em abril de 2013.
Rio de Janeiro - Brasil.


VOLTAR
Copyright ©2026 - Web Design - Naise Minas
|

