|
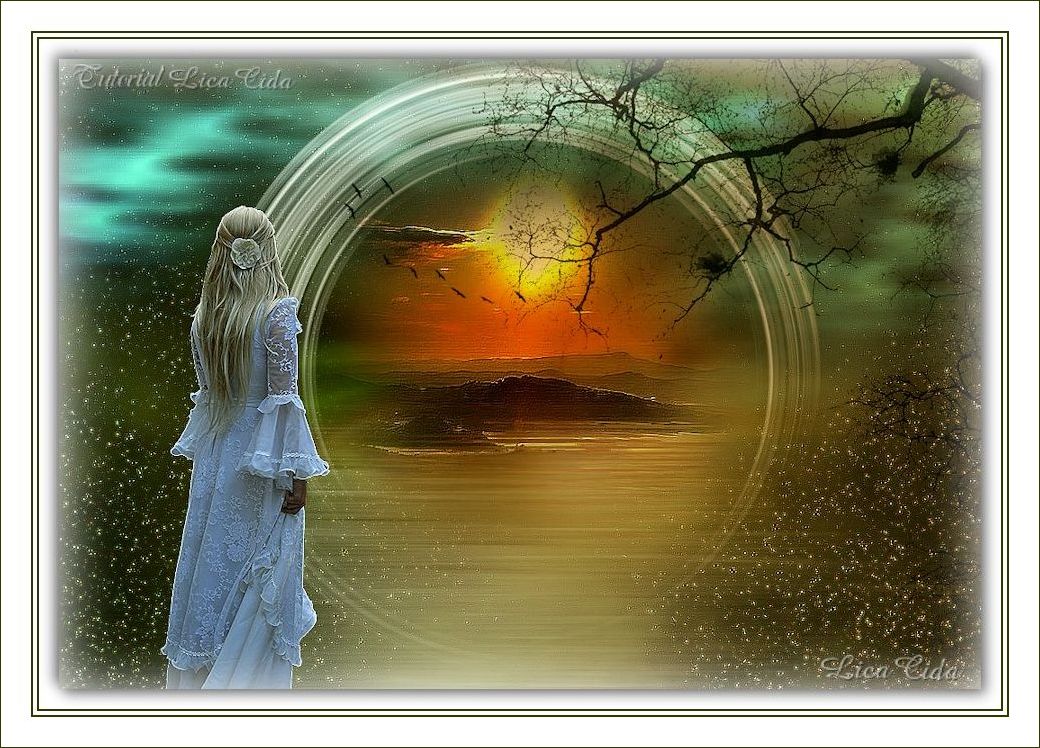
Make a Wish
TRADUÇÕES

MATERIAL

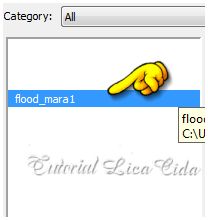
Preset: Preset_SmudgeBrush_flood_mara1 --
Salvar na pasta Presets do PSP.
Tubes: tube2600_mulher_mara_pontes
3273-luzcristina
kikirou1403_mist_eyes
Mask: 20-20
Elementos: elemento chãolc
Birds of a Feather II_21
Tree Borders_18
Marca-d'água.
Efeitos do PSP.
Versão usada: PSP X7.
PLUGINS
Plugin Nik Software → Color Efex Pro 3.0 → Bi-Color Filters
Plugin Flaming Pear → Glitterato
Plugin AAA Filters → Custom
Plugin Ulead Effects → Particle
Plugin Transparency → Eliminate Black
Plugin MuRa's Meister → Pole Transform
TUTORIAL
|
Esta seta marca sua linha
Clique e arraste para movê-la
|
|
1_.
Abra uma nova imagem transparente de 1024 x 700 px.
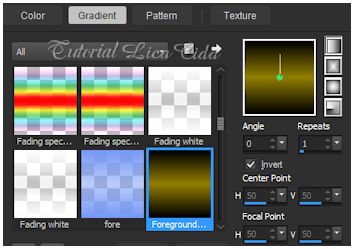
Pinte com o gradiente formado por uma cor retirada da paisagem, #917e00, e a cor #000000.
Configure: Style: Linear — Angle: 0 — Repeats: 1 — Invert marcado.
2_.
Selections → Select All.
Edit → Copy no tube kikirou1403_mist_eyes
Edit → Paste Into Selection.
Selections → Select None.
Opcional: use o seu tube principal.
Effects → Image Effects → Seamless Tiling — Default.
3_.
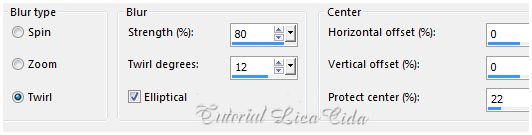
Adjust → Blur → Radial Blur.
4_.
Plugin Nik Software → Color Efex Pro 3.0 → Bi-Color Filters — Color Set: Cool/Warm 1.
Opcional: use de acordo com as suas cores, ou deixe para aplicar o efeito no final do tutorial.
5_.
Layers → New Raster Layer.
Plugin Flaming Pear → Glitterato.
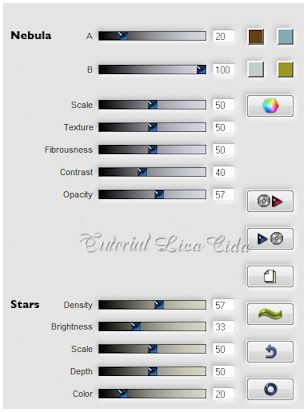
6_.
Layers → New Mask Layer → From Image: 20-20 — Invert mask data marcado.
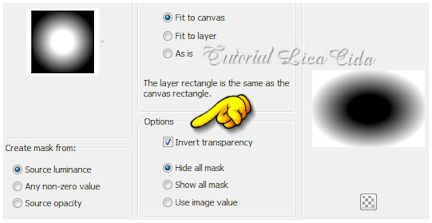
Layers → Merge → Merge Group.
7_.
Plugin AAA Filters → Custom.
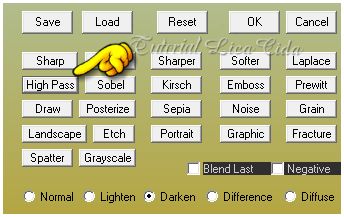
Effects → Edge Effects → Enhance.
8_.
Plugin Ulead Effects → Particle — Effect: Cloud → Cloud3 — Default.
Layers → Duplicate.
9_.
Layers → New Raster Layer.
Pinte com a cor #232323.
Repita: Plugin Ulead Effects → Particle — Effect: Cloud → Cloud3 — Default.
10_.
Plugin Transparency → Eliminate Black.
Blend Mode: Multiply.
11_.
Edit → Copy no elemento chãolc
Edit → Paste As New Layer.
Objects → Align → Bottom.
Layers → Duplicate.
12_.
Plugin MuRa's Meister → Pole Transform.
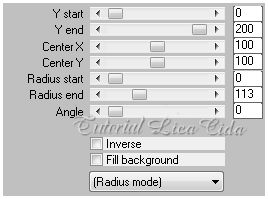
Image → Mirror → Mirror Vertical (Flip).
13_.
Volte à layer do elemento chãolc (Raster 3).
Ative a ferramenta Smudge.
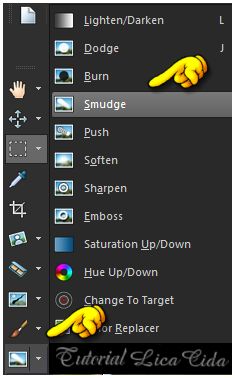
Procure o preset Preset_SmudgeBrush_flood_mara1.

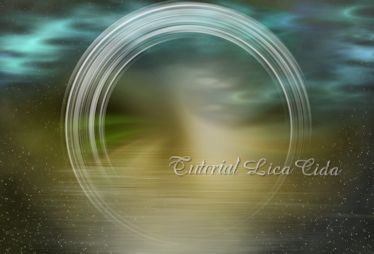
Suavize o efeito do chão como mostra o print.
14_.
Com a ferramenta Selection Tool — Circle — Feather: 20, selecione como no print:
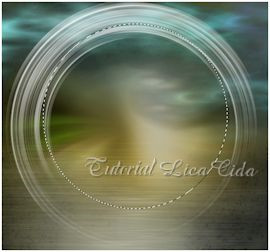
Se necessário, acerte com Selections → Edit Selection e, ao terminar, desmarque Selections → Edit Selection.
15_.
Selections → Modify → Expand: 4 px.
16_.
Layers → New Raster Layer.
Edit → Copy no tube 3273-luzcristina (paisagem)
Edit → Paste Into Selection.
Selections → Select None.
17_.
Repita o item 13: suavize o chão (observe o modelo).
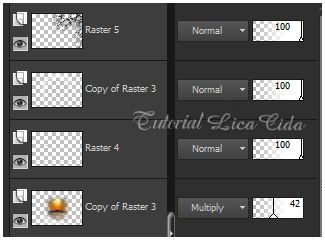
Layers → Duplicate.
Blend Mode: Multiply — Opacity: 42%.
18_.
Edit → Copy no Birds of a Feather II_21
Edit → Paste As New Layer.
Image → Resize: 80% — Resize all layers desmarcado.
Posicione de acordo.
19_.
Ative a layer superior (Copy of Raster 3).
Edit → Copy no Tree Borders_18
Edit → Paste As New Layer.
Objects → Align → Right.
20_.
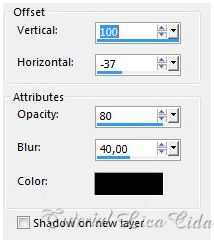
Effects → 3D Effects → Drop Shadow:
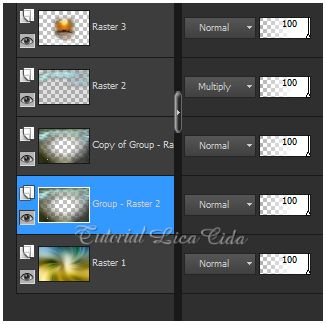
LAYERS
21_.
Layers → New Raster Layer.
Escolha duas cores retiradas da paisagem: #38617c e #d58616.
Configure: Style: Linear — Angle: 90 — Repeats: 0 — Invert desmarcado.
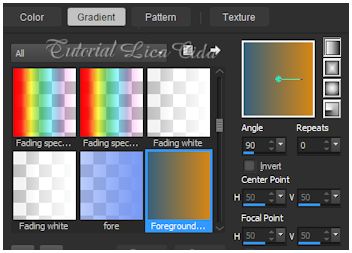
Atenção: Opacity: 24% — Blend Mode: Overlay.
22_.
Edit → Copy no tube2600_mulher_mara_pontes
Edit → Paste As New Layer.
Redimensione e posicione.
23_.
Layers → Merge → Merge Visible.
Image → Resize: 90% — Resize all layers marcado.
24_.
Image → Add Borders: 20 px, Symmetric marcado — Color: #ffffff.
Selections → Select All.
Selections → Modify → Contract: 20 px.
25_.
Layers → New Raster Layer.
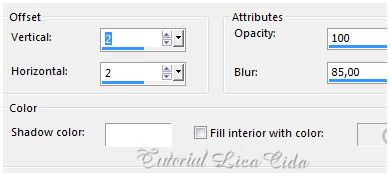
Effects → 3D Effects → Cutout.
26_.
Effects → 3D Effects → Drop Shadow: 5 / 5 / 50 / 30,00 — Color: #000000.
Repita com Vertical e Horizontal negativos: -5 / -5.
Selections → Select None.
27_.
Image → Add Borders: 3 px, Symmetric marcado — Color: #303700 (cor escura do top).
Image → Add Borders: 5 px, Symmetric marcado — Color: #ffffff.
Image → Add Borders: 3 px, Symmetric marcado — Color: #303700.
Image → Add Borders: 30 px, Symmetric marcado — Color: #ffffff.
28_.
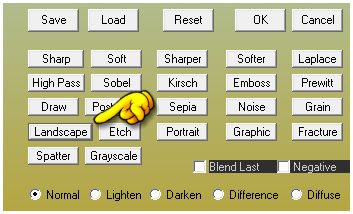
Plugin AAA Filters → Custom → Landscape.
Aplique a marca-d'água.
Assine e salve.
Espero que gostem.
Aparecida / LicaCida, maio de 2015.
Rio de Janeiro - Brasil.

VOLTAR
Copyright ©2026 - Web Design - Naise Minas
|


