|
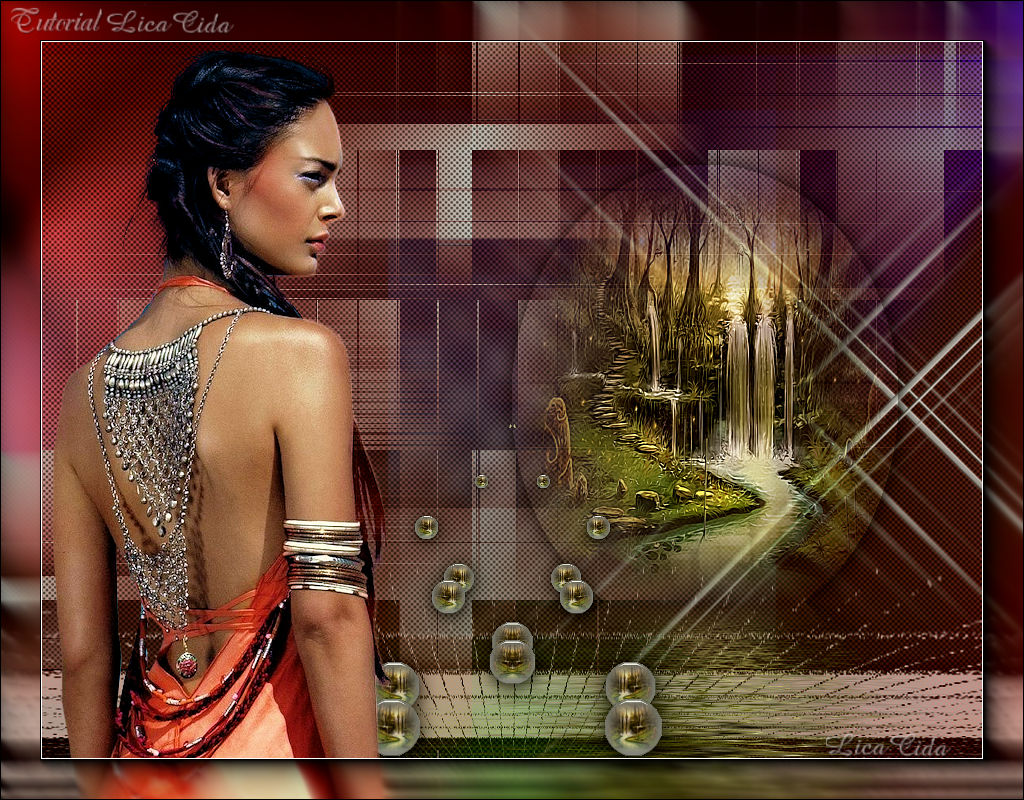
Merche
DEDICATÓRIA
Com carinho!
TRADUÇÕES

MATERIAL

Preset: katrina (Eye Candy 5: Impact → Glass) --
Dê um duplo clique sobre o preset para importá-lo para o plugin.
Alpha Channel: alphachannel_lc
Back: backlc
Tubes: tube3208_mulher_mara_pontes
Mina@.4662 mist paesaggio.04.17
Mask: Narah_Mask_1243
Deco: decolcperspective
Marca-d'água.
Efeitos do PSP.
Versão usada: PSP X8.
PLUGINS
Plugin Flaming Pear → Flood
Plugin Toadies → Motion Trail
Plugin Toadies → Weaver
Plugin MuRa's Seamless → Emboss at Alpha
Plugin Alien Skin Eye Candy 5: Impact → Glass
Plugin MuRa's Meister → Copies
Plugin MuRa's Meister → Cloud
Plugin AAA Filters → Custom
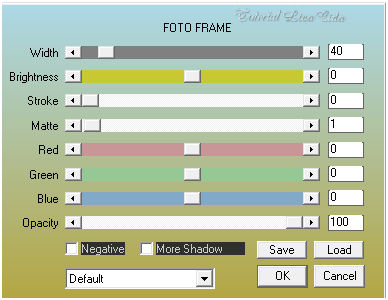
Plugin AAA Frames → Foto Frame
TUTORIAL
|
Esta seta marca sua linha
Clique e arraste para movê-la
|
|
Configure: Foreground: #9f9f9f — Background: #b35c52 (cores retiradas do tube principal).


1_.
Abra o alphachannel_lc, duplique (Shift + D) e feche (ou minimize) a original.
Selections → Select All.
Edit → Copy no backlc
Edit → Paste Into Selection.
Selections → Select None.
2_.
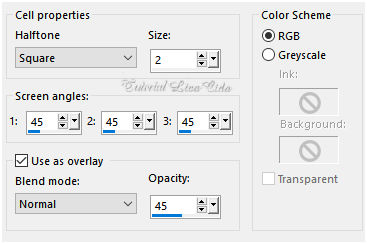
Effects → Artistic Effects → Halftone.
3_.
Selections → Load/Save Selection → Load Selection From Alpha Channel → Selection #1.
Layers → New Raster Layer.
Pinte com a cor usada no Foreground.
4_.
Selections → Modify → Contract: 46 px.
5_.
Layers → New Raster Layer.
Edit → Copy no Mina@.4662 mist paesaggio.04.17
Edit → Paste Into Selection.
Adjust → Sharpness → Sharpen More.
Effects → 3D Effects → Drop Shadow: 1 / 1 / 70 / 30,00 — Color: #000000.
Selections → Select None.
Ative a Raster 2 e pressione a tecla Delete.
Volte à Raster 3.
6_.
Effects → Image Effects → Offset: H: 391 / V: 0 — Custom e Transparent marcados.
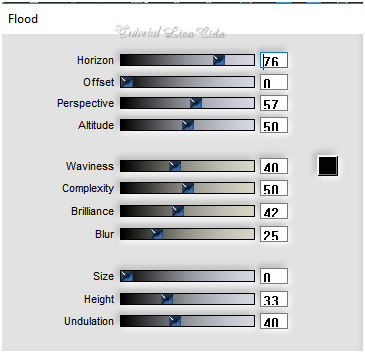
Plugin Flaming Pear → Flood.
LAYERS
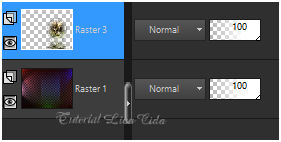
7_.
Selections → Load/Save Selection → Load Selection From Alpha Channel → Selection #2.
Layers → New Raster Layer.
Pinte com a cor usada no Foreground.
Selections → Select None.
Layers → Arrange → Move Down.
8_.
Plugin Toadies → Motion Trail: 200 / 255 / 146.
9_.
Effects → Geometric Effects → Skew.
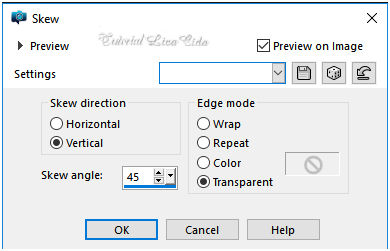
10_.
Effects → Texture Effects → Mosaic - Antique.
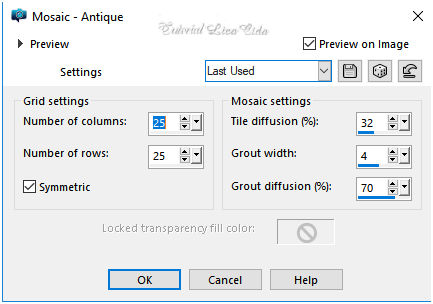
11_.
Plugin Toadies → Weaver — Default: 59 / 48 / 222.
Repita: Effects → Artistic Effects → Halftone (print do item 2).
12_.
Layers → New Raster Layer.
Pinte com a cor usada no Foreground.
Layers → New Mask Layer → From Image: Narah_Mask_1243.
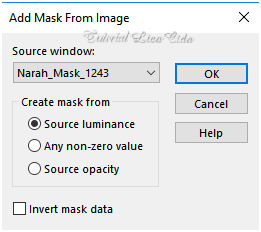
Layers → Merge → Merge Group.
Plugin MuRa's Seamless → Emboss at Alpha — Default.
13_.
Effects → Geometric Effects → Skew.
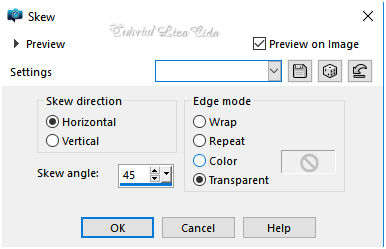
Layers → Duplicate.
Image → Mirror → Mirror Vertical.
Layers → Merge → Merge Down.
Image → Mirror → Mirror Horizontal.
14_.
Edit → Copy no decolcperspective
Edit → Paste As New Layer.
Objects → Align → Bottom.
Effects → 3D Effects → Drop Shadow: 1 / 1 / 70 / 30,00 — Color: #000000.
Blend Mode: Luminance (L).
15_.
Ative a layer superior (Raster 3).
Selections → Load/Save Selection → Load Selection From Alpha Channel → Selection #3.
Layers → New Raster Layer.
Pinte com a cor usada no Foreground.
16_.
Edit → Copy no Mina@.4662 mist paesaggio.04.17
Edit → Paste Into Selection.
17_.
Plugin Alien Skin Eye Candy 5: Impact → Glass — Settings: katrina.
Selections → Select None.
18_.
Plugin MuRa's Meister → Copies.
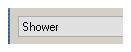
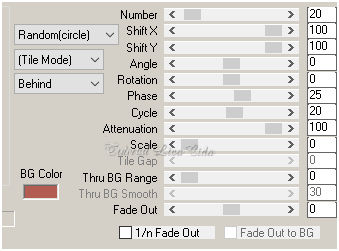
Selections → Select None.
OBSERVAÇÃO
Ao refazer o tutorial, observei que o efeito Shower não sai igual... sem problemas.
Effects → 3D Effects → Drop Shadow: 1 / 1 / 70 / 30,00 — Color: #000000.
19_.
Ative a Raster 1.
Layers → New Raster Layer.
Plugin MuRa's Meister → Cloud.
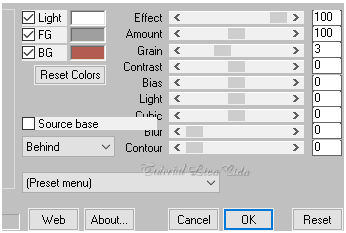
Blend Mode: Overlay.
Altere os Blend Modes e a Opacity das layers.
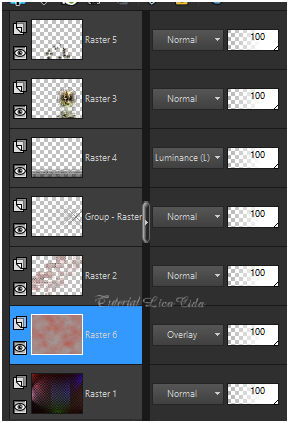
Layers → Merge → Merge Visible.
Opcional: Plugin AAA Filters → Custom → Landscape — Default.
20_.
Edit → Copy no tube tube3208_mulher_mara_pontes
Edit → Paste As New Layer.
Image → Mirror.
Image → Resize: 80% — Resize all layers desmarcado.
Posicione.
Layers → Merge → Merge Visible.
21_.
Plugin AAA Frames → Foto Frame.
Aplique a marca-d'água.
Assine e salve.
Espero que gostem. Obrigada!
Aparecida / LicaCida, junho de 2018.
Rio de Janeiro - Brasil.

VOLTAR
Copyright ©2026 - Web Design - Naise Minas
|


