|
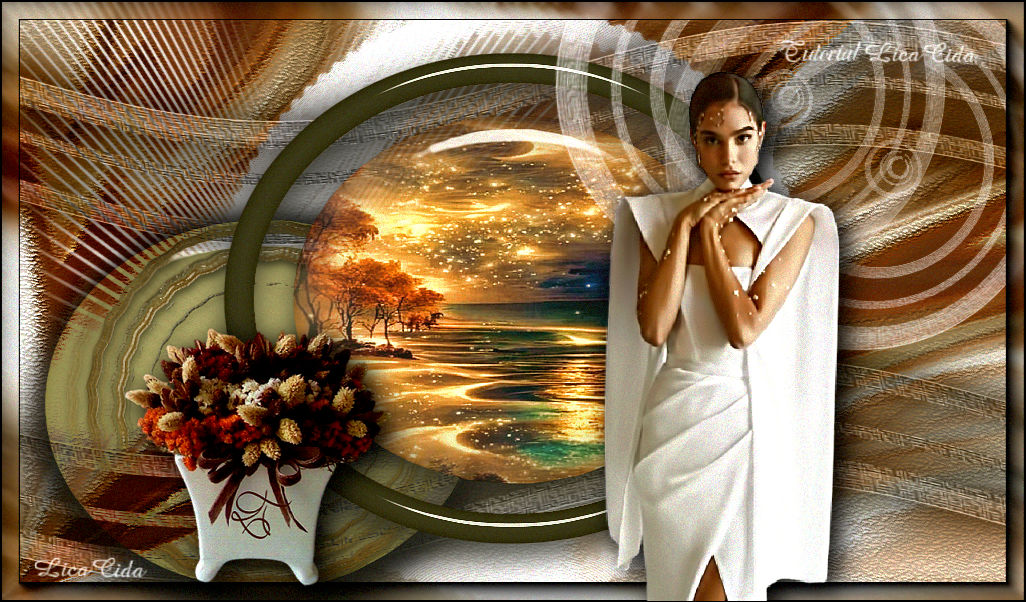
Meu Disfarce
TRADUÇÕES

MATERIAL

Seleções: disfarce1-lc
disfarce2-lc --
Salvar na pasta Selections do PSP.
Tubes: Callitubes-3434mulheres
Callitubes-605Paisagens
Callitubes-327flores
Deco: decor_nmcriacoes_14
decor_nmcriacoes_65
deco1
deco2
Marca-d'água.
Efeitos do PSP.
PLUGINS
Plugin Alien Skin Eye Candy 5: Impact → Glass
Plugin AAA Filters → Custom → Landscape
Plugin VM Distortion → Distortion by Brightness
Plugin Artistique → Rough Pastels
Plugin Convolution Filter → Emboss (light)
Plugin Nik Software → Color Efex Pro 3.0 → Glamour Glow
Plugin MuRa's Meister → Pole Transform
Plugin AAA Frames → Foto Frame
TUTORIAL
|
Esta seta marca sua linha
Clique e arraste para movê-la
|
|
1_.
Abra o material no PSP, duplique e feche os originais.
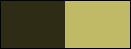
Escolha duas cores para trabalhar: #2f2c16 (escura) e #c0ba67 (clara).
2_.
Abra uma nova imagem transparente de 1024 x 600 px.
3_.
Selections → Load/Save Selection → Load Selection From Disk → disfarce1-lc.
4_.
Pinte a seleção com a cor escura.
5_.
Selections → Modify → Contract: 30.
Aperte a tecla Delete do teclado.
6_.
Layers → New Raster Layer.
Edit → Copy no misted Callitubes-605Paisagens
Edit → Paste Into Selection.
Adjust → Sharpness → Sharpen.
Selections → Select None.
Layers → Merge → Merge Down.
7_.
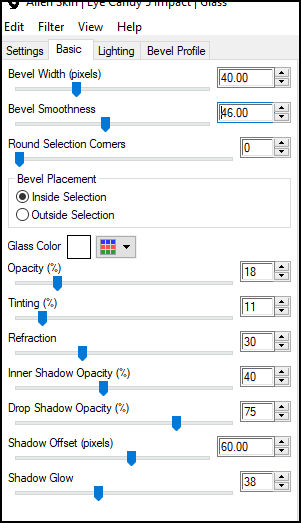
Plugin Alien Skin Eye Candy 5: Impact → Glass.
8_.
Plugin AAA Filters → Custom → Landscape: Default.
9_.
Layers → New Raster Layer.
Selections → Load/Save Selection → Load Selection From Disk → disfarce2-lc.
10_.
Ferramenta Flood Fill: Opacity: 60%.
Pinte a seleção com a cor clara.
11_.
Edit → Copy no decor_nmcriacoes_14
Edit → Paste As New Layer.
Centralize na seleção.
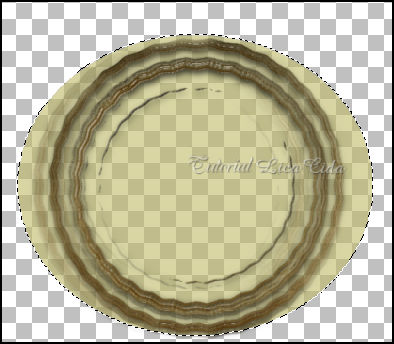
Selections → Select None.
Layers → Merge → Merge Down.
12_.
Plugin Alien Skin Eye Candy 5: Impact → Glass (print do item 7).
13_.
Plugin AAA Filters → Custom → Landscape: Default.
Layers → Arrange → Move Down.
Ferramenta Flood Fill: volte a Opacity para 100%.
14_.
Layers → New Raster Layer.
Layers → Arrange → Send to Bottom.
Pinte a layer com a cor escura.
15_.
Selections → Select All.
Edit → Copy no tube Callitubes-3434mulheres
Edit → Paste Into Selection.
Selections → Select None.
16_.
Effects → Image Effects → Seamless Tiling: Default.
17_.
Adjust → Blur → Radial Blur.
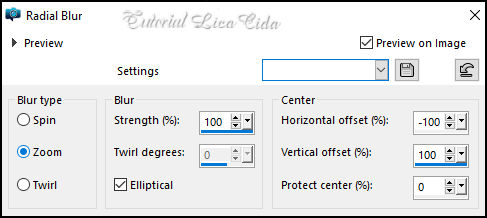
18_.
Plugin VM Distortion → Distortion by Brightness.
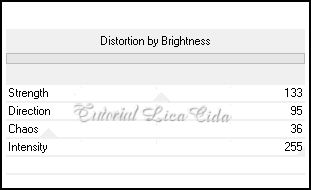
19_.
Plugin Artistique → Rough Pastels.
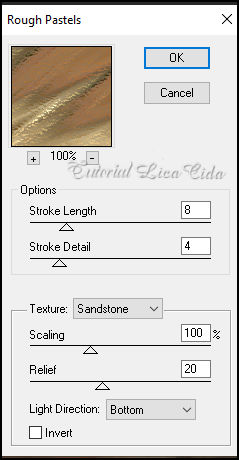
20_.
Plugin Convolution Filter → Emboss (light): Emboss 191.
Layers → Duplicate.
21_.
Plugin Nik Software → Color Efex Pro 3.0 → Glamour Glow: Default.
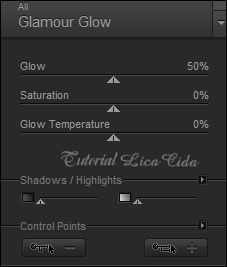
Blend Mode: Multiply.
Edit → Repeat o efeito Glamour Glow: Default.
22_.
Edit → Copy no decor_nmcriacoes_65
Edit → Paste As New Layer.
23_.
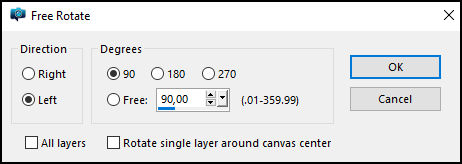
Image → Free Rotate.
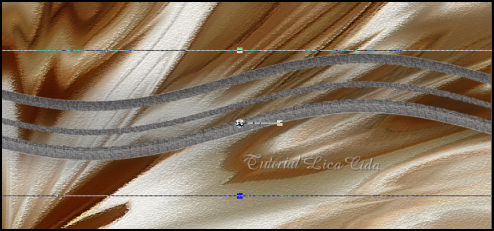
Com a ferramenta Pick Tool (tecla K), puxe o efeito até o final do back.
24_.
Ative a régua e posicione a 430 px.
Layers → Duplicate.
Image → Mirror → Mirror Vertical.
Image → Mirror → Mirror Horizontal.
Layers → Merge → Merge Down.
Blend Mode: Luminance (L).
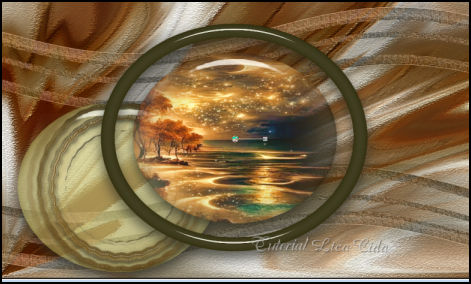
Altere os Blend Modes e a Opacity das layers.
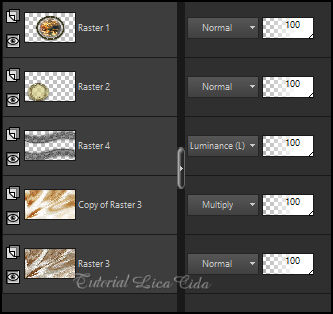
Effects → 3D Effects → Drop Shadow a gosto.
Layers → Duplicate (Raster 4).
25_.
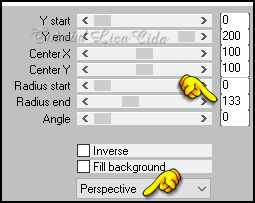
Plugin MuRa's Meister → Pole Transform.
26_.
Layers → Arrange → Bring to Top.
Blend Mode: Screen.
Use como no modelo.
Duplique o efeito e use como no modelo.
Blend Mode: Screen.
27_.
Ative a Raster 4.
Edit → Copy no deco1
Edit → Paste As New Layer (já posicionado).
28_.
Edit → Copy no deco2
Edit → Paste As New Layer.
Objects → Align → Left.
29_.
Ative a layer do topo.
Edit → Copy no tube Callitubes-3434mulheres
Edit → Paste As New Layer.
Posicione e use a gosto.
30_.
Edit → Copy no tube Callitubes-327flores
Edit → Paste As New Layer.
Posicione e use a gosto.
31_.
Plugin AAA Frames → Foto Frame: Width: 25, demais valores Default.
Aplique a marca-d'água.
Assine e salve.
File → Export → JPEG Optimizer.
Aparecida / LicaCida.
Rio de Janeiro - Brasil.

VOLTAR
Copyright ©2026 - Web Design - Naise Minas
|


