|
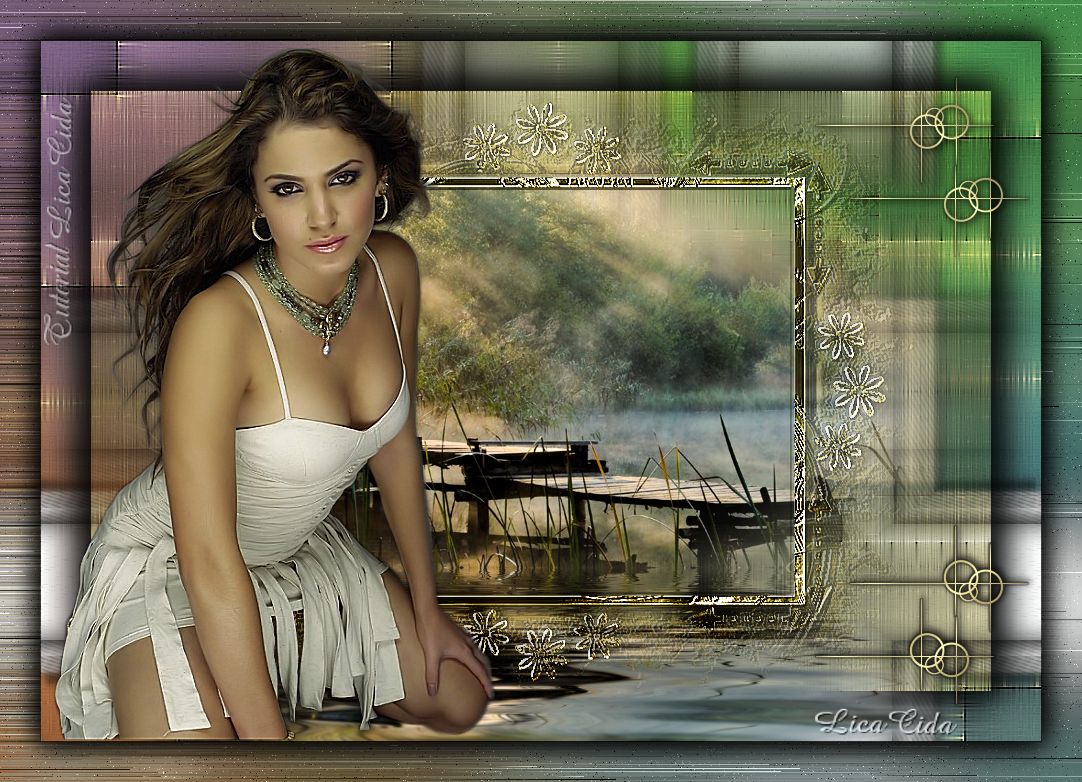
Quietude
DEDICATÓRIA
Dedico à amiga Monique, com carinho!
TRADUÇÕES

MATERIAL

Tubes: Chouchoucats82's Tubes_Nikki Reed005_Decembre_2011
Grisi_Misted_Land_344
Fundo: VBM FOND4 (tubé par Valérie)
Elementos: elemento3lc
elemento4lc-arquivonet
Back: back 5-rb (Regina Barbeiro)
Marca-d'água.
Efeitos do PSP.
Versão usada: PSP X6.
PLUGINS
Plugin Mehdi → Sorting Tiles
Plugin Mehdi → Weaver
Plugin VM Toolbox → Instant Tile
Plugin VM Toolbox → Tiler
Plugin VM Toolbox → Blast
Plugin MuRa's Seamless → Mirror Diagonal
Plugin Flaming Pear → Flood
TUTORIAL
|
Esta seta marca sua linha
Clique e arraste para movê-la
|
|
1_.
Abra uma nova imagem transparente de 900 x 600 px.
Selections → Select All.
Edit → Copy na layer Cadre1 do VBM FOND4
Edit → Paste Into Selection.
Selections → Select None.
2_.
Plugin Mehdi → Sorting Tiles.
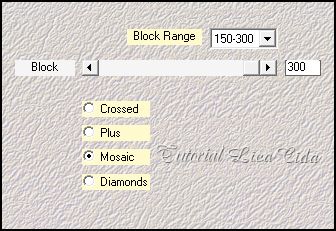
3_.
Plugin Mehdi → Weaver.
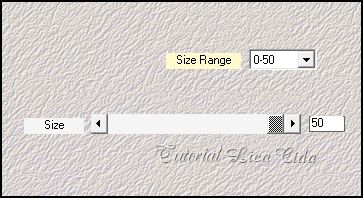
4_.
Plugin VM Toolbox → Instant Tile: Default (77 / 31).
Adjust → Sharpness → Sharpen More.
Repita.
5_.
Edit → Copy na layer Copie de Cadre1 do VBM FOND4
Edit → Paste As New Layer.
6_.
Ative a ferramenta Selection Tool (tecla S) → Custom Selection.
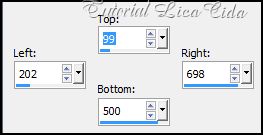
Selections → Promote Selection to Layer.
Retire a visibilidade desta layer (Promoted Selection).
7_.
Ative a Raster 2.
Pressione a tecla Delete.
Selections → Invert.
Effects → Artistic Effects → Chrome.
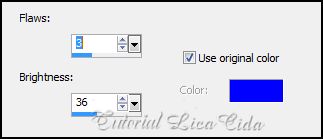
Effects → User Defined Filter → Emboss_3.
Adjust → Sharpness → Sharpen More.
Adjust → Hue and Saturation → Colorize: 35 / 136 (use o melhor tom para a sua tag).
Selections → Select None.
8_.
Ative a Raster 1.
Edit → Copy no tube Grisi_Misted_Land_344
Edit → Paste As New Layer.
9_.
Ative novamente a visibilidade da layer Promoted Selection, ative-a e delete-a.
LAYERS
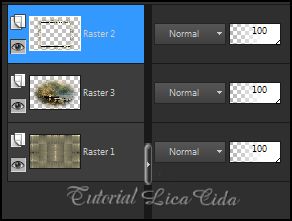
10_.
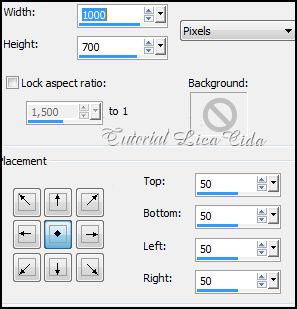
Image → Canvas Size: 1000 x 700.
Layers → New Raster Layer.
Layers → Arrange → Send to Bottom.
11_.
Ative a Raster 1.
Edit → Copy.
12_.
Ative a Raster 4.
Selections → Select All.
Edit → Paste Into Selection.
Selections → Select None.
13_.
Ative a Raster 1.
Effects → 3D Effects → Drop Shadow: 0 / 0 / 80 / 50,00 — Color: #000000.
Repita o Drop Shadow.
14_.
Ative a Raster 4 (retire a visibilidade das layers superiores).
Plugin VM Toolbox → Tiler.
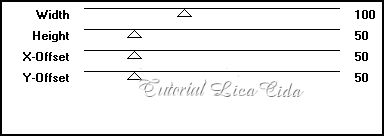
15_.
Plugin MuRa's Seamless → Mirror Diagonal: 216.
Adjust → Sharpness → Sharpen More.
Repita.
16_.
Edit → Copy no elemento3lc
Edit → Paste As New Layer.
Plugin MuRa's Seamless → Mirror Diagonal: 216.
Effects → Image Effects → Seamless Tiling.
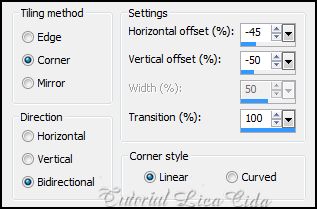
Effects → 3D Effects → Drop Shadow: 10 / 5 / 65 / 10,00 — Color: #000000.
Repita com os valores negativos: -10 / -5 / 65 / 10,00.
17_.
Ative novamente a visibilidade das layers superiores.
Na Raster 3 (layer da paisagem):
Plugin Flaming Pear → Flood.
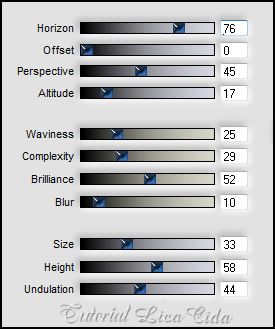
18_.
Ative a Raster 4.
Layers → Duplicate.
Layers → New Raster Layer.
Layers → Arrange → Move Down.
19_.
Selections → Select All.
Edit → Copy no back 5-rb
Edit → Paste Into Selection.
Selections → Select None.
20_.
Ative a layer superior (Raster 2).
Edit → Copy no tube Chouchoucats82's Tubes_Nikki Reed005_Decembre_2011
Edit → Paste As New Layer.
Faça o resize necessário.
Posicione.
21_.
Edit → Copy no elemento4lc-arquivonet
Edit → Paste As New Layer.
Posicione.
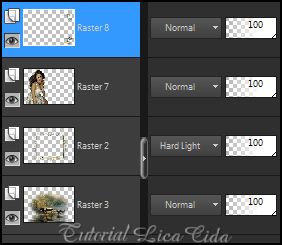
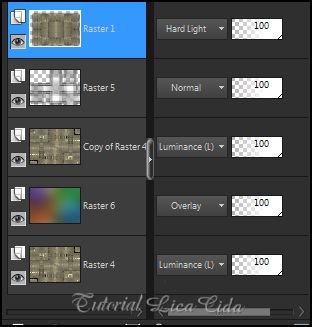
22_.
Image → Add Borders: 1 px, Symmetric marcado — Color: #000000.
Edit → Copy.
Image → Add Borders: 40 px, Symmetric marcado — Color: #ffffff.
Selecione a borda.
23_.
Edit → Paste Into Selection.
Adjust → Blur → Gaussian Blur — Radius: 30,00.
Adjust → Add/Remove Noise → Add Noise: Random — Noise: 8 — Monochrome marcado.
24_.
Plugin VM Toolbox → Blast: 176.
25_.
Selections → Invert.
Effects → 3D Effects → Drop Shadow: 0 / 0 / 80 / 50,00 — Color: #000000.
Repita o Drop Shadow.
Selections → Select None.
Aplique a marca-d'água.
Assine e salve como JPG.
Espero que gostem e aprovem.
Aparecida / LicaCida, novembro de 2013.
Rio de Janeiro - Brasil.


VOLTAR
Copyright ©2026 - Web Design - Naise Minas
|

