|
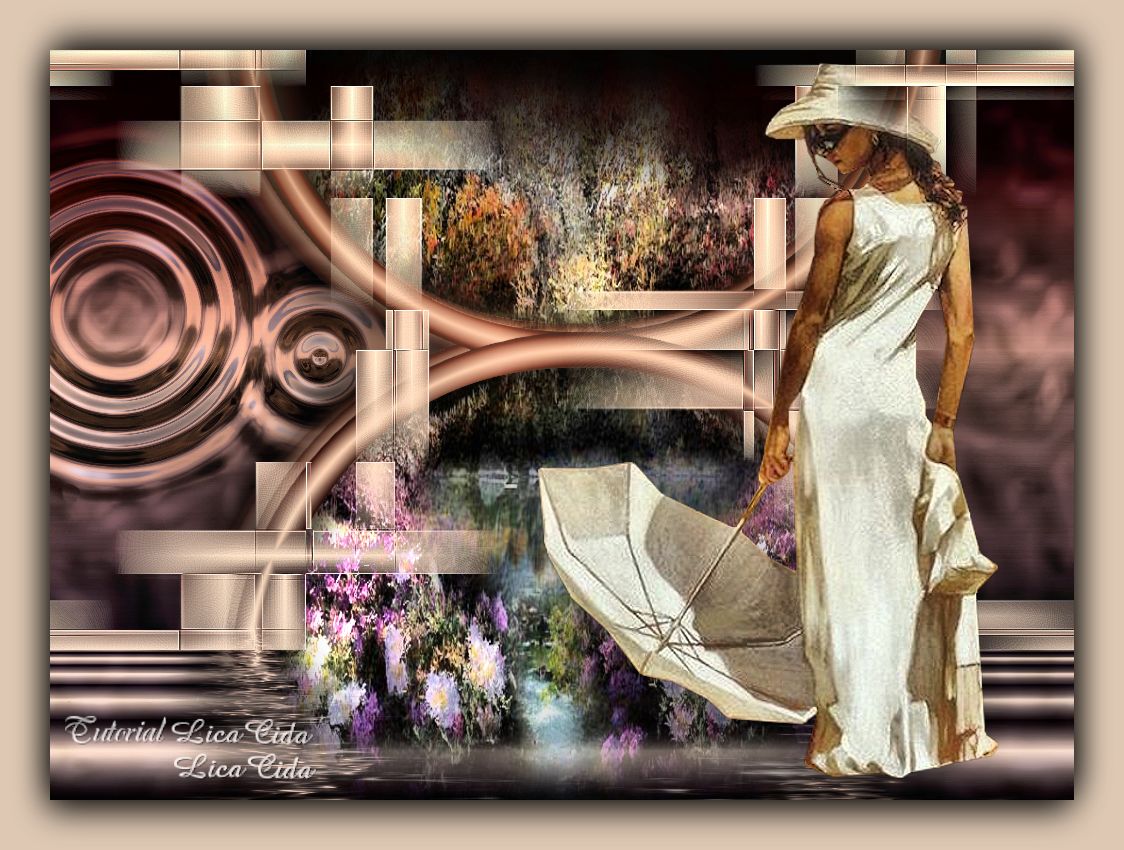
River of Dreams
DEDICATÓRIA
Dedico à querida amiga Mariana. Parabéns, muitas felicidades!
TRADUÇÕES

MATERIAL

Preset: Illumination → Lights → Preset_Lights_lightlc5 --
Salvar na pasta Presets do PSP.
Tubes: anna.br_painted.02_17-08-10
GINATUBES FEMME 1887
Marca-d'água.
Efeitos do PSP.
Versão usada: PSP X6.
PLUGINS
Plugin Distort → Shear
Plugin MuRa's Meister → Pole Transform
Plugin MuRa's Meister → Perspective Tiling
Plugin MuRa's Meister → Copies
Plugin Toadies → Weaver
Plugin Simple → Half Wrap
Plugin Alien Skin Eye Candy 5: Nature → Ripples
Plugin Flaming Pear → Flood
Plugin Nik Color Efex Pro 1.0 → Graduated User Defined
TUTORIAL

|
Esta seta marca sua linha
Clique e arraste para movê-la
|
|
1_.
Abra uma nova imagem transparente de 1024 x 600 px.
Pinte com o gradiente formado pelas cores #2f1717 e #dec8b3.
Configure: Style: Linear — Angle: 0 — Repeats: 1 — Invert desmarcado.
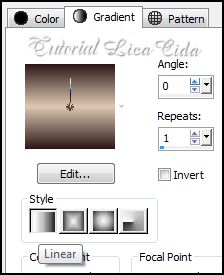
Layers → Duplicate.
Retire a visibilidade da Raster 1.
2_.
Effects → Geometric Effects → Perspective - Horizontal: Distortion: 90 — Transparent.
Repita usando Distortion: -90 — Transparent.
Image → Rotate Left.
3_.
Plugin Distort → Shear.
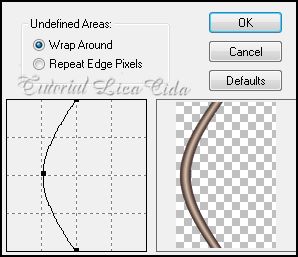
Image → Rotate Right.
4_.
Plugin MuRa's Meister → Pole Transform.
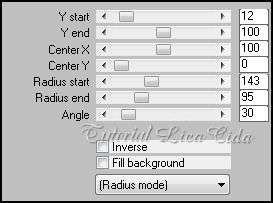
Layers → Duplicate.
Image → Flip.
Layers → Merge → Merge Down.
5_.
Layers → Duplicate.
Plugin Toadies → Weaver.
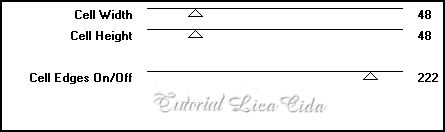
6_.
Plugin Simple → Half Wrap.
Layers → Duplicate.
Effects → Edge Effects → Enhance More.
Layers → Merge → Merge Down.
7_.
Image → Canvas Size: 1024 x 750 — Bottom: 150.
8_.
Ative a Raster 1.
Layers → Duplicate.
Plugin Alien Skin Eye Candy 5: Nature → Ripples.
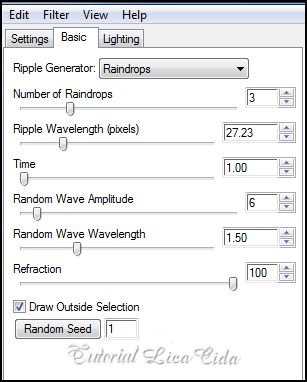
9_.
Volte à Raster 1 e aplique o Plugin MuRa's Meister → Perspective Tiling — Default.
Com a ferramenta Pick Tool, desça o efeito até 590 px.

Effects → User Defined Filter → Emboss_3.
10_.
Ative a Copy of Raster 1.
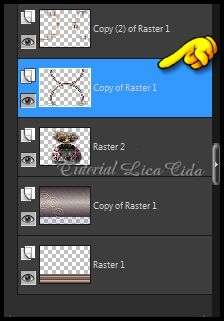
Plugin Flaming Pear → Flood.
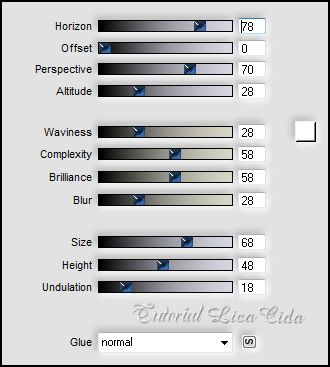
11_.
Com a ferramenta Magic Wand, selecione o efeito (com o Flood).

Selections → Modify → Expand: 8 px (veja o print).
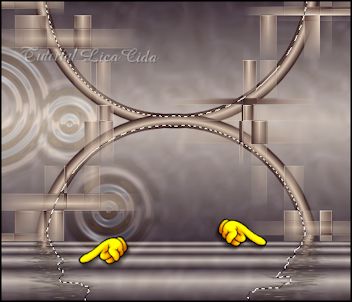
12_.
Layers → New Raster Layer.
Edit → Copy no tube anna.br_painted.02_17-08-10
Edit → Paste Into Selection.
Selections → Select None.
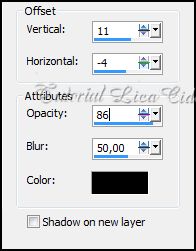
Effects → 3D Effects → Drop Shadow: 11 / -4 / 86 / 50,00 — Color: #000000.
13_.
Effects → Illumination Effects → Lights → Preset_Lights_lightlc5.
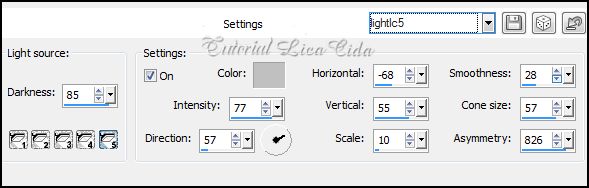
Layers → Merge → Merge Down.
14_.
Ative novamente a Copy of Raster 1.
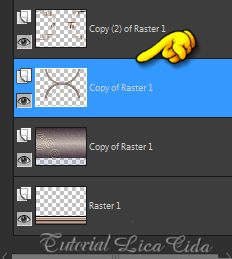
Layers → Duplicate.
Effects → Image Effects → Offset: H: 0 / V: -20 — Custom e Transparent marcados.
15_.
Plugin MuRa's Meister → Copies.
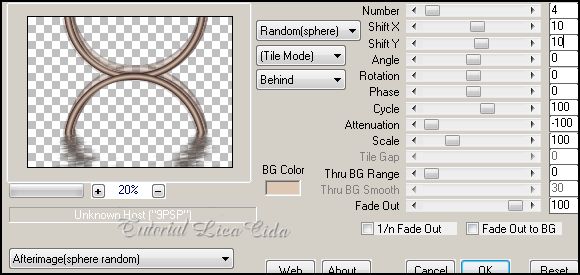
Effects → 3D Effects → Drop Shadow: 11 / -4 / 86 / 50,00 — Color: #000000.
Effects → 3D Effects → Drop Shadow: -11 / 4 / 86 / 50,00 — Color: #000000 (na Copy of Raster 1).
16_.
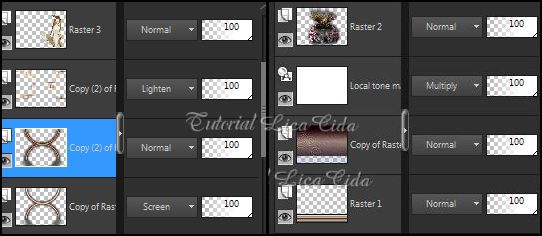
Ative a Copy of Raster 1 (veja o print).
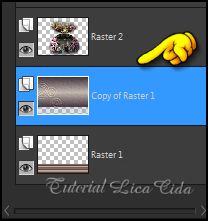
17_.
Layers → New Adjustment Layer → Local Tone Mapping.
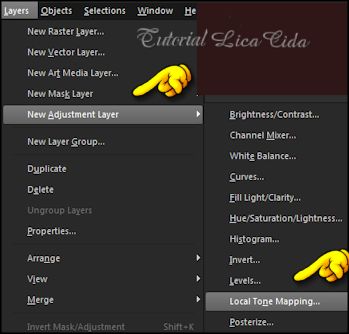
Ajuste a gosto.
18_.
Anote as cores usadas acima (#2f1717 e #dec8b3) e intercale-as a gosto em todas as layers.
Plugin Nik Color Efex Pro 1.0 → Graduated User Defined.
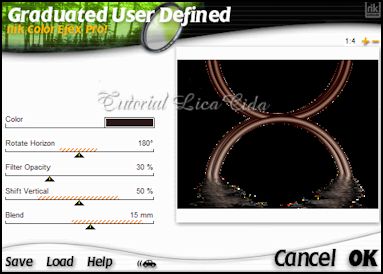
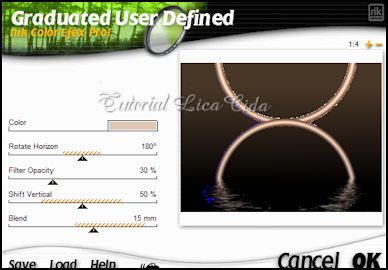
19_.
Ative a layer superior.
Edit → Copy no tube GINATUBES FEMME 1887
Edit → Paste As New Layer.
Posicione.
Aplique a marca-d'água.
Assine e salve.
Espero que gostem.
Aparecida / LicaCida, julho de 2014.
Rio de Janeiro - Brasil.

VOLTAR
Copyright ©2026 - Web Design - Naise Minas
|

