|
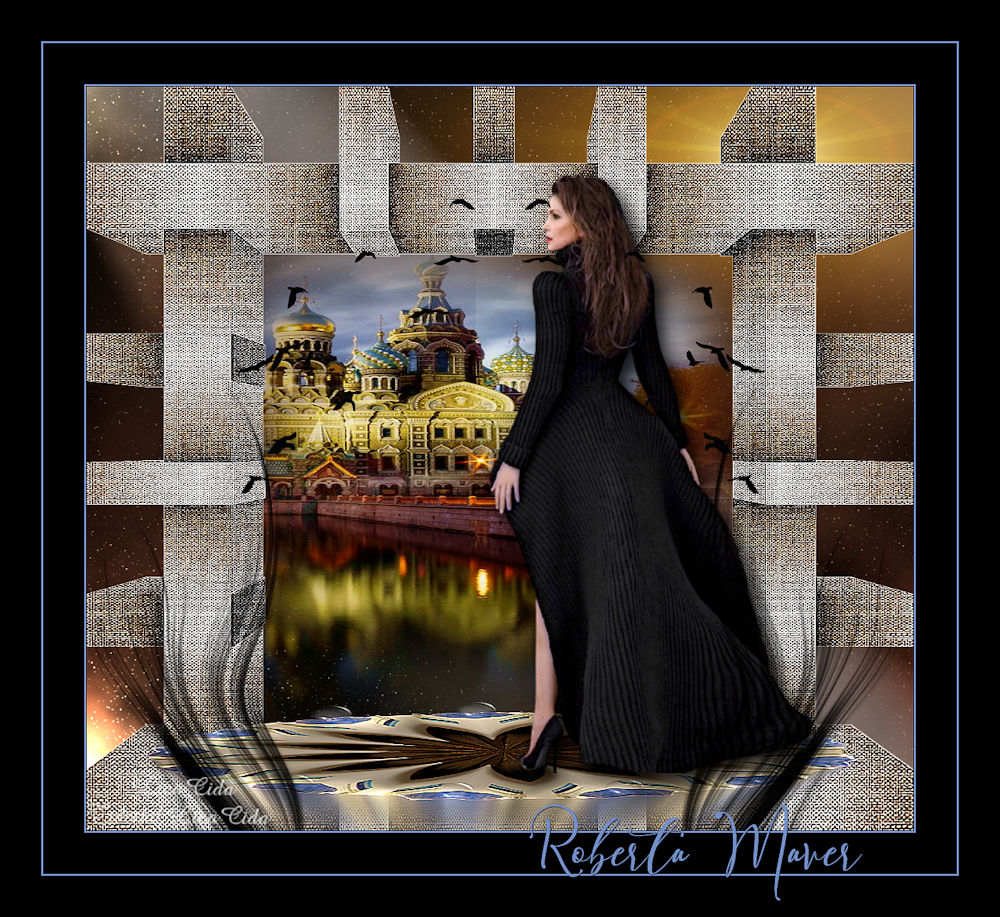
Roberta Mayer
DEDICATÓRIA
Carinhosamente!
TRADUÇÕES

MATERIAL

Preset: Illumination → Lights → Preset_Lights_araralightdw --
Salvar na pasta Presets do PSP.
Tubes: Callitubes-1076mulheres
Callitubes-29misted
passaros
Decorações: PRE4PSPCYBER
deco robermaver
textorobertamaver_EF
Marca-d'água.
Efeitos do PSP.
Versão usada: PSP X9.
PLUGINS
Plugin Flaming Pear → Glitterato
Plugin VM Instant Art → Steel Mesh
Plugin Alien Skin Eye Candy 5: Impact → Extrude
Plugin Knoll Lens Flare Pro
Plugin DC Layer → SideMerge
TUTORIAL
|
Esta seta marca sua linha
Clique e arraste para movê-la
|
|
OBSERVAÇÃO
O plugin Knoll Lens Flare Pro se encontra no material do tutorial Flare.
Instale a primeira pasta (Knoll Light Factory 2) na pasta de plugins não executáveis.
Pegue o registro (registratienummer.txt), copie, minimize e instale (Knoll LF2.0.1 Photoshop Only.exe).
Feche o PSP e abra novamente: ele vai reconhecer o plugin.
Configure: Foreground: #024564 — Background: #ec878f.
1_.
Abra uma nova imagem de 1000 x 900 px.
Plugin Flaming Pear → Glitterato — Nebula: use as cores #67454e / #3f697c / #e85221 / #829b85 (ou a gosto).
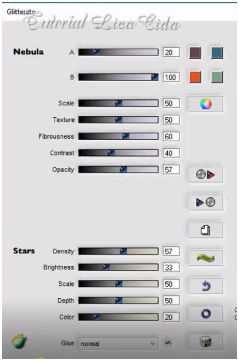
Layers → Duplicate.
Retire a visibilidade da Raster 1.
2_.
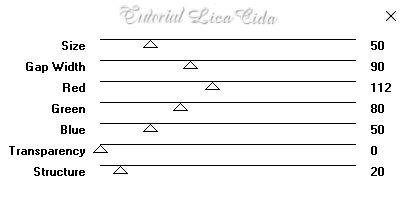
Plugin VM Instant Art → Steel Mesh.
3_.
Selections → Select All.
Selections → Modify → Contract: 135 px.
Pressione a tecla Delete.
4_.
Layers → New Raster Layer.
Layers → Arrange → Move Down.
Ative a visibilidade da Raster 1.
5_.
Na Raster 2:
Edit → Copy no tube Callitubes-29misted
Edit → Paste Into Selection.
Selections → Select None.
Posicione a gosto.
Adjust → Sharpness → Sharpen.
6_.
Edit → Copy no tube passaros
Edit → Paste As New Layer.
Posicione a gosto.
7_.
Ative a layer superior (Copy of Raster 1).
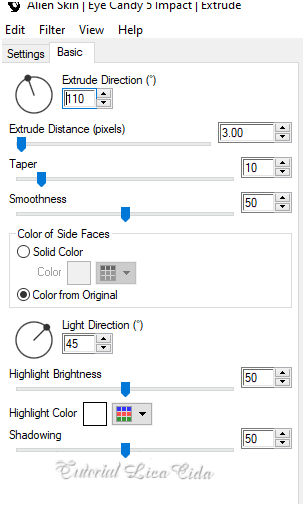
Plugin Alien Skin Eye Candy 5: Impact → Extrude.
8_.
Paper Texture → Canvas Fine — Default (156 / 57).
Effects → Edge Effects → Enhance More.
9_.
Effects → Distortion Effects → Pinch: 50%.
Ative a Raster 1.
Layers → Duplicate.
10_.
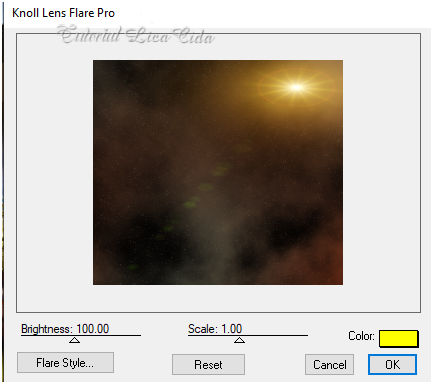
Plugin Knoll Lens Flare Pro.
Clique em Color para escolher a cor.
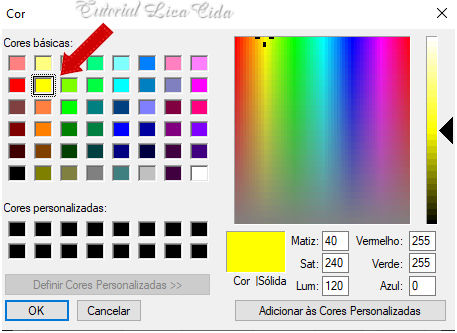
Clique em Flare Style e posicione o flare com o mouse, do lado direito, como no modelo.
11_.
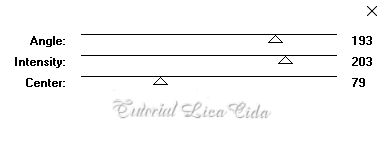
Plugin DC Layer → SideMerge.
12_.
Edit → Copy no PRE4PSPCYBER
Edit → Paste As New Layer.
Layers → Arrange → Bring to Top.
Com a ferramenta Pick Tool, posicione como no modelo.
Adjust → Sharpness → Sharpen.
Observe as pontas do efeito VM Instant Art → Steel Mesh: selecione-as e pressione a tecla Delete.
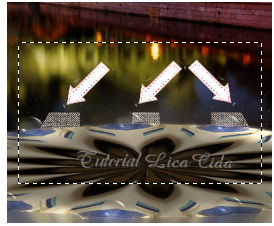
Selections → Select None.
13_.
Na layer PRE4PSPCYBER:
Adjust → Brightness and Contrast → Brightness/Contrast.
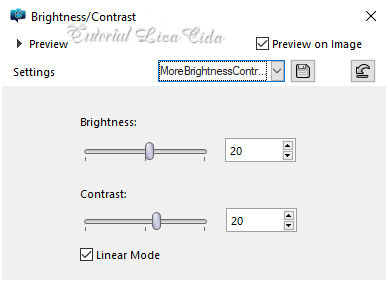
14_.
Edit → Copy no tube Callitubes-1076mulheres
Edit → Paste As New Layer.
Posicione.
15_.
Effects → Illumination Effects → Lights → Preset_Lights_araralightdw.
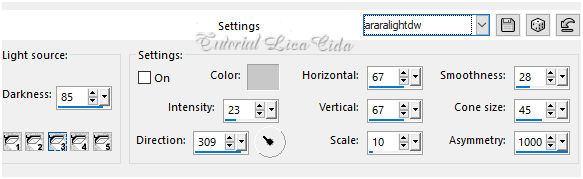
16_.
Edit → Copy no deco robermaver
Edit → Paste As New Layer.
Image → Add Borders: 2 px, Symmetric marcado — Color: #768fc8.
Image → Add Borders: 50 px, Symmetric marcado — Color: #000000.
Image → Add Borders: 2 px, Symmetric marcado — Color: #768fc8.
Image → Add Borders: 50 px, Symmetric marcado — Color: #000000.
As bordas de 2 px devem ser da cor do texto.
17_.
Edit → Copy no textorobertamaver_EF
Edit → Paste As New Layer.
Posicione a gosto.
Image → Resize: Width 1000 px.
Aplique a marca-d'água.
Assine e salve.
Espero que gostem.
Aparecida / LicaCida, agosto de 2021.
Rio de Janeiro - Brasil.

VOLTAR
Copyright ©2026 - Web Design - Naise Minas
|


