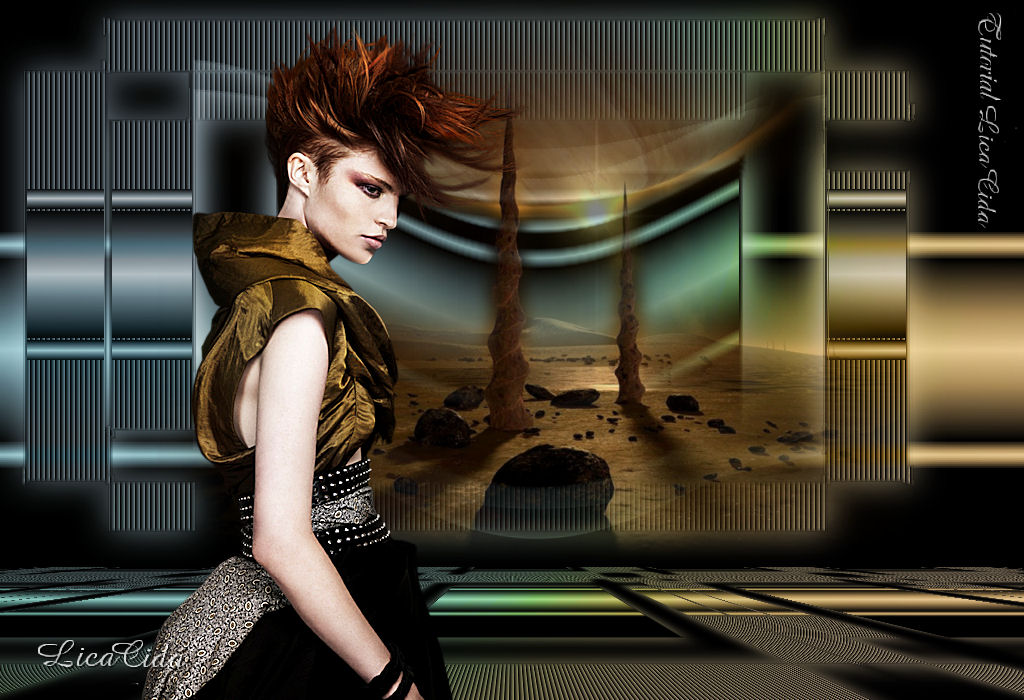
Sandra Scobedo

MATERIAL

Tubes: Alies 10VR34-woman-18092012
calguismistedlandscape02082012
Gradiente: mqc Curl
Mask: cd5mask22dw
Marca D'água.
Efeitos do PSP.
Versão PSP X3.
PLUGINS
Plugin MuRa's Meister → Perspective Tiling
Plugin Nik Software → Color Efex Pro 3.0 → Bi-Color Filters
TUTORIAL
|
Esta seta marca sua linha
Clique e arraste para movê-la
|
1_.
Abra uma nova imagem transparente de 1024 x 600 px.
Pinte com a cor #000000.
2_.
Aplique a Mask cd5mask22dw.
Layers → Merge → Merge Group.
3_.
Selecione todos os efeitos da Mask com a ferramenta Magic Wand.
Delete.
4_.
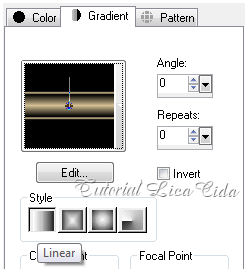
Pinte as partes selecionadas com o gradiente mqc Curl (anexado).
Configure: Style: Linear — Angle: 0 — Repeats: 0.
5_.
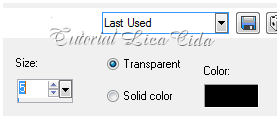
Effects → 3D Effects → Chisel.
Size: 5 — Transparent — Color: #000000.
Selections → Select None.
6_.
Layers → New Raster Layer.
Pinte com a cor #000000.
Layers → Arrange → Move Down.
7_.
Ative a layer superior.
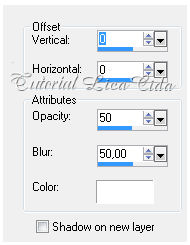
Effects → 3D Effects → Drop Shadow: 0 / 0 / 50 / 50 — Color: #ffffff.
8_.
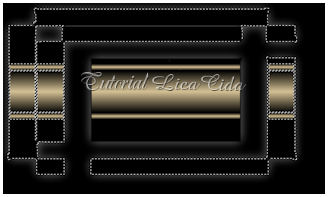
Selecione os efeitos da Mask com a ferramenta Magic Wand.
Preserve o centro.
9_.
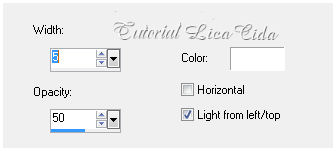
Effects → Texture Effects → Blinds.
Width: 5 — Opacity: 50 — Color: #ffffff — Light from left/top marcado.
Selections → Select None.
10_.
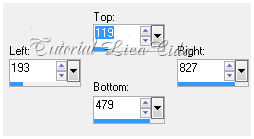
Ative a ferramenta Selection → Rectangle ou pressione a tecla S.
Em Custom Selection, configure: Top: 119 — Left: 193 — Right: 827 — Bottom: 479.
11_.
Selections → Promote Selection to Layer.
Selections → Select None.
12_.
Effects → Distortion Effects → Wave.
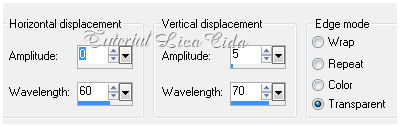
13_.
Layers → Duplicate.
Repita o item 12.
14_.
Layers → Merge → Merge Down.
15_.
Image → Canvas Size: 1024 x 700 — Bottom: 100.
16_.
Layers → New Raster Layer.
Layers → Arrange → Send to Bottom.
Pinte com o gradiente do item 4.
17_.
Tire a visibilidade da Raster 1.
Duplique a Group - Raster 1.
18_.
Plugin MuRa's Meister → Perspective Tiling.
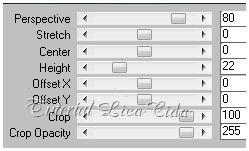
Layers:
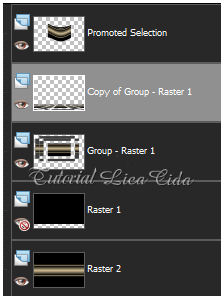
19_.
Ative a Raster 1.
Delete.
Layers → New Raster Layer.
Pinte com o gradiente formado pelas cores #8f441f e #ddbd6d.
Configure: Style: Linear — Angle: 90 — Repeats: 0 — Invert desmarcado.
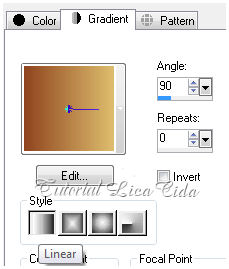
Blend Mode: Overlay — Opacity: 42%.
20_.
Layers → New Raster Layer.
Pinte com o gradiente formado pelas cores #1c4c67 e #745326.
Configure: Style: Linear — Angle: 90 — Repeats: 0 — Invert desmarcado.
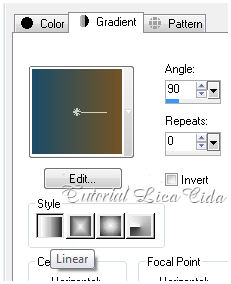
Blend Mode: Hue (Legacy) — Opacity: 75%.
21_.
Plugin Nik Software → Color Efex Pro 3.0.
Bi-Color Filters — use a gosto.
Observe os Blend Modes; duplique as layers se necessário.
Mude a Opacity.
22_.
Edit → Copy nos tubes escolhidos.
Edit → Paste As New Layer.
Posicione e redimensione.
Aplique a Marca D'água.
Assine e salve.
Aparecida / LicaCida, em outubro de 2012.
Rio de Janeiro - Brasil.
Tutorial testado pela amiga Regina, obrigada!

VOLTAR
Copyright ©2020/2025 -
Web Design -
Liriani Silva®
|

