|
Setembro
TRADUÇÕES

MATERIAL

Tubes: Renee-TUBES-Septembre2024-47
Renee-TUBES-Septembre2024-51
Renee-TUBES-Paysage 3
Decor: decor_mp
decor_nmcriacoes_146
Masks: !!!!gradientedworisch
mask_02 - Copia
Marca-d'água.
Efeitos do PSP.
PLUGINS
Plugin Mehdi → Sorting Tiles
Plugin Mehdi → Weaver
Plugin Convolution Filter → Emboss (strong)
Plugin VM Natural → Legoland
Plugin MuRa's Meister → Perspective Tiling
Plugin MuRa's Seamless → Emboss at Alpha
Plugin AAA Filters → Custom
Plugin Graphics Plus → Cross Shadow
TUTORIAL
|
Esta seta marca sua linha
Clique e arraste para movê-la
|
|
1_.
Abra o material no PSP, duplique e feche o original.
Escolha duas cores para trabalhar: Foreground: #180305 — Background: #e88791.
2_.
Abra uma nova imagem transparente de 1024 x 800 px.
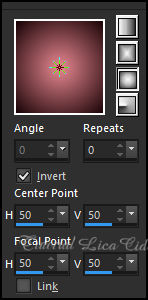
Pinte com o gradiente Sunburst formado pelas cores em uso.
Configure: Style: Sunburst — Repeats: 0 — Invert marcado.
3_.
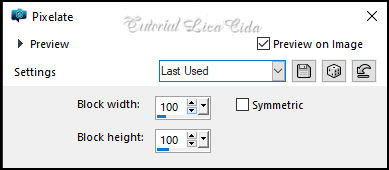
Effects → Distortion Effects → Pixelate.
4_.
Plugin Mehdi → Sorting Tiles.
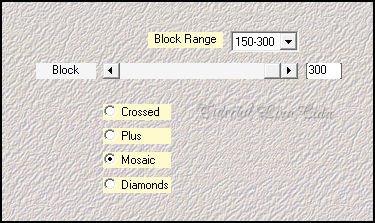
5_.
Effects → Reflection Effects → Rotating Mirror — Default.
6_.
Plugin Mehdi → Weaver.
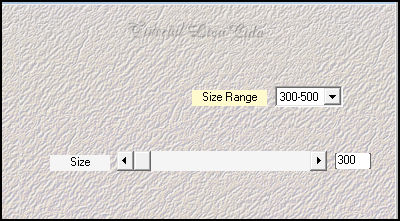
7_.
Plugin Convolution Filter → Emboss (strong) — Emboss Strong: 206.
Edit → Repeat.
Layers → Duplicate.
8_.
Plugin VM Natural → Legoland.
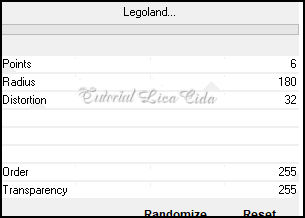
9_.
Plugin MuRa's Meister → Perspective Tiling: Height: 15.
10_.
Effects → Reflection Effects → Rotating Mirror — Default.
11_.
Com a ferramenta Magic Wand — Tolerance: 0 — Feather: 70, clique na parte transparente.
Pressione a tecla Delete 3 ou 4 vezes.
Selections → Select None.
12_.
Edit → Copy no decor_mp
Edit → Paste As New Layer.
Layers → Arrange → Move Down.
13_.
Layers → New Raster Layer.
Pinte com a cor #ffffff.
Layers → New Mask Layer → From Image: mask_02 - Copia.
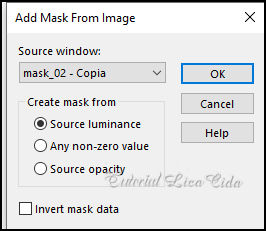
Effects → Edge Effects → Enhance.
Layers → Merge → Merge Group.
Plugin MuRa's Seamless → Emboss at Alpha — Default.
Em seguida, aplique:
14_.
Layers → New Mask Layer → From Image: !!!!gradientedworisch.
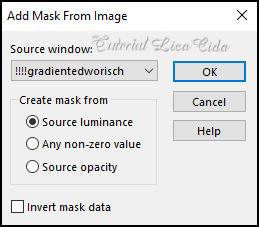
Layers → Duplicate.
Layers → Merge → Merge Group.
Blend Mode: Hard Light — Opacity: 67%.
Layers → Arrange → Move Down.
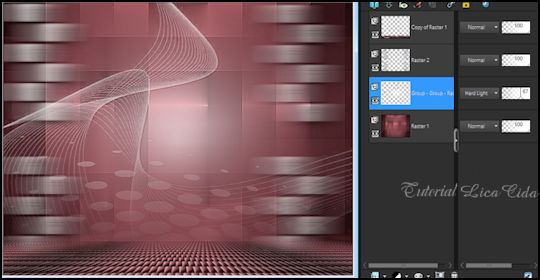
15_.
Ative a Raster 1.
Ative a ferramenta Selection Tool (tecla S) → Custom Selection.
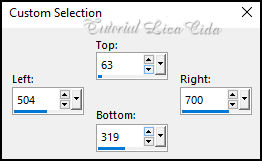
Selections → Promote Selection to Layer.
Layers → Arrange → Bring to Top.
16_.
Adjust → Blur → Gaussian Blur — Radius: 10,00.
17_.
Edit → Copy no Renee-TUBES-Paysage 3
Edit → Paste As New Layer.
Image → Resize: 60% — Resize all layers desmarcado.
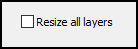
Posicione.
Selections → Invert.
Pressione a tecla Delete.
Selections → Invert.
Layers → Merge → Merge Down.
18_.
Layers → New Raster Layer.
Effects → 3D Effects → Cutout — Color: #ffffff.
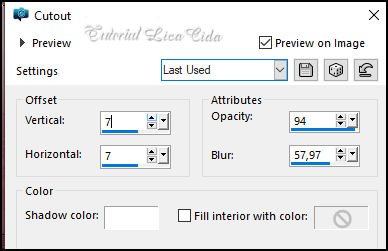
Selections → Select None.
Layers → Merge → Merge Down.
Adjust → Sharpness → Sharpen.
Effects → 3D Effects → Drop Shadow: 0 / 0 / 100 / 40,00 — Color: #000000.
Blend Mode: Luminance (L) — Opacity: 100%.
Layers → Duplicate.
19_.
Com a ferramenta Pick Tool, posicione: Position X: 305,00 — Position Y: 117,00.
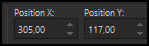
Blend Mode: Luminance (L) — Opacity: 100%.
Layers → Merge → Merge Down.
20_.
Edit → Copy no decor_nmcriacoes_146
Edit → Paste As New Layer.
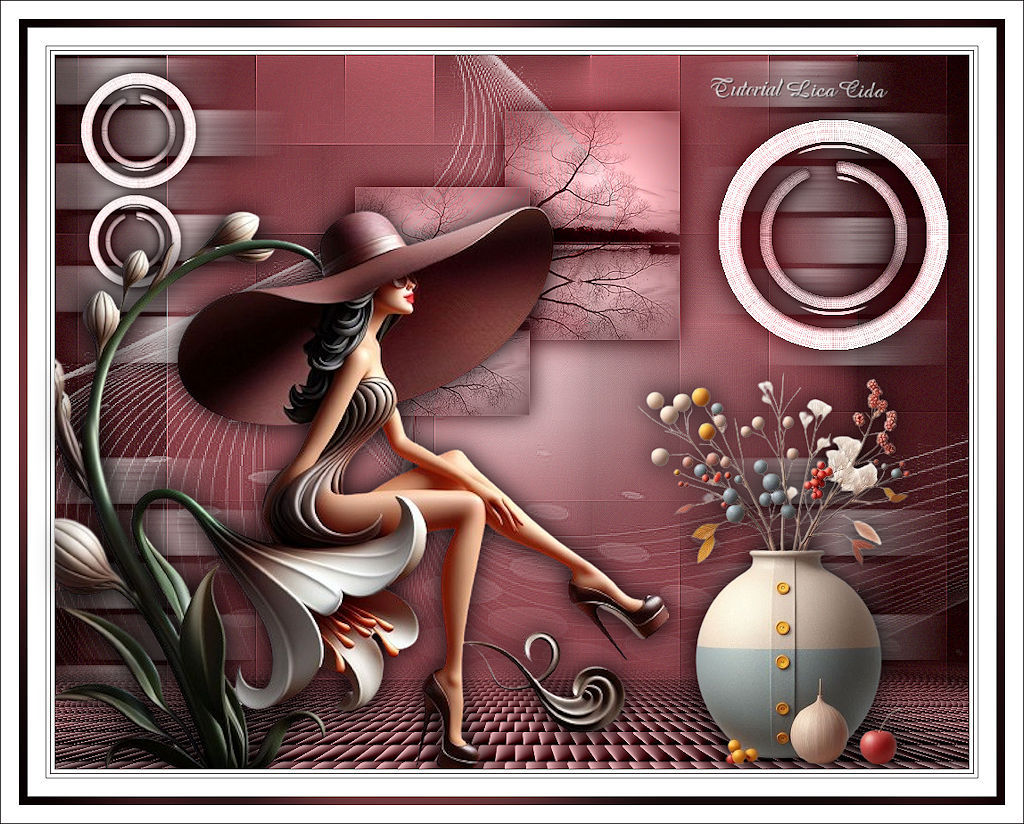
Posicione como no modelo.
Blend Mode: Luminance (L) — Opacity: 100%.
Aplique o Drop Shadow em uso.
21_.
Layers → Duplicate.
Image → Resize: 60% — Resize all layers desmarcado.
Posicione do lado oposto (veja o modelo).
22_.
Layers → Duplicate.
Image → Resize: 80% — Resize all layers desmarcado.
Posicione abaixo (veja o modelo).
Layers → Merge → Merge Down (aplique duas vezes).
23_.
Edit → Copy no tube Renee-TUBES-Septembre2024-47
Edit → Paste As New Layer.
Posicione.
Aplique o Drop Shadow em uso.
24_.
Edit → Copy no tube Renee-TUBES-Septembre2024-51
Edit → Paste As New Layer.
Posicione.
Aplique o Drop Shadow em uso.
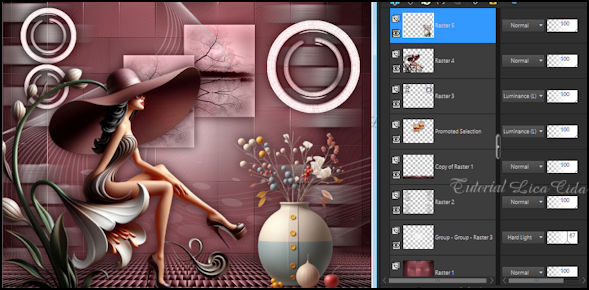
25_.
Ative a Raster 1.
Plugin AAA Filters → Custom → Grain.
BORDAS
26_.
Image → Add Borders: 1 px, Symmetric marcado — Color: #180305 (Foreground).
Image → Add Borders: 4 px, Symmetric marcado — Color: #ffffff.
Image → Add Borders: 1 px, Symmetric marcado — Color: #180305 (Foreground).
Image → Add Borders: 4 px, Symmetric marcado — Color: #ffffff.
Image → Add Borders: 1 px, Symmetric marcado — Color: #180305 (Foreground).
Image → Add Borders: 20 px, Symmetric marcado — Color: #ffffff.
Image → Add Borders: 10 px, Symmetric marcado — Color: a gosto.
27_.
Selecione essa borda e pinte com o gradiente em uso.
28_.
Plugin Graphics Plus → Cross Shadow — Default.
Selections → Select None.
Image → Add Borders: 20 px, Symmetric marcado — Color: #ffffff.
Image → Add Borders: 1 px, Symmetric marcado — Color: #180305 (Foreground).
Image → Resize: Width: 1024 px.
Aplique a marca-d'água.
Assine e salve.
File → Export → JPEG Optimizer.
Aparecida / LicaCida, setembro de 2024.
Rio de Janeiro - Brasil.
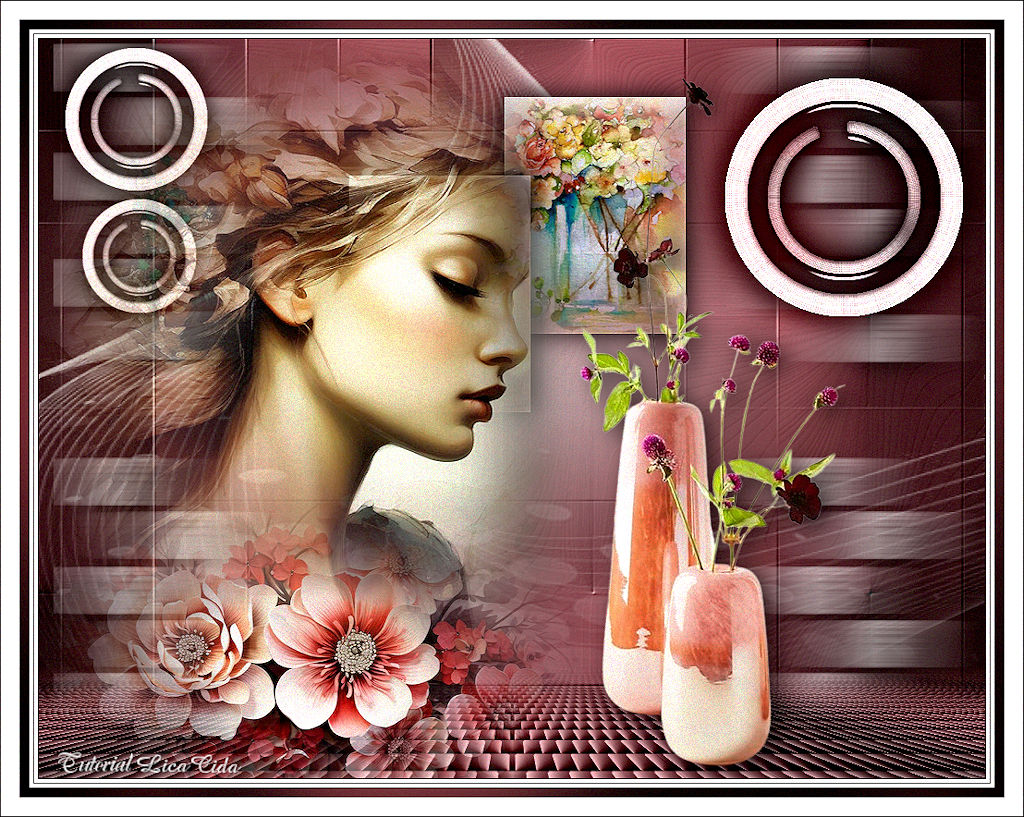
OUTRO MODELO

VOLTAR
Copyright ©2026 - Web Design - Naise Minas
|


