|
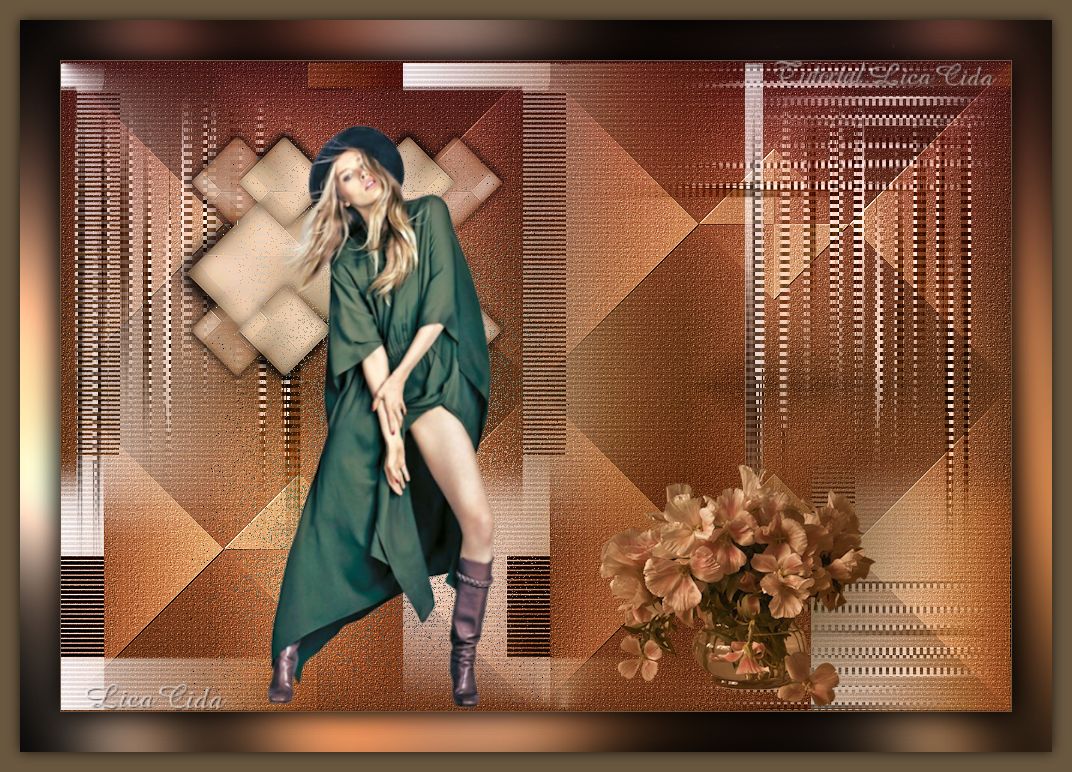
Simplicity
TRADUÇÕES

MATERIAL

Script: 01 One Step Photo Fix & Noise Removal (do próprio PSP) --
Salvar na pasta Scripts-Restricted do PSP.
Seleção: lclosango --
Salvar na pasta Selections do PSP.
Tubes: malackatube k284
vazo güllü
Elementos: decô1lc
decô2lc
Marca-d'água.
Efeitos do PSP.
Versão usada: PSP X7.
PLUGINS
Plugin Simple → Pizza Slice Mirror
Plugin Simple → Quick Tile
Plugin Simple → Zoom Out and Flip
Plugin &<Bkg Designer sf10 IV>
Plugin FM Tile Tools → Blend Emboss
Plugin Alien Skin Eye Candy 5: Impact → Glass
Plugin Carolaine and Sensibility → CS-LDots
Plugin Nik Software → Color Efex Pro 3.0 → Bi-Color Filters
TUTORIAL
|
Esta seta marca sua linha
Clique e arraste para movê-la
|
|
1_.
Abra uma nova imagem transparente de 950 x 650 px.
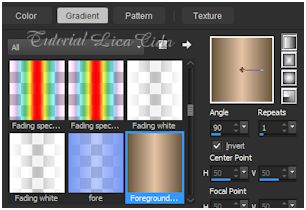
Pinte com o gradiente formado pelas cores #e4c3a4 e #6a573f, retiradas do tube de flores.
Configure: Style: Linear — Angle: 90 — Repeats: 1 — Invert marcado.
2_.
Plugin Simple → Pizza Slice Mirror.
Repita o efeito.
3_.
Plugin &<Bkg Designer sf10 IV>.
4_.
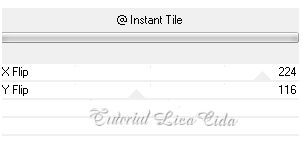
Plugin Simple → Quick Tile.
5_.
Effects → Image Effects → Seamless Tiling — Side by side (efeito do próprio PSP).
6_.
Adjust → Add/Remove Noise → JPEG Artifact Removal — Maximum — Crispness: 79.
Plugin FM Tile Tools → Blend Emboss.
7_.
Selections → Load/Save Selection → Load Selection From Disk → lclosango.
Selections → Promote Selection to Layer.
8_.
Plugin Alien Skin Eye Candy 5: Impact → Glass — Preset: Clear.
Selections → Select None.
Effects → 3D Effects → Drop Shadow: 0 / 0 / 80 / 40,00 — Color: #000000.
9_.
Effects → Image Effects → Seamless Tiling — Stutter (efeito do próprio PSP).
Layers → Duplicate.
10_.
Plugin Simple → Zoom Out and Flip.
Layers → Merge → Merge Down.
Image → Resize: 80% — Resize all layers desmarcado.
11_.
Rode o script "01 One Step Photo Fix & Noise Removal".
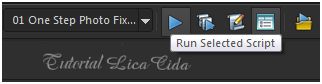
Procure o script "01 One Step Photo Fix & Noise Removal".
Clique em Run Selected Script para rodá-lo.
12_.
Edit → Copy no decô1lc
Edit → Paste As New Layer.
Effects → Image Effects → Seamless Tiling — Side by side.
Image → Mirror → Mirror Vertical (Flip).
Effects → Texture Effects → Blinds: Width: 342 — Opacity: 76 — Light from left/top marcado — Color: #6a573f (cor escura).
Layers → Arrange → Move Down.
13_.
Edit → Copy no decô2lc
Edit → Paste As New Layer.
14_.
Ative a Raster 1.
Plugin Carolaine and Sensibility → CS-LDots.
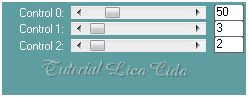
Layers → Duplicate.
15_.
Plugin Nik Software → Color Efex Pro 3.0 → Bi-Color Filters — Color Set: Violet/Pink 1.
Altere os Blend Modes e a Opacity das layers (use a gosto).
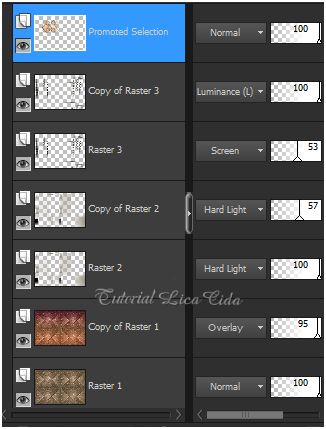
16_.
Ative a layer Promoted Selection.
Layers → Duplicate.
Repita o item 11 (rode o script "01 One Step Photo Fix & Noise Removal").
Blend Mode: Luminance.
Repita o script na Raster 2.
17_.
Image → Add Borders: 1 px, Symmetric marcado — Color: #6a573f.
18_.
Edit → Copy no tube malackatube k284
Edit → Paste As New Layer.
Posicione.
Layers → Duplicate.
Na Raster 1: Adjust → Blur → Gaussian Blur — Radius: 49,00.
Repita o item 11 (rode o script "01 One Step Photo Fix & Noise Removal").
Blend Mode: Dissolve — Opacity: 32%.
19_.
Ative a Copy of Raster 1.
Edit → Copy no tube vazo güllü
Edit → Paste As New Layer.
Posicione.
Redimensione a gosto (reduzi três vezes: Image → Resize: 80% — Resize all layers desmarcado).
Layers → Duplicate.
Na Raster 2: Adjust → Blur → Gaussian Blur — Radius: 49,00.
Repita o item 11 (rode o script "01 One Step Photo Fix & Noise Removal").
Blend Mode: Multiply.
20_.
Layers → Merge → Merge All (Flatten).
Faça o acabamento a gosto.
Aplique a marca-d'água.
Assine e salve.
Espero que gostem.
Aparecida / LicaCida, julho de 2015.
Rio de Janeiro - Brasil.


VOLTAR
Copyright ©2026 - Web Design - Naise Minas
|

