|
Thatiana TRADUÇÕES
MATERIAL
Tubes: 1788
Fractais: violet-fractals-
Decos: calguisdevetblossomingradii24102011
Marca-d'água.
Versão usada: PSP X8.
PLUGINS
Plugin Galaxy → Instant Mirror
TUTORIAL
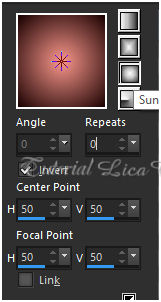
1_. Abra uma nova imagem transparente de 1024 x 900 px. Pinte com o gradiente formado pelas cores #190101 (Foreground) e #f9968b (Background). Configure: Style: Sunburst — Repeats: 0 — Invert marcado — Center Point: H: 50 / V: 50 — Focal Point: H: 50 / V: 50.
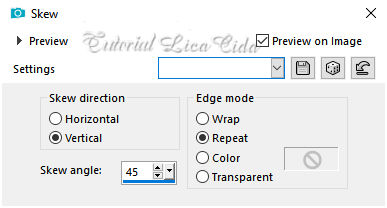
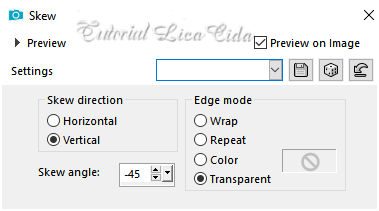
2_. Layers → New Raster Layer. Selections → Select All. Edit → Copy no violet-fractals- Edit → Paste Into Selection. 3_. Selections → Modify → Contract: 60 px. Pressione a tecla Delete. Selections → Select None. 4_. Effects → Geometric Effects → Skew.
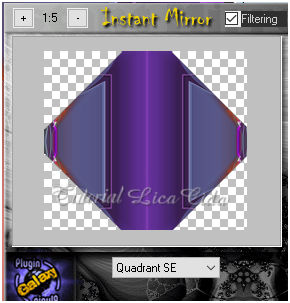
Layers → Duplicate. Image → Mirror → Mirror Horizontal. Layers → Merge → Merge Down. Layers → Duplicate. Image → Mirror → Mirror Vertical. Layers → Merge → Merge Down. 5_. Plugin Galaxy → Instant Mirror — Quadrant: SE. Ao aplicar o efeito, você perceberá modificações, mas isso não afeta o resultado final.
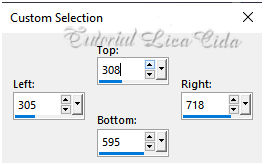
6_. Plugin Simple → Pizza Slice Mirror. 7_. Plugin Simple → Top Left Mirror. Effects → 3D Effects → Drop Shadow: 0 / 0 / 70 / 30,00 — Color: #000000. Blend Mode: Hard Light. 8_. Ative a ferramenta Selection Tool (tecla S) → Custom Selection.
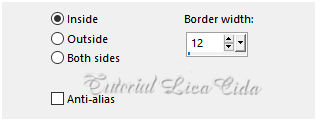
9_. Edit → Copy no misted vvs-paisagem0468 (cópia reduzida do tube) Edit → Paste As New Layer. Selections → Invert. Pressione a tecla Delete. Selections → Invert. 10_. Selections → Modify → Contract: 22 px. 11_. Selections → Modify → Select Selection Borders.
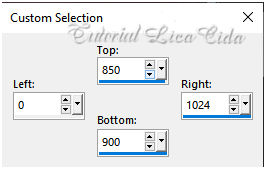
Pressione a tecla Delete. Selections → Select None. 12_. Layers → New Raster Layer. Selections → Select All. Edit → Copy no fractal1 Edit → Paste Into Selection. 13_. Selections → Modify → Contract: 60 px. Pressione a tecla Delete. Selections → Select None. 14_. Effects → Geometric Effects → Skew (print do item 4). Layers → Duplicate. Image → Mirror → Mirror Horizontal. Layers → Merge → Merge Down. Layers → Duplicate. Image → Mirror → Mirror Vertical. Layers → Merge → Merge Down. 15_. Plugin Galaxy → Instant Mirror — Quadrant: SE (print do item 5). Layers → Arrange → Move Down. Effects → Edge Effects → Enhance. 16_. Ative a Raster 1. Ative a ferramenta Selection Tool (tecla S) → Custom Selection.
Layers → New Raster Layer.
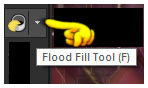
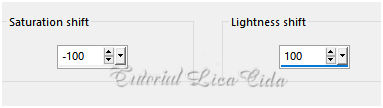
Flood Fill — Opacity: 50% — pinte a seleção com o gradiente formado no item 1. 17_. Adjust → Hue and Saturation → Hue Map.
Selections → Select None. 18_. Effects → Geometric Effects → Skew.
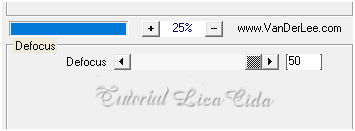
Layers → Duplicate. Image → Mirror → Mirror Horizontal. Layers → Merge → Merge Down. Image → Mirror → Mirror Vertical. 19_. Plugin VanDerLee → UnPlugged-X → Defocus: 50.
Effects → Edge Effects → Enhance More. Blend Mode: Screen. 20_. Volte à Raster 1. Selections → Select All. Edit → Copy no fractal1 Edit → Paste Into Selection. Selections → Select None. Adjust → Blur → Gaussian Blur — Radius: 28,00. 21_. Effects → Artistic Effects → Enamel.
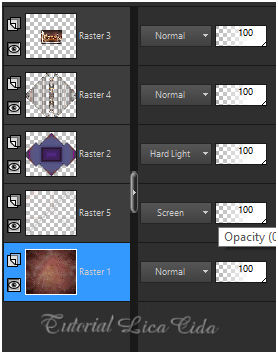
Altere os Blend Modes e a Opacity das layers.
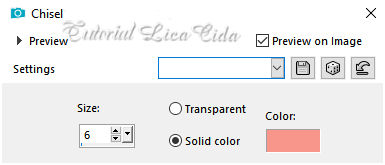
22_. Continue na Raster 1. Selections → Select All. Selections → Modify → Contract: 40 px. Selections → Invert. 23_. Plugin It@lian Editors Effect → Effetto Fantasma — Default (41 / 41) (aplique duas vezes). Selections → Invert. Ative a layer superior (Raster 5). 24_. Layers → New Raster Layer. Effects → 3D Effects → Chisel — Color: cor do Background.
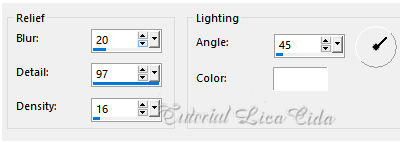
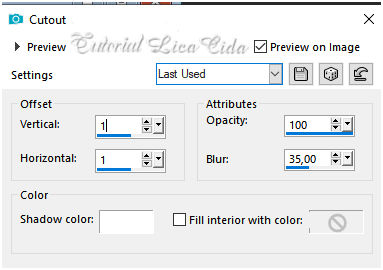
25_. Effects → 3D Effects → Cutout.
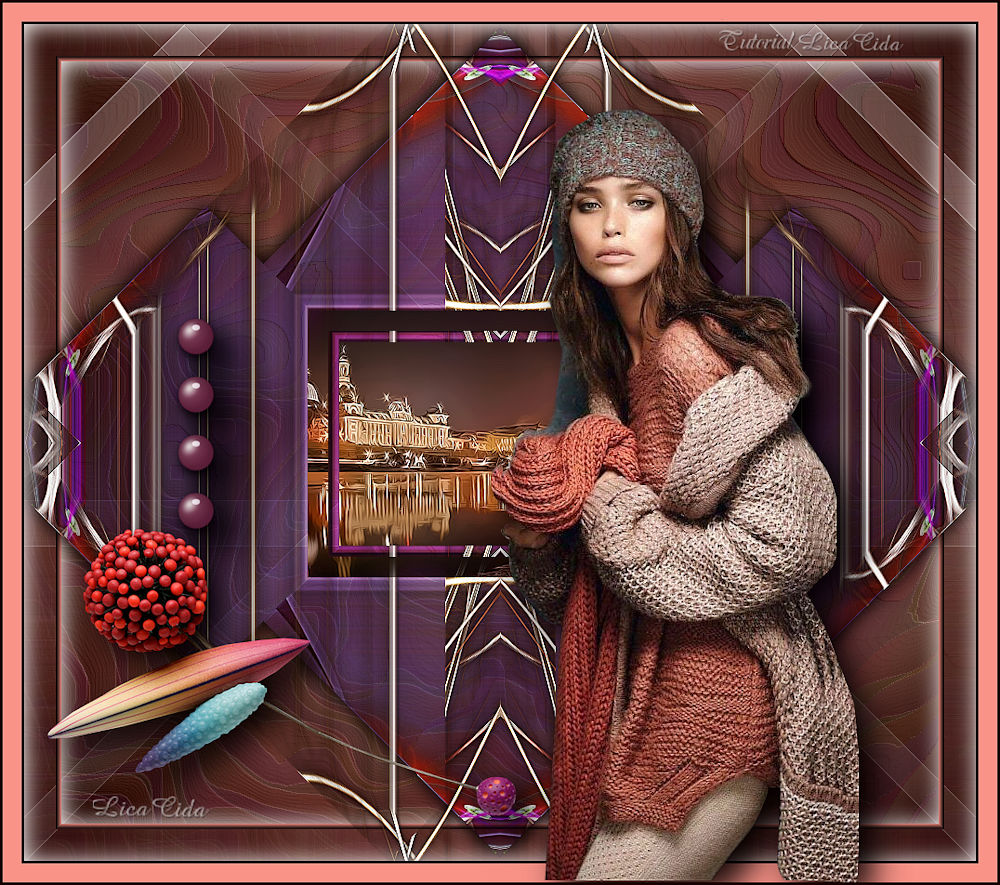
Selections → Select None. Image → Add Borders: 3 px, Symmetric marcado — Color: #190101 (Foreground). Image → Add Borders: 20 px, Symmetric marcado — Color: #f9968b (Background). Image → Add Borders: 3 px, Symmetric marcado — Color: #190101 (Foreground). 26_. Selections → Select All. Selections → Modify → Contract: 26 px. 27_. Effects → 3D Effects → Cutout (print do item 25). Selections → Select None. 28_. Edit → Copy no deco1lc Edit → Paste As New Layer. 29_. Edit → Copy no calguisdevetblossomingradii24102011 Edit → Paste As New Layer (Raster 1). 30_. Edit → Copy no tube 1788 Edit → Paste As New Layer. Image → Resize: Width 1000 px. Aplique a marca-d'água. Assine e salve. Espero que gostem.
Aparecida / LicaCida, junho de 2020.
Copyright ©2026 - Web Design - Naise Minas |