|
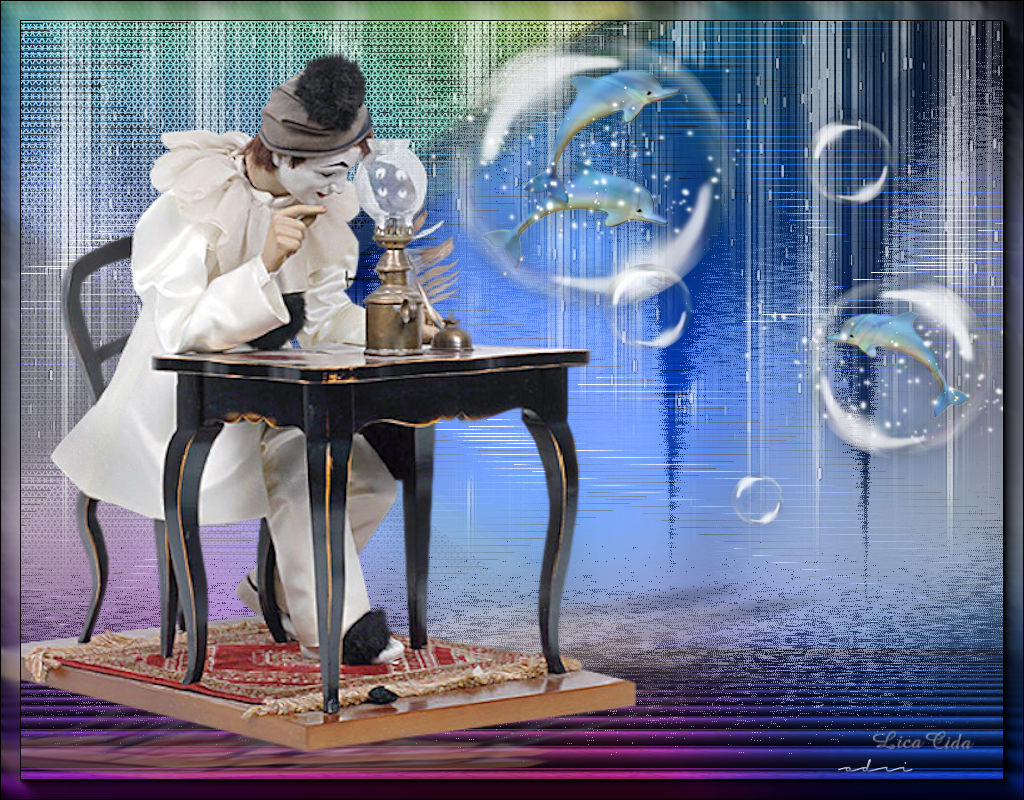
The Clown Blue
TRADUÇÕES

MATERIAL

Seleções: LD_7
LD_8 --
Salvar na pasta Selections do PSP.
Masks: !a_fadebotomm
cas_Mask_0415_04
Tubes: Grace's_TLC_PierrePierrot
dauphins_dans_la_bulle_tubed_by_thafs
Decorações: deco1
deco2
Marca-d'água.
Efeitos do PSP.
Versão usada: PSP X8.
PLUGINS
Plugin VM Instant Art → Three Cuts
Plugin Tramages → Hex Lattice
Plugin Tramages → Starmaker
Plugin VanDerLee → Unplugged-X → Defocus
Plugin MuRa's Meister → Perspective Tiling
Plugin Alien Skin Eye Candy 5: Impact → Perspective Shadow
TUTORIAL
|
Esta seta marca sua linha
Clique e arraste para movê-la
|
|
1_.
Abra uma nova imagem transparente de 1024 x 700 px.
Pinte com qualquer cor.
2_.
Plugin VM Instant Art → Three Cuts.
OBSERVAÇÃO
Todo o efeito fica azul; vamos alterar no final.
Effects → Edge Effects → Enhance.
Layers → Duplicate.
Image → Flip.
Opacity: 50%.
Layers → Merge → Merge Down.
3_.
Selections → Load/Save Selection → Load Selection From Disk → LD_7.
Adjust → Blur → Gaussian Blur — Radius: 10,00.
4_.
Plugin Tramages → Hex Lattice.
Selections → Select None.
5_.
Layers → New Raster Layer.
Selections → Load/Save Selection → Load Selection From Disk → LD_8.
6_.
Pinte com o gradiente formado pelas cores #006bff e #000012.
Configure: Style: Linear — Angle: 90 — Repeats: 1 — Invert marcado.
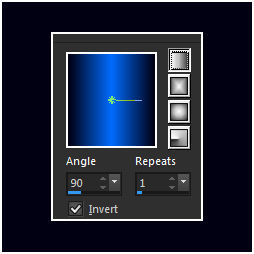
Selections → Select None.
7_.
Plugin VanDerLee → Unplugged-X → Defocus — Defocus: 6.
8_.
Layers → New Raster Layer.
Ative a ferramenta Selection Tool (tecla S) → Custom Selection.
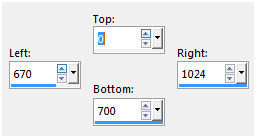
Pinte com o gradiente formado no item 6.
Selections → Select None.
9_.
Plugin Tramages → Starmaker.
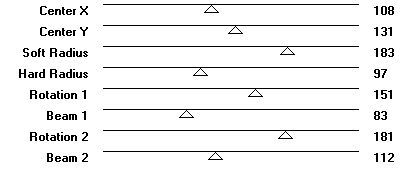
10_.
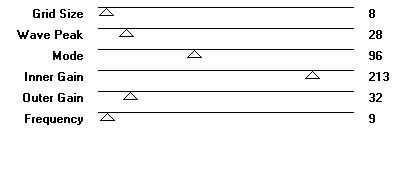
Effects → Distortion Effects → Wave.
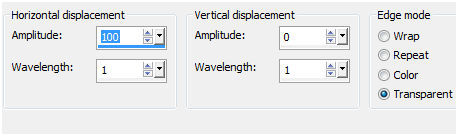
11_.
Image → Canvas Size: 1024 x 800 — Bottom: 100.
12_.
Aplique a mask !a_fadebotomm nas três layers:
Layers → New Mask Layer → From Image: !a_fadebotomm.
Layers → Merge → Merge Group.
Duplique a layer quantas vezes for necessário, sem deixar marca.
13_.
Layers → New Raster Layer.
Layers → Arrange → Send to Bottom.
Pinte com o gradiente formado no item 6, mudando Angle: 0.
Layers → Duplicate.
14_.
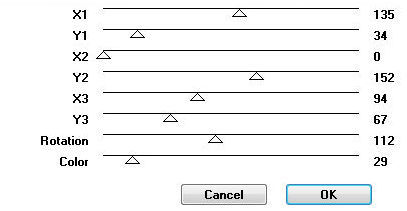
Plugin MuRa's Meister → Perspective Tiling.
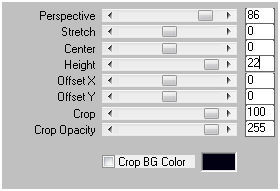
Repita, modificando os valores:
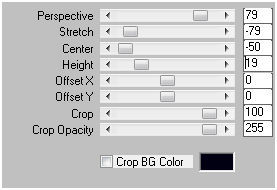
15_.
Ative a layer superior: Group-Raster 3.
Edit → Copy no deco1
Edit → Paste As New Layer.
Blend Mode: Luminance (L) — Opacity: 55%.
16_.
Layers → New Raster Layer.
Pinte com a cor #ffffff.
Layers → New Mask Layer → From Image: cas_Mask_0415_04.
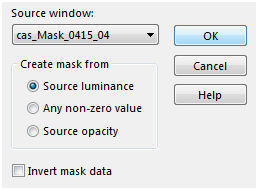
Layers → Merge → Merge Group.
17_.
Edit → Copy no tube Grace's_TLC_PierrePierrot
Edit → Paste As New Layer.
Image → Mirror.
Redimensione e posicione (observe o modelo).
18_.
Plugin Alien Skin Eye Candy 5: Impact → Perspective Shadow — Reflect Behind.
Basic:
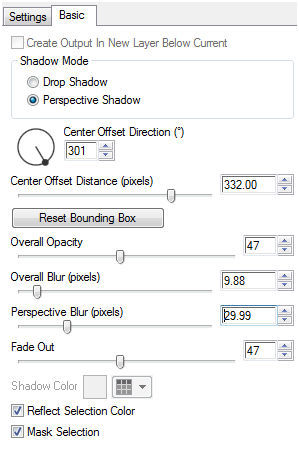
19_.
Edit → Copy no tube dauphins_dans_la_bulle_tubed_by_thafs
Edit → Paste As New Layer.
Posicione a gosto.
Effects → 3D Effects → Drop Shadow: 2 / 2 / 38 / 41,00 — Color: #000000.
20_.
Ative a layer inferior: Raster 1.
Edit → Copy no deco2
Edit → Paste As New Layer.
Altere os Blend Modes e a Opacity das layers a gosto.
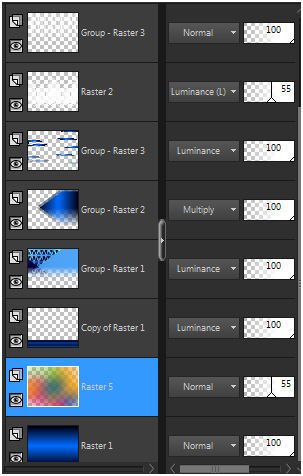
Faça o acabamento a gosto.
Aplique a marca-d'água.
Assine e salve.
Esperamos que gostem.
Adri e LicaCida, novembro de 2015.
Rio de Janeiro - Brasil.

VOLTAR
Copyright ©2026 - Web Design - Naise Minas
|

