|
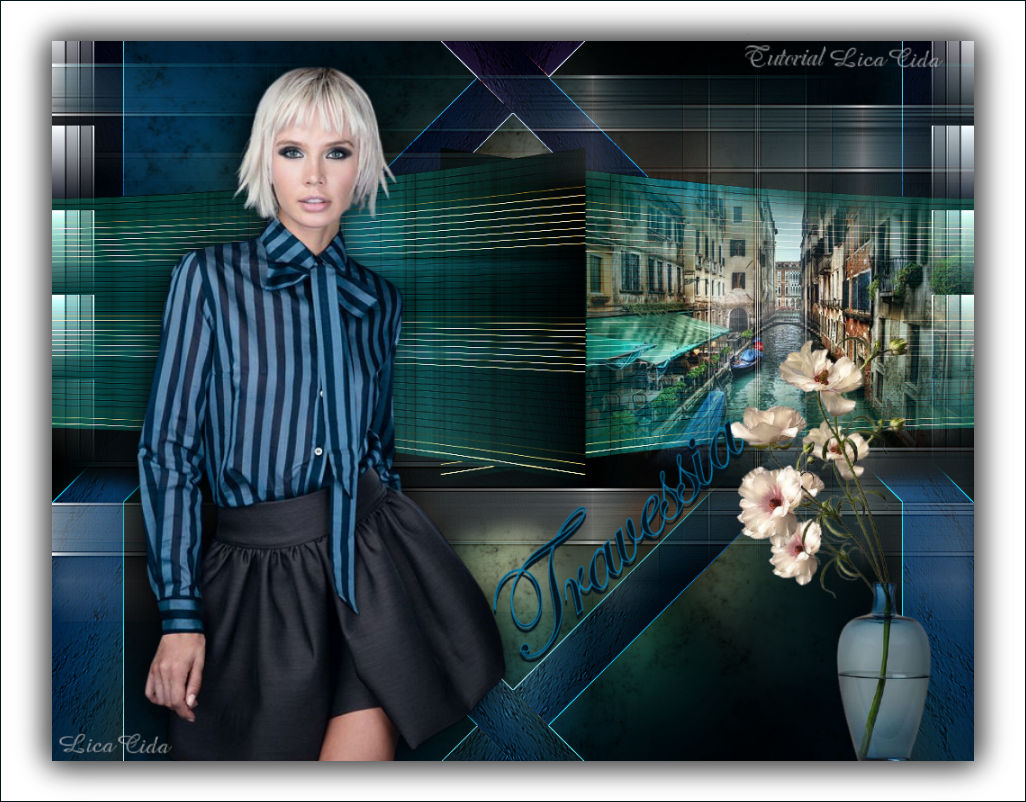
Travessia
TRADUÇÕES

MATERIAL

Imagem (back): imagemmp- travessia
Tubes: 404MulherByPqnaAlice
Callitubes-190misted
Callitubes-115flores
Decor: HuzunluYillar_18
Título: titulotravessia_bylc
Marca-d'água.
Efeitos do PSP.
PLUGINS
Plugin Photo Aging Kit → Dirt Dust
Plugin L en K's → Mayra
Plugin Simple → Quick Tile
Plugin Nik Software → Color Efex Pro 3.0 → Cross Balance
Plugin Nik Software → Color Efex Pro 3.0 → Bi-Color Filters
TUTORIAL
|
Esta seta marca sua linha
Clique e arraste para movê-la
|
|
Configure: Foreground: #04141f — Background: #0685bc.
1_.
Abra a imagem imagemmp- travessia, anexada ao material (Raster 1).
2_.
Layers → New Raster Layer.
Layers → Arrange → Send to Bottom.
3_.
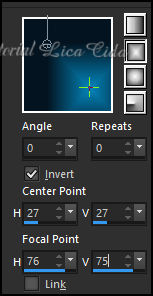
Pinte com o gradiente formado pelas cores configuradas acima.
Configure: Style: Rectangular — Angle: 0 — Repeats: 0 — Invert marcado.
4_.
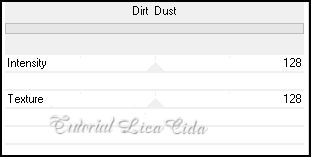
Plugin Photo Aging Kit → Dirt Dust.

Retire a visibilidade da Raster 1.
5_.
Selecione o gradiente como mostra o print.
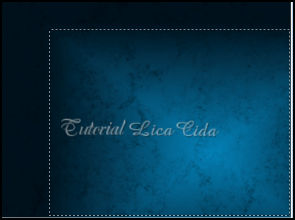
Selections → Promote Selection to Layer.
6_.
Plugin L en K's → Mayra: Default (0 / 149 / 76 / 2).
Selections → Select None.
7_.
Com a ferramenta Pick Tool: Position X: 282 — Position Y: 106.
Tecle M para desativar a ferramenta.
8_.
Effects → Geometric Effects → Perspective - Horizontal: 36 — Transparent.
Layers → Duplicate.
Image → Mirror → Mirror Horizontal.
Layers → Merge → Merge Down.
9_.
Effects → Distortion Effects → Pinch — Strength: 100%.
10_.
Effects → Image Effects → Offset: H: 0 / V: 100 — Custom e Transparent marcados.
11_.
Edit → Copy no Callitubes-190misted
Edit → Paste As New Layer.
Posicione a gosto, ao lado esquerdo do efeito.
Adjust → Sharpness → Sharpen.
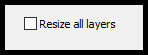
Image → Resize: 80% — Resize all layers desmarcado.
12_.
Ative a layer inferior: Promoted Selection.
Effects → 3D Effects → Drop Shadow: 52 / 0 / 76 / 30,00 — Color: #000000.
13_.
Ative a layer Raster 2.
Plugin Simple → Quick Tile.
14_.
Selections → Select All.
Edit → Copy no Callitubes-190misted
Edit → Paste Into Selection.
Selections → Select None.
15_.
Adjust → Blur → Gaussian Blur — Radius: 24,00.
16_.
Edit → Repeat: item 4 (Plugin Photo Aging Kit → Dirt Dust).

17_.
Selections → Select All.
Selections → Modify → Contract: 80 px.
Selections → Invert.
Selections → Promote Selection to Layer.
Selections → Select None.
18_.
Effects → Geometric Effects → Skew.
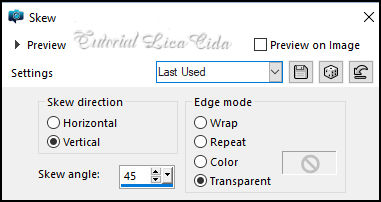
Layers → Duplicate.
Image → Mirror → Mirror Horizontal.
Layers → Merge → Merge Down.
Effects → Edge Effects → Enhance More.
Ative novamente a visibilidade da Raster 1 e ative essa layer.
LAYERS
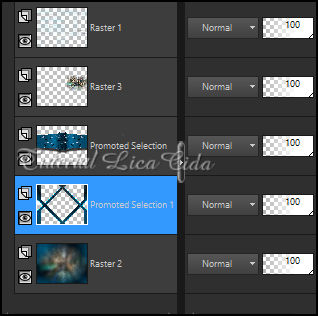
19_.
Edit → Copy no tube 404MulherByPqnaAlice
Edit → Paste As New Layer.
Posicione a gosto. Drop Shadow como preferir.
20_.
Ative a layer Raster 2.
Layers → Duplicate.
Plugin Nik Software → Color Efex Pro 3.0 → Cross Balance.
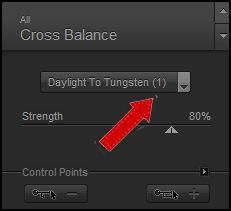
Blend Mode: Hard Light.
21_.
Plugin Nik Software → Color Efex Pro 3.0 → Bi-Color Filters — Color Set: Violet/Pink (veja o print).
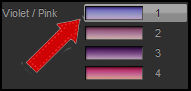
22_.
Ative a layer Promoted Selection.
Layers → Duplicate.
Plugin Nik Software → Color Efex Pro 3.0 → Bi-Color Filters — Color Set: Brown 4 — Default.
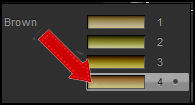
Blend Mode: Overlay.
23_.
Ative a layer do topo.
Edit → Copy no Callitubes-115flores
Edit → Paste As New Layer.
Posicione a gosto. Drop Shadow como preferir.
24_.
Edit → Copy no HuzunluYillar_18
Edit → Paste As New Layer.
Objects → Align → Top.
Objects → Align → Left.
Blend Mode: Luminance (L).
Layers → Duplicate.
Image → Mirror → Mirror Horizontal.
Layers → Merge → Merge Down.
25_.
Edit → Copy no titulotravessia_bylc
Edit → Paste As New Layer.
Posicione a gosto.
BORDAS
Image → Add Borders: 1 px, Symmetric marcado — Color: #04141f (Foreground).
Image → Resize: 90% — Resize all layers desmarcado.
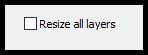
Layers → New Raster Layer.
Layers → Arrange → Send to Bottom.
Pinte com a cor #ffffff.
Effects → 3D Effects → Drop Shadow: 0 / 0 / 80 / 40,00 — Color: #000000.
Image → Add Borders: 1 px, Symmetric marcado — Color: #04141f (Foreground).
Aplique a marca-d'água.
Assine e salve.
Image → Resize: Width 1024 px.
Espero que apreciem.
Aparecida / LicaCida, setembro de 2022.
Rio de Janeiro - Brasil.

VOLTAR
Copyright ©2026 - Web Design - Naise Minas
|


