|
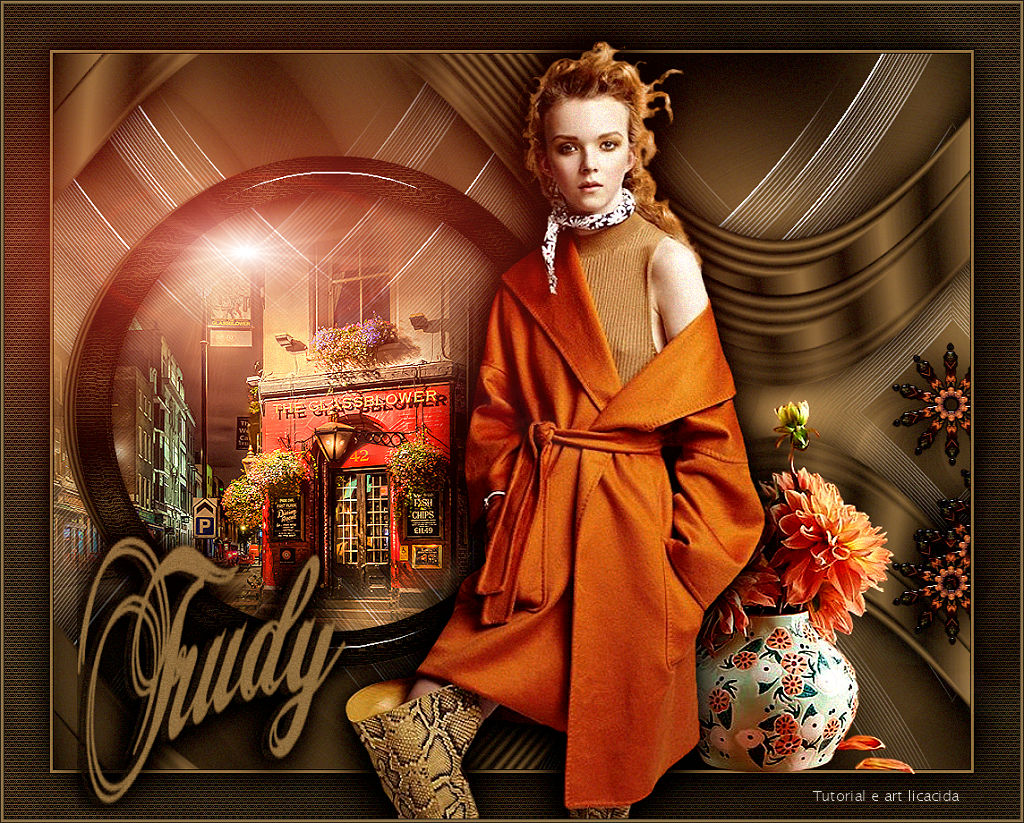
Trudy
TRADUÇÕES

MATERIAL

Scripts: mover1mara
smudgemara1 --
Salvar na pasta Scripts-Restricted do PSP.
Dica: instale e feche o PSP; ao abrir, ele vai reconhecer os scripts.
Imagens com script rodado (caso o script não rode): scriptrodado_ mover1mara
scriptrodado_ smudgemara1
Tubes: 031PaisagemByPqnaAlice
679MulherByPqnaAlice
Callitubes-248flores
Decor: decokaleidoscope_.bylc
tracostrudy
Título: Titulo_bylc
Marca-d'água.
Efeitos do PSP.
PLUGINS
Plugin Knoll Light Factory → Knoll Lens Flare Pro (opcional)
O plugin se encontra no material do tutorial Flare. Caso não conheça o plugin: instale a primeira pasta (Knoll Light Factory 2) nos plugins não executáveis.
Pegue o registro (registratienummer.txt), copie, minimize e instale (Knoll LF2.0.1 Photoshop Only.exe).
Feche o PSP; ao abrir, ele vai reconhecer o plugin.
Plugin ScreenWorks → Chain Link
Plugin Alien Skin Eye Candy 5: Impact → Glass
Plugin Alien Skin Eye Candy 5: Impact → Perspective Shadow
Plugin Graphics Plus → Cross Shadow
Plugin MuRa's Meister → Copies
Plugin AAA Filters → Custom
TUTORIAL
|
Esta seta marca sua linha
Clique e arraste para movê-la
|
|
Abra o material no PSP, duplique e feche os originais.
Escolha duas cores para trabalhar.
Configure: Foreground: #282116 — Background: #8b7149.
1_.
Abra uma nova imagem transparente de 1024 x 800 px.
Pinte com o gradiente formado pelas cores configuradas acima.
Configure: Style: Rectangular — Angle: 0 — Repeats: 10 — Invert marcado — Center Point: H: 50 / V: 50 — Focal Point: H: 50 / V: 50.
2_.
Effects → Geometric Effects → Perspective - Horizontal: 85 — Transparent.
3_.
Edit → Repeat: Effects → Geometric Effects → Perspective - Horizontal: -85 — Transparent.
4_.
Effects → Image Effects → Offset: H: 0 / V: 150 — Custom e Transparent marcados.
Layers → Duplicate.
Image → Mirror → Mirror Vertical.
5_.
Effects → Distortion Effects → Polar Coordinates — Rectangular to polar — Wrap.
6_.
Rode o script mover1mara.
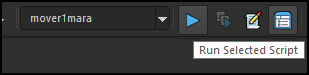
Procure o script mover1mara e clique em Run Selected Script para rodá-lo.
7_.
Ative a layer inferior (Raster 1).
Objects → Align → Bottom.
8_.
Rode o script smudgemara1.
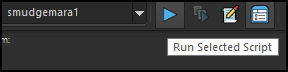
Procure o script smudgemara1 e clique em Run Selected Script para rodá-lo.
9_.
Ative a layer superior.
Com a ferramenta Magic Wand, Tolerance e Feather: 0, selecione o centro do círculo.
10_.
Selections → Modify → Select Selection Borders.
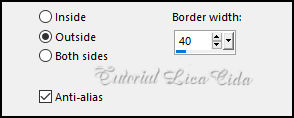
Selections → Promote Selection to Layer.
11_.
Plugin ScreenWorks → Chain Link.
12_.
Plugin Alien Skin Eye Candy 5: Impact → Glass — Basic: Color #8b7149.
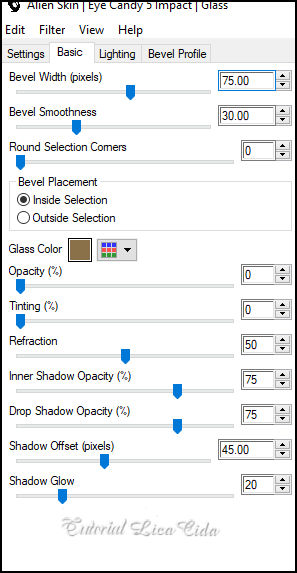
Selections → Select None.
Layers → Merge → Merge Down.
13_.
Layers → New Raster Layer.
Pinte com o gradiente Rectangular formado acima, alterando: Angle: 0 — Repeats: 0 — Invert marcado.
Layers → Arrange → Send to Bottom.
14_.
Plugin ScreenWorks → Chain Link.
15_.
Effects → Texture Effects → Blinds — Color: #8b7149.
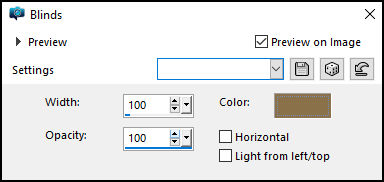
16_.
Adjust → Blur → Radial Blur.
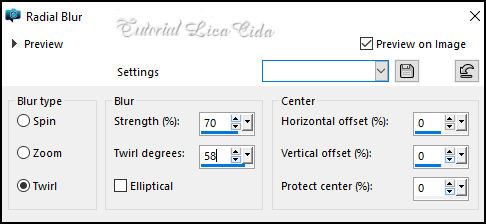
17_.
Effects → Image Effects → Seamless Tiling.
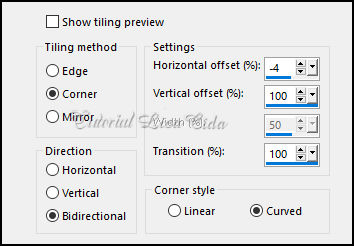
Adjust → Sharpness → Sharpen More.
18_.
Plugin Graphics Plus → Cross Shadow → Default.
19_.
Ative a layer superior (Raster 1).
Plugin Alien Skin Eye Candy 5: Impact → Perspective Shadow: use a gosto.
20_.
Edit → Copy no tracostrudy
Edit → Paste As New Layer.
Layers → Arrange → Move Down.
21_.
Volte à Raster 1.
Edit → Copy no misted 031PaisagemByPqnaAlice
Edit → Paste As New Layer.
Posicione. Faça Resize, se for necessário.
Adjust → Sharpness → Sharpen.
22_.
Edit → Copy no decokaleidoscope_.bylc
Edit → Paste As New Layer.
Tecle K para ativar a ferramenta Pick Tool.
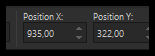
Position X: 935,00 — Position Y: 322,00.
Tecle M para desativar a ferramenta.
Layers → Duplicate.
23_.
Plugin MuRa's Meister → Copies — Throw.
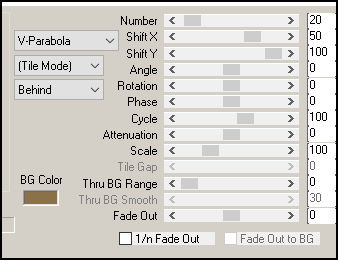
Layers → Merge → Merge Down.
Layers → Duplicate.
Layers → Merge → Merge Down.
Plugin Alien Skin Eye Candy 5: Impact → Perspective Shadow: use a gosto.
LAYERS
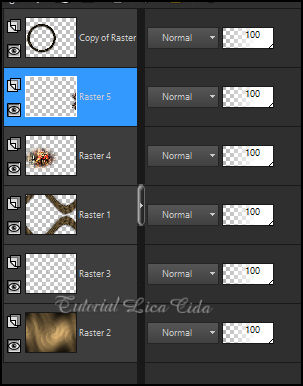
24_.
Ative a layer Copy of Raster 1 (topo).
Edit → Copy Special → Copy Merged.
Image → Add Borders: 1 px, Symmetric marcado — Color: cor escura.
Image → Add Borders: 3 px, Symmetric marcado — Color: cor clara.
Image → Add Borders: 1 px, Symmetric marcado — Color: cor escura.
Selections → Select All.
Image → Add Borders: 50 px, Symmetric marcado — Color: #ffffff.
Selections → Invert.
Edit → Paste Into Selection.
Adjust → Blur → Radial Blur (print do item 16).
Plugin ScreenWorks → Chain Link.
Selections → Invert.
Effects → 3D Effects → Drop Shadow: 0 / 0 / 100 / 50,00 — Color: #000000.
Selections → Select None.
25_.
Edit → Copy no tube 679MulherByPqnaAlice
Edit → Paste As New Layer.
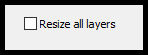
Image → Resize: 120% — Resize all layers desmarcado.
Posicione.
Plugin Alien Skin Eye Candy 5: Impact → Perspective Shadow: use a gosto.
26_.
Edit → Copy no Callitubes-248flores
Edit → Paste As New Layer.
Posicione.
Plugin Alien Skin Eye Candy 5: Impact → Perspective Shadow: use a gosto.
27_.
Edit → Copy no Titulo_bylc
Edit → Paste As New Layer.
Posicione.
Layers → Merge → Merge Visible.
28_.
Plugin AAA Filters → Custom — Sharp (repita) e Grain.
29_.
Opcional: Plugin Knoll Light Factory → Knoll Lens Flare Pro.
Clique em Color para escolher a cor.
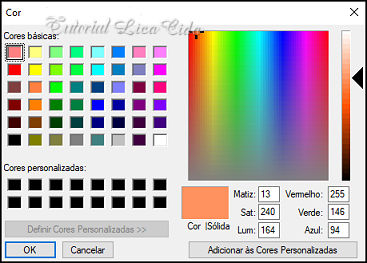
Clique em Flare Style para posicionar o Flare.
Pouse o mouse sobre o efeito e use onde desejar.
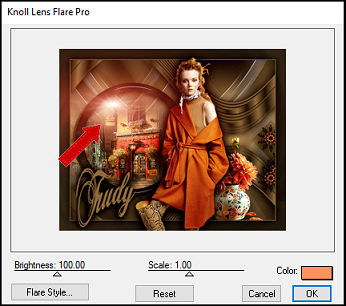
Image → Add Borders: 1 px, Symmetric marcado — Color: cor escura.
Image → Add Borders: 3 px, Symmetric marcado — Color: cor clara.
Image → Add Borders: 1 px, Symmetric marcado — Color: cor escura.
Aplique a marca-d'água.
Assine e salve.
Image → Resize: Width 1024 px.
Espero que apreciem.
Aparecida / LicaCida, outubro de 2022.
Rio de Janeiro - Brasil.

VOLTAR
Copyright ©2026 - Web Design - Naise Minas
|


