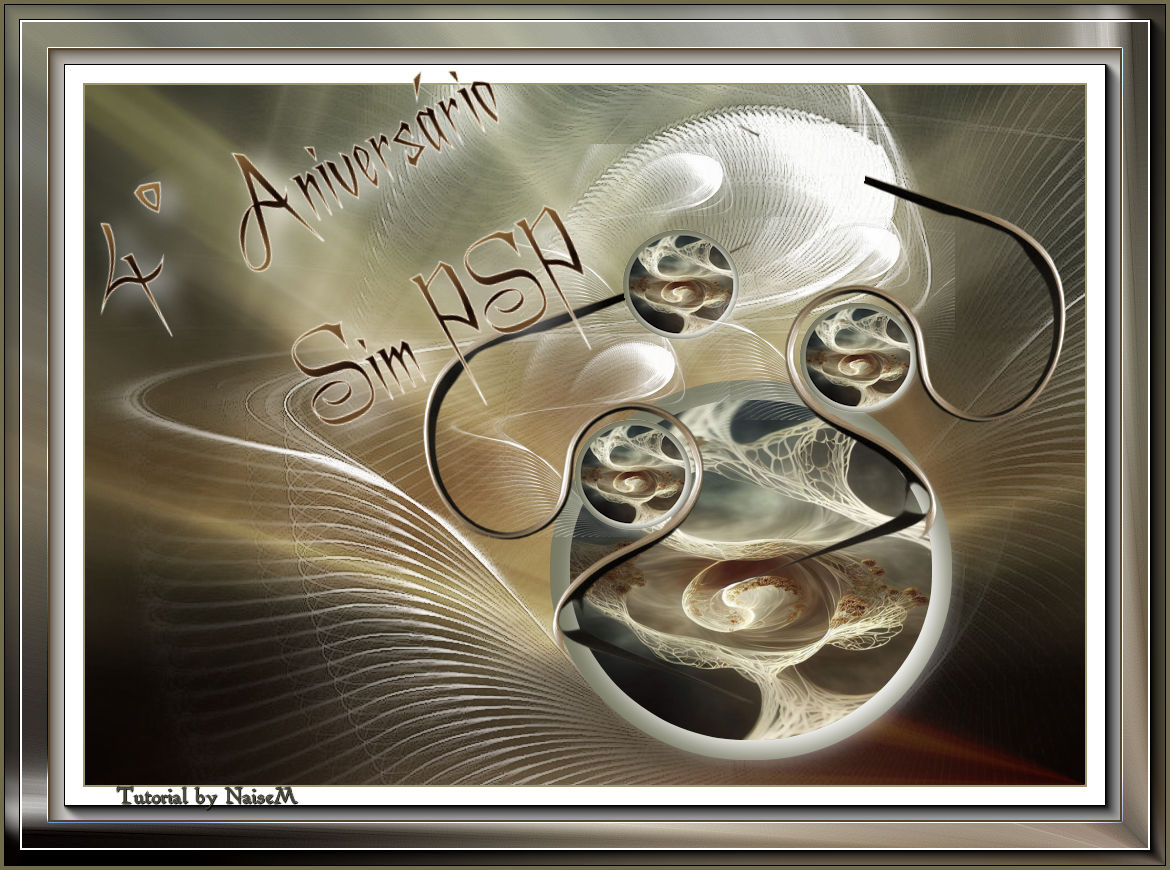
|
Materials
PSP used: 2020
Image acquired from the net
Selection of my own creation
Deco of my own creation
Mask: Narah - thank you

Plug-ins
AAA Foto Frame
 |
Use the arrow to mark your line
Click with the mouse to move it
|
1_. Choose an image: Edit → Copy.
2_. Open a new transparent image of 1000 x 700 px.
Selections → Select All.
Edit → Paste Into Selection.
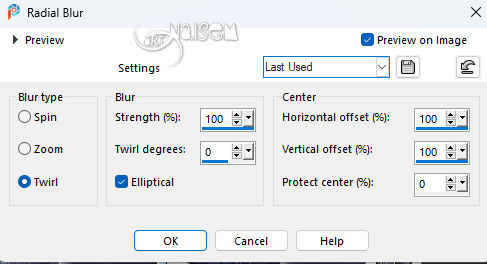
3_. Adjust → Blur → Radial Blur.
4_. Layers → Duplicate.
5_. Image → Mirror → Mirror Horizontal.
Layers → Properties → Blend Mode: Overlay, Multiply or whatever you wish.
Layers → Merge → Merge Down.
6_. Layers → New Raster Layer.
Fill with the color #ffffff (white).
Layers → Load/Save Mask → Load Mask From Disk: NarahsMasks_1786.
Layers → Merge → Merge Group.
Effects → Edge Effects → Enhance.
7_. Selections → Load/Save Selection → Load Selection From Disk: #selecao_simpsp.
8_. Layers → New Raster Layer.
Your image is still in memory: Edit → Paste Into Selection.
9_. Selections → Modify → Expand.
10_. Layers → New Raster Layer.
Fill with a solid color of your choice.
11_. Selections → Modify → Contract.
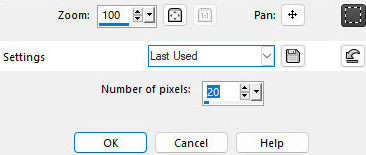
Still selected, press the Delete key.
Effects → 3D Effects → Drop Shadow.
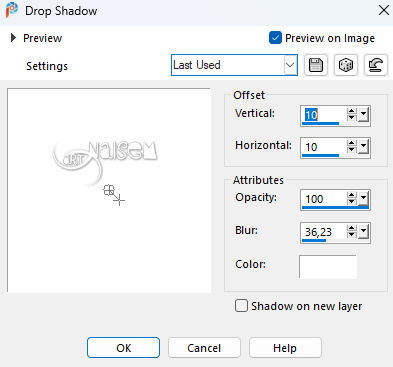
Selections → Select None.
Layers → Merge → Merge Down (2 times).
Layers → Duplicate.
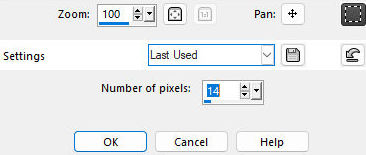
12_. Image → Resize.
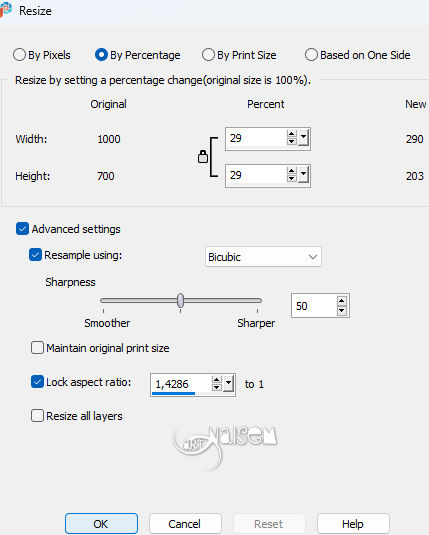
13_. Layers → Duplicate again.
With the Pick Tool, position at X: 403 / Y: 59.
14_. Layers → Duplicate.
With the Pick Tool, position at X: 580 / Y: 132.
15_. Open deco-simpsp and apply Colorize as you like.
16_. Edit → Copy.
Edit → Paste As New Layer.
With the Pick Tool, position at X: 337 / Y: 156.
With the Eraser tool, clean the tip of the deco that goes over the circle.
17_. Layers → Duplicate.
Image → Mirror → Mirror Horizontal.
18_. With the Pick Tool, position at X: 649 / Y: 39.
Layers → Merge → Merge Down.
19_. Image → Add Borders → Symmetric checked:
2 px - dark color
33 px - color #ffffff (white)
2 px - color #232a60 (dark color)
44 px - color #ffffff (white)
20_. Open your image: Edit → Copy.
21_. With the Magic Wand tool, select the 44 px (white) border.
Edit → Paste Into Selection.
Adjust → Blur → Radial Blur.
Effects → Edge Effects → Enhance More.
22_. Effects → Plugins → AAA Frames → Foto Frame.
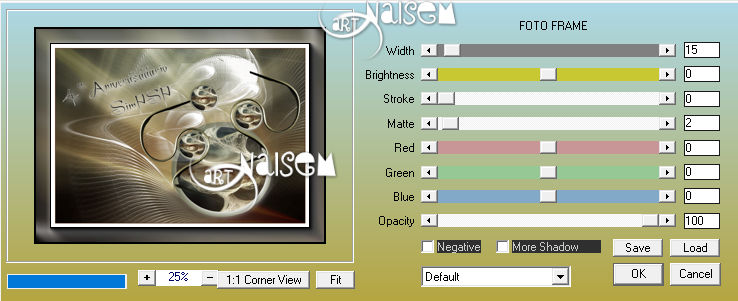
Selections → Select None.
23_. Select the 33 px (white) border.
Apply the plugin AAA Frames → Foto Frame again, with the same settings.
24_. Open the title: Edit → Copy.
Edit → Paste As New Layer.
With the Pick Tool, position at X: 81 / Y: 61.
25_. Image → Add Borders → Symmetric checked: 4 px - color of your choice.
26_. Sign and save as JPG.
Another model

Santa Catarina Brazil
03-06-23
|