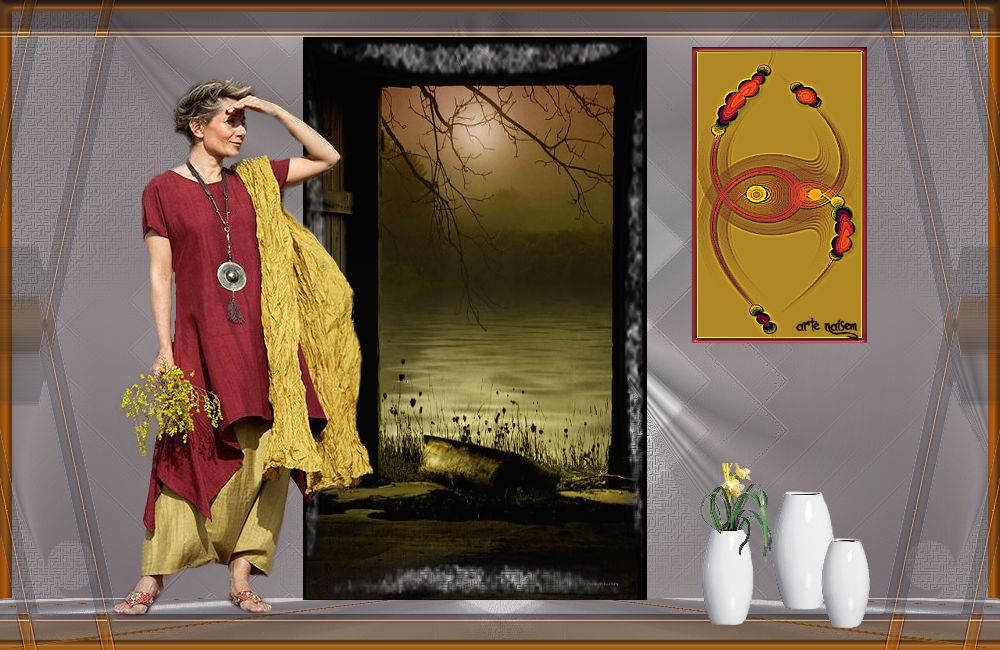
|
Be
fine alone
Plug-ins
Toadies
Mura's
Materials
PSP tools (I used X8)
Tubes of my own creation
Masks - idesigner 6 - author not credited
Mask - Nara Pamplona
Selection - my own creation
Deco - my own creation

Instructions
 |
Use the arrow to mark your line
Click with the mouse to move it
|
1_. Open a new transparent image of 1000 x 650 px.
2_. Fill with a Sunburst gradient: Angle: 0 / Repeats: 2, with the settings below.
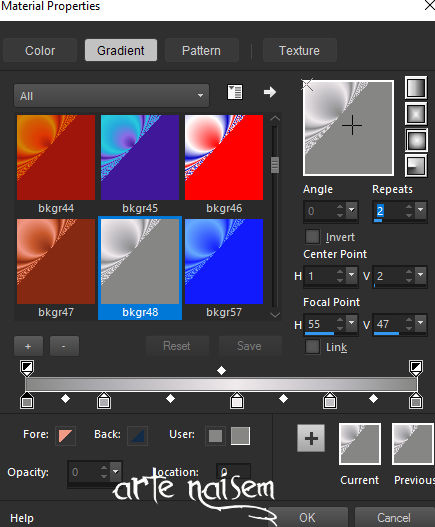
3_. With the Magic Wand tool, click on the solid color part and delete it.
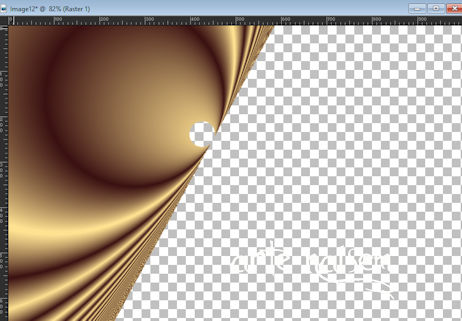
4_. Layers → Duplicate.
Image → Mirror → Mirror Horizontal.
Layers → Merge → Merge Visible.
5_. Effects → Image Effects → Seamless Tiling with the settings below.
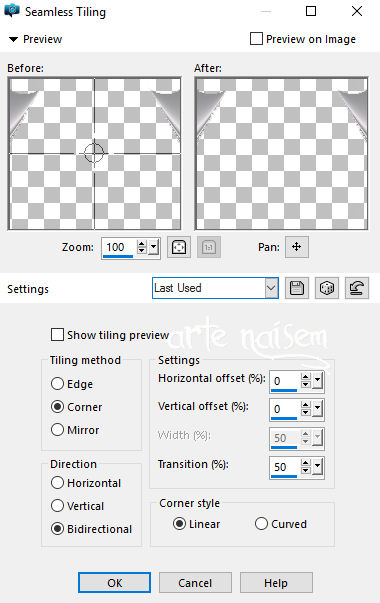
6_. Layers → New Raster Layer and fill with a solid color of your choice.
7_. Effects → Texture Effects → Texture: texturemate-greyscale06.
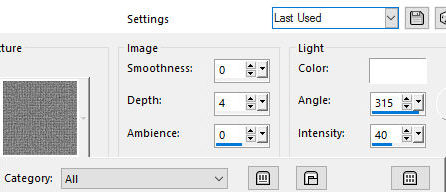
8_. Layers → Arrange → Send to Bottom.
Layers → Merge → Merge Visible.
9_. Layers → New Raster Layer and fill with a solid color of your choice.
Apply Nara Pamplona's mask (narinha): Layers → New Mask Layer → From Image.
Layers → Merge → Merge Group.
10_. Effects → Plugins → Toadies → What Are You?: 20 / 20.
Effects → User Defined Filter → Emboss 3.
Layers → Merge → Merge Visible.
11_. Layers → Duplicate.
Effects → Plugins → Mura's Meister → Perspective Tiling.
Layers → Merge → Merge Visible.
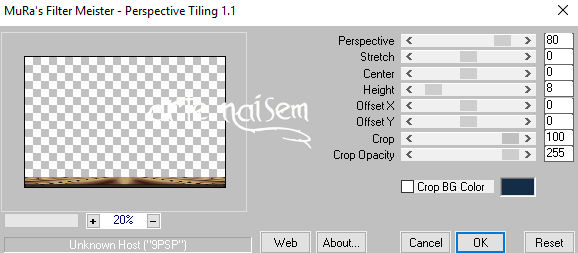
12_. Choose an image that has a door, or one of your choice.
Apply the mask idesigner 6 (dmsk0124): Layers → New Mask Layer → From Image.
Layers → Merge → Merge Group.
Edit → Copy.
13_. Go back to your work: Edit → Paste As New Layer. Adjust to your taste and, if you wish, apply a Colorize on the Merged layer and on the copy.
Do the Merge.
14_. Selections → Select All.
15_. Selections → Modify → Contract: 12.
Selections → Invert.
16_. Fill with a foreground color of your choice.
17_. Effects → 3D Effects → Inner Bevel with the settings below.
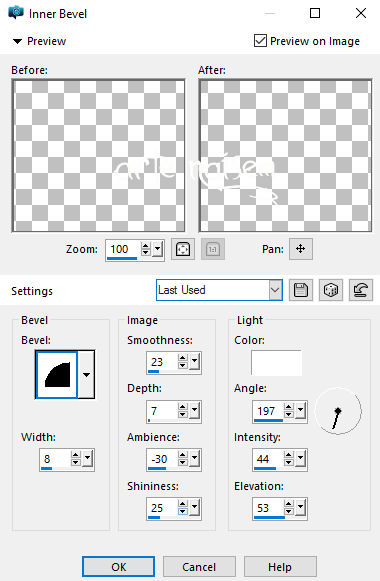
18_. Selections → Promote Selection to Layer.
Selections → Select None.
19_. Effects → Geometric Effects → Skew: Horizontal - 12 - Transparent checked.
20_. Layers → Duplicate.
Image → Mirror → Mirror Horizontal.
Layers → Merge → Merge Down.
21_. Effects → Plugins → Toadies → What Are You?: 20 / 20.
Effects → Edge Effects → Enhance More.
22_. Layers → Duplicate and apply a Blend Mode of your choice (I used Luminance).
Layers → Merge → Merge Visible.
23_. Layers → New Raster Layer.
Selections → Load/Save Selection → Load Selection From Disk: be_fine_alone.
Fill with a color.
24_. Selections → Modify → Select Selection Borders: Inside / Border width: 4 / Anti-alias checked.
25_. Fill with a color of your choice.
26_. Effects → 3D Effects → Outer Bevel with the settings below.
Selections → Select None.
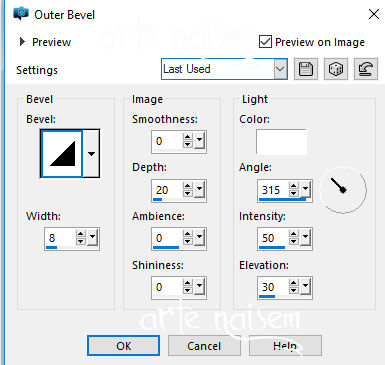
27_. On the deco DECOS_NAISEM_CRIAÇOES_0062: Edit → Copy.
Go back to your work, select the rectangle and apply Edit → Paste Into Selection.
Effects → Edge Effects → Enhance More.
28_. Effects → Image Effects → Offset: 316 / 30 - Custom - Transparent.
29_. Apply your tubes.
30_. Sign, add the author's watermark and save as JPG.
Another Model
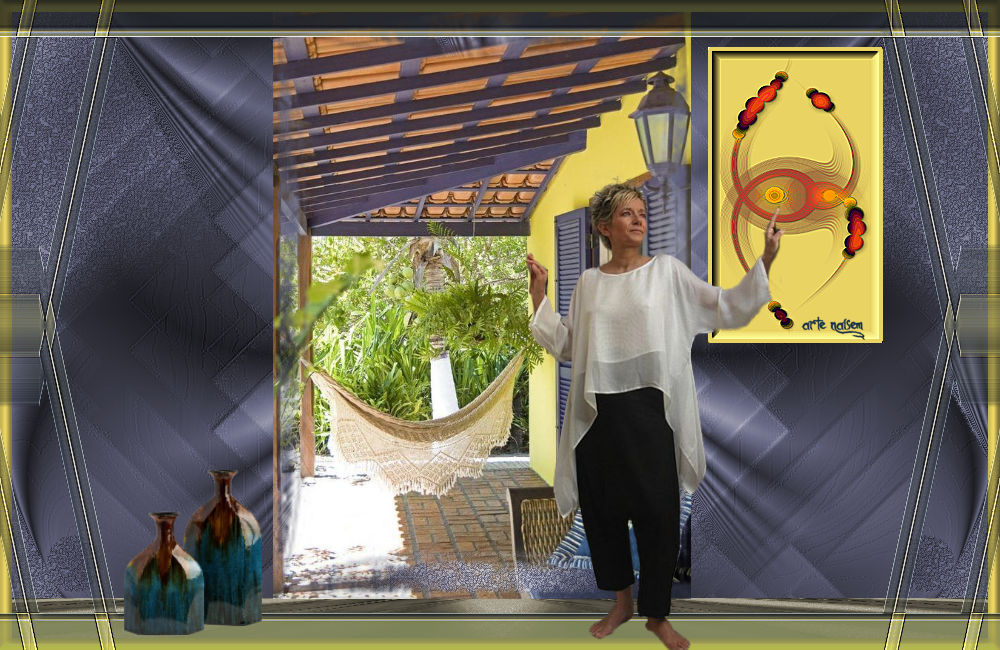
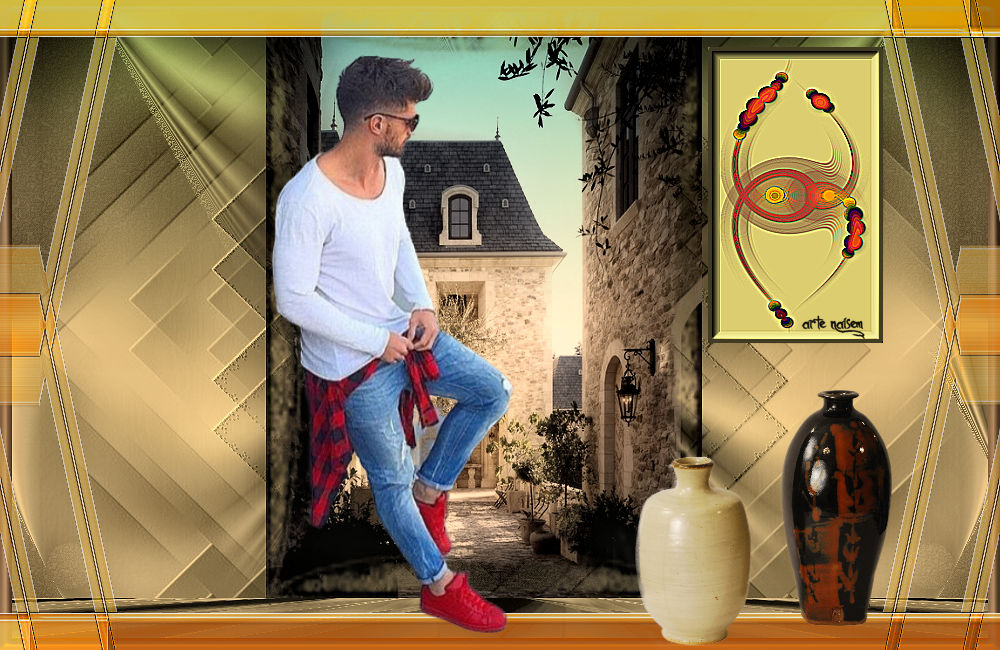
In this one I applied Nik Software 3.0 on the merged layer
Credits
Tutorial by NaiseM
All tubes, deco and selection: NaiseM
Mask: 1st - Nara Pamplona
2nd - author not credited
23/02/2017
|