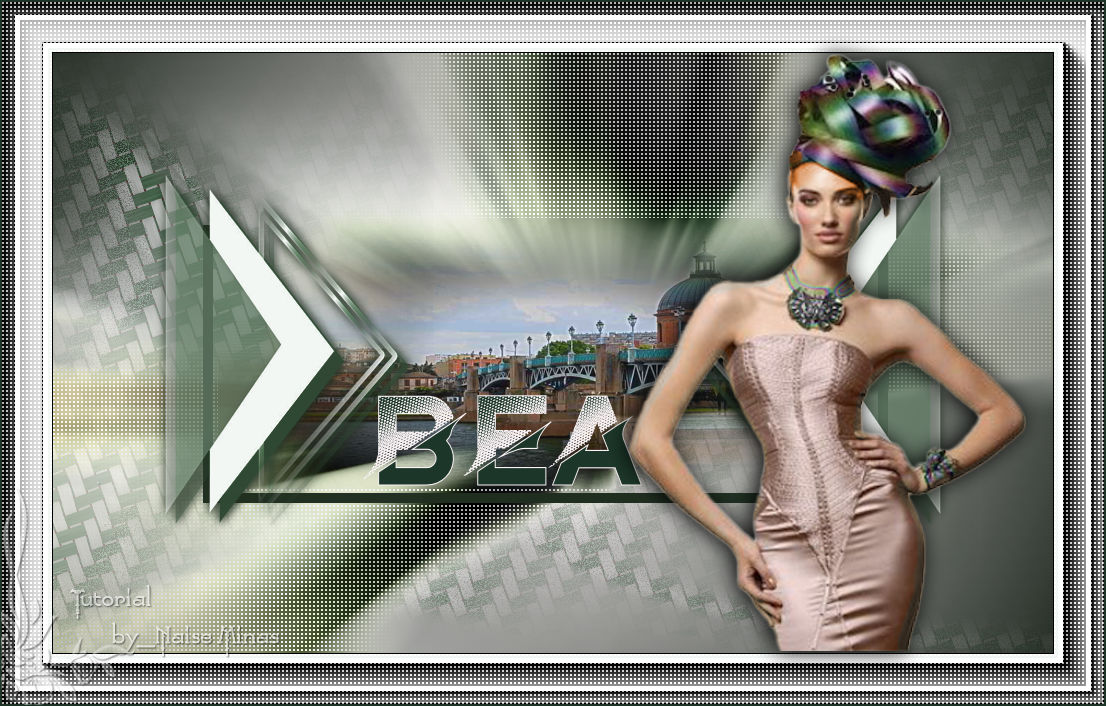
TO BEA, IN GRATITUDE FOR THE BEAUTIFUL TRANSLATIONS OF MY TUTORIALS
 Material
Tube
Mask Narah
Selection
Exclusive image
Misted
Preset: double-click it and it will go straight into the Eye Candy 5 Textures plugin folder

Plugin
Unlimited 2.0 - AFS IMPORT
Eye Candy 5 Textures - Weave
Instructions
Click on the butterfly to follow the tutorial
Preparation
Open your exclusive image
Apply a colorize with Color Efex Pro 3.0 (Nik) Bi-Color Filters to your liking
 |
Use the arrow to mark your line
Click with the mouse to move it
|
1_. Open your exclusive image and apply a colorize to your liking with Effects → Plugins → Nik Color Efex Pro 3.0 → Bi-Color Filters.
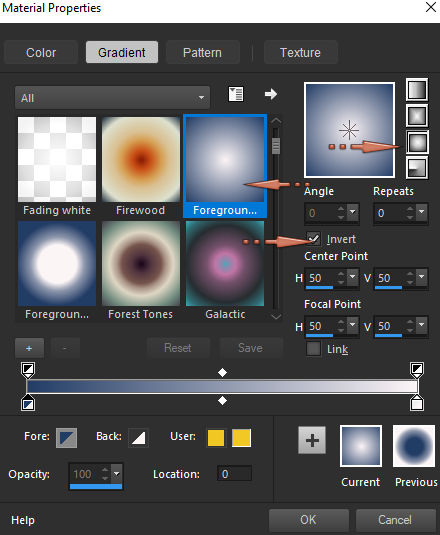
2_. Create a Sunburst gradient with the settings below.
Foreground: #ffffff.
Background: #244372.
3_. Open a new transparent image of 1000 x 600 px.
4_. Fill the image with the gradient.
5_. On the exclusive image: Edit → Copy.
6_. Layers → New Raster Layer.
7_. Selections → Select All.
Edit → Paste Into Selection.
Apply a colorize to your liking.
8_. Effects → Plugins → Filters Unlimited 2.0 → [AFS IMPORT] → sqborder2.
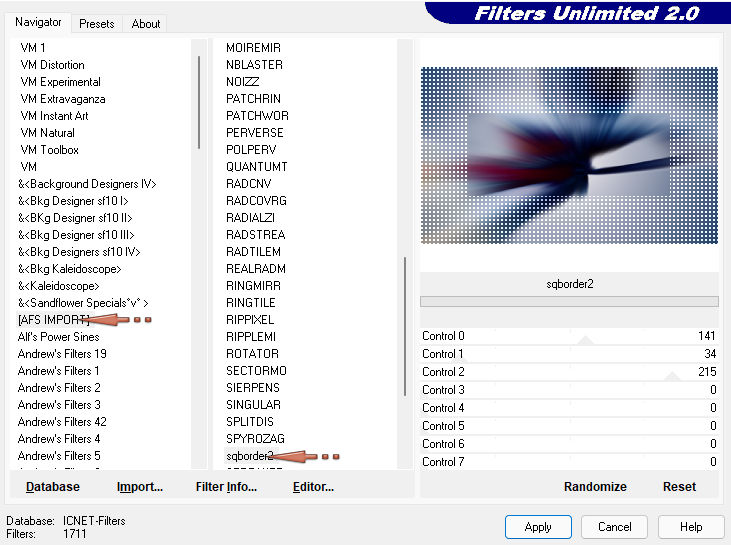
Selections → Select None.
9_. Layers → New Raster Layer.
10_. Selections → Load/Save Selection → Load Selection From Disk: selec_bea.
11_. Apply the misted and, with the selection still active, apply Effects → 3D Effects → Drop Shadow with the settings below.
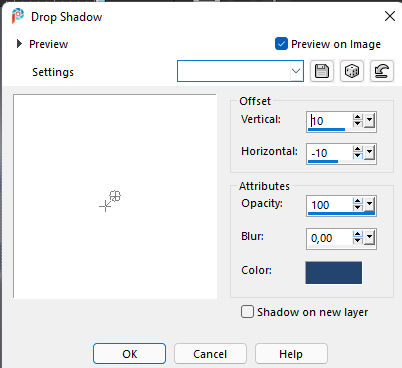
Then repeat with Horizontal positive, everything else the same.
Selections → Select None.
12_. Layers → Merge → Merge Down.
13_. Activate the layer Raster 1.
14_. Layers → New Raster Layer.
Fill with the color #ffffff.
15_. Layers → Load/Save Mask → Load Mask From Disk: Narah_Mask_1109.
Layers → Merge → Merge Group.
16_. Effects → Plugins → Alien Skin Eye Candy 5: Textures → Weave: apply the preset_bea; on the Basic tab, choose the color you want.
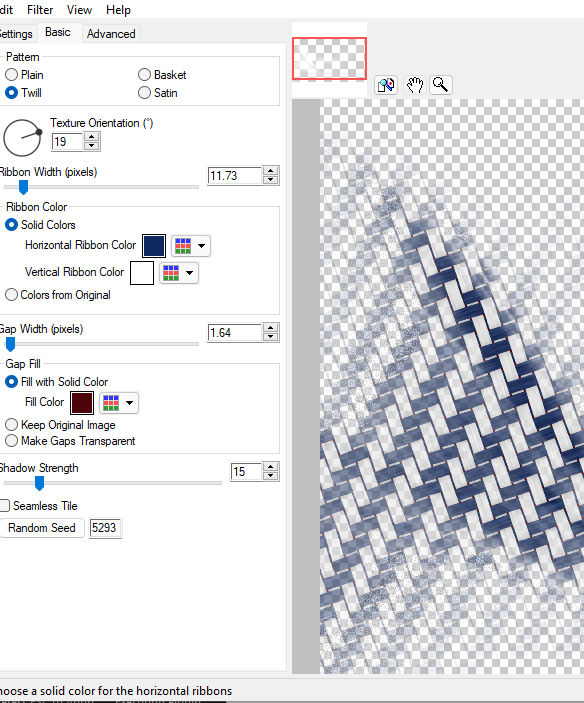
Layers → Merge → Merge Visible.
17_. Open the deco: Edit → Copy.
On your work: Edit → Paste As New Layer.
18_. Effects → Image Effects → Offset with the settings below.
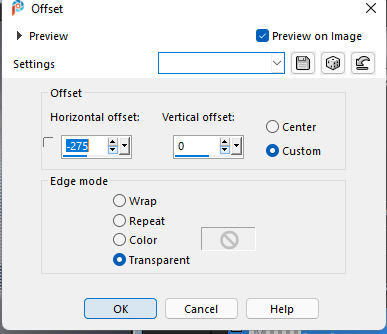
19_. Layers → Duplicate.
20_. Image → Mirror → Mirror Horizontal.
Layers → Merge → Merge Group.
21_. Effects → 3D Effects → Drop Shadow: 1 / 1 / 100 / 12, positive and negative.
22_. Image → Add Borders → Symmetric checked:
1 px - color #000000
50 px - color #ffffff
23_. With the Magic Wand tool, select the 50 px border.
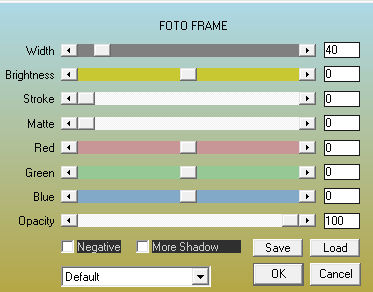
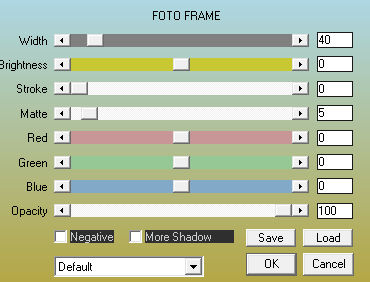
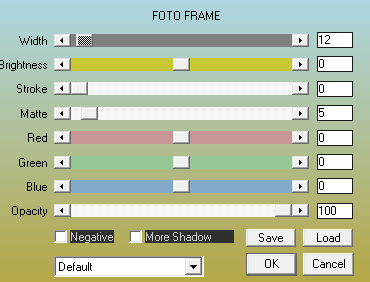
24_. Effects → Plugins → AAA Frames → Foto Frame. Apply the plugin 3 times:
1st time:
2nd time:
3rd time:
25_. With the selection still active, apply Effects → Plugins → Filters Unlimited 2.0 → [AFS IMPORT] → sqborder2 again.
26_. Image → Add Borders → Symmetric checked: 1 px - any color you like.
27_. Selections → Select None.
28_. Apply the name.
Or, if you prefer to make the title: use the font Brightness, size 128, with white in the Foreground and the predominant color of your work in the Background, and write the name Bia.
29_. Adjust the name as in the example.
30_. Apply the tube.
31_. Sign your work.
Save as JPG.
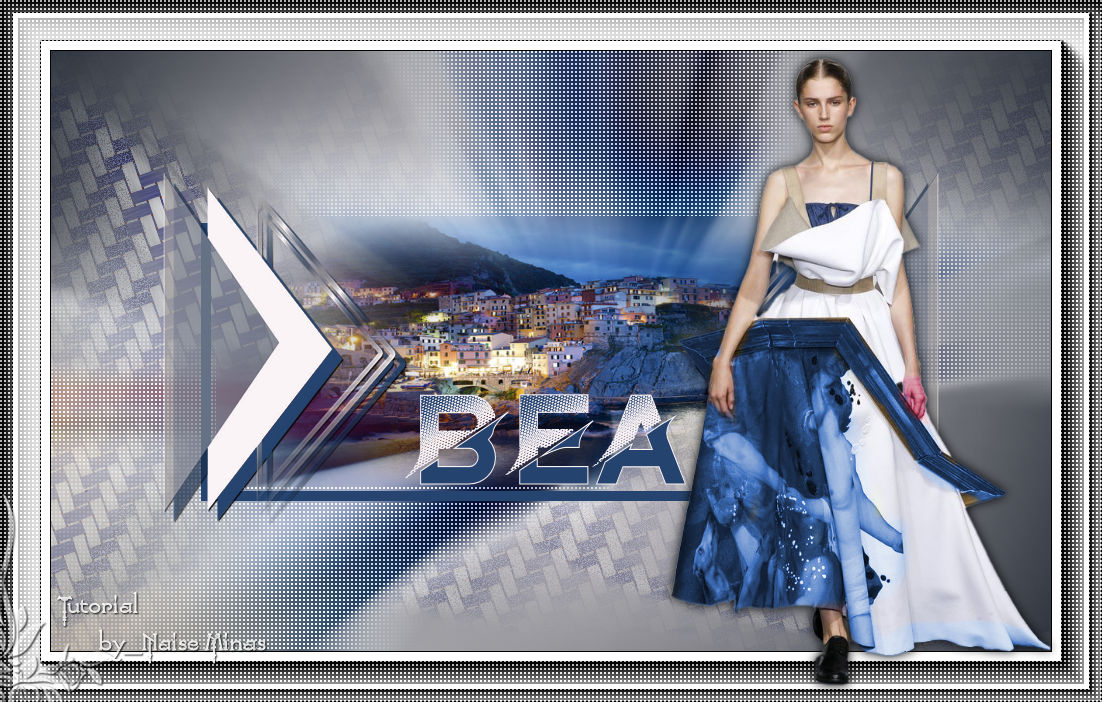
ANOTHER EXAMPLE