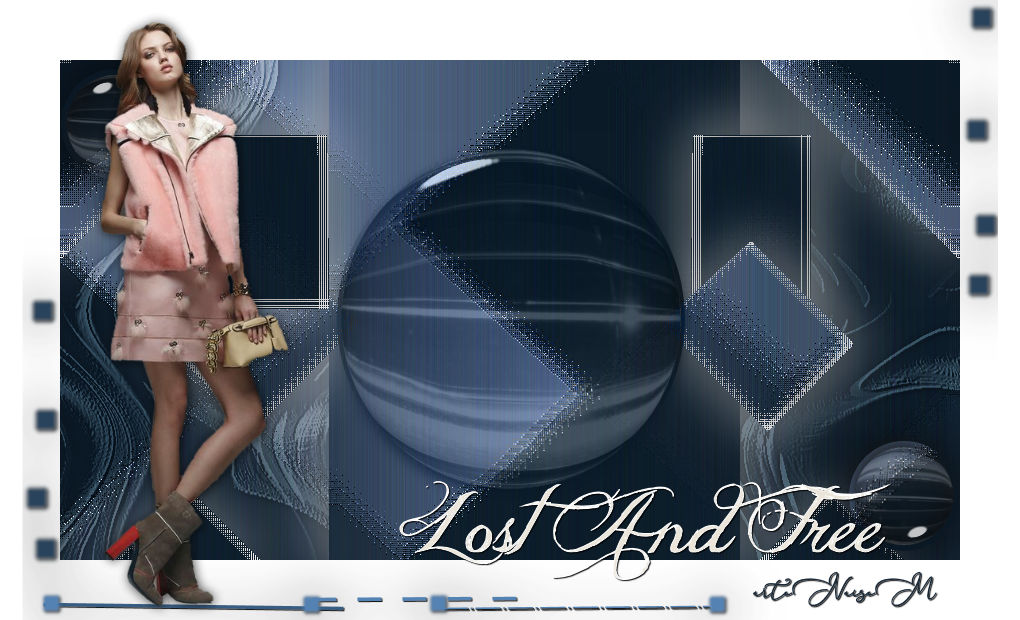
Lost and Free
Tutorial elaborado no PSP.
Todos os tutoriais são pessoais.
Qualquer semelhança é mera coincidência. |
MATERIAL

Seleções no Alpha Channel: Alphachannell_lost_and_free (selec 1, selec 2, selec 3 e selec 4)
Tubes e decos: próprios
Presets Eye Candy 5: Impact: lost_and_free-perspective-shadown (Perspective Shadow) e preset_lost_and_free (Glass)
Nome
Fonte usada: Jellyka Delicious Cake
PLUGINS
Mehdi → Wavy Lab 1.1
Lotis Filters → Mosaic ToolKit Plus
Filters Unlimited 2.0 → FunHouse → Loom
Alien Skin Eye Candy 5: Impact → Perspective Shadow
Alien Skin Eye Candy 5: Impact → Glass
 |
Use a seta para marcar a sua linha
Clique no mouse para movê-la
|
Roteiro
1_. Abra o Alphachannell_lost_and_free.
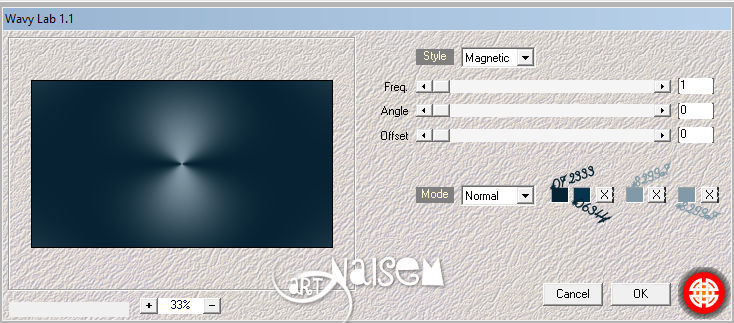
2_. Effects → Plugins → Mehdi → Wavy Lab 1.1: Style Magnetic / Freq 1 / Angle 0 / Offset 0.
Effects → Plugins → Lotis Filters → Mosaic ToolKit Plus, nas configurações abaixo:
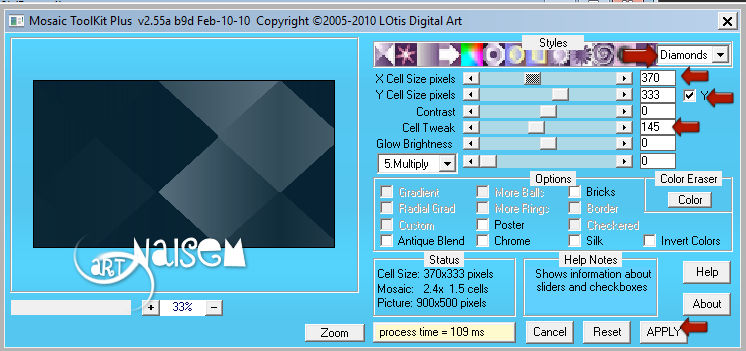
Effects → Edge Effects → Enhance More.
Effects → Plugins → Filters Unlimited 2.0 → FunHouse → Loom: X-threads 10 / Y-threads 2.
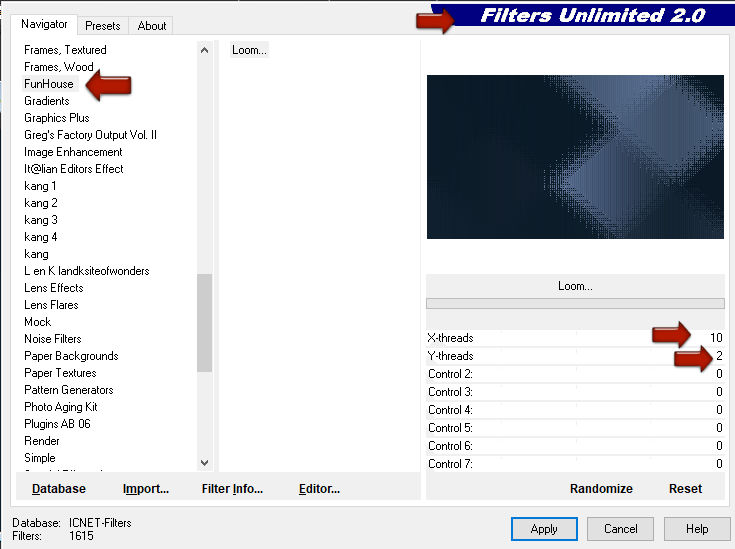
Image → Mirror → Mirror Horizontal.
3_. Selections → Load/Save Selection → Load Selection From Alpha Channel: selec 1.
Selections → Promote Selection to Layer.
Effects → Plugins → Alien Skin Eye Candy 5: Impact → Perspective Shadow: preset lost_and_free-perspective-shadown.
Effects → Plugins → Filters Unlimited 2.0 → FunHouse → Loom: X-threads 10 / Y-threads 2.
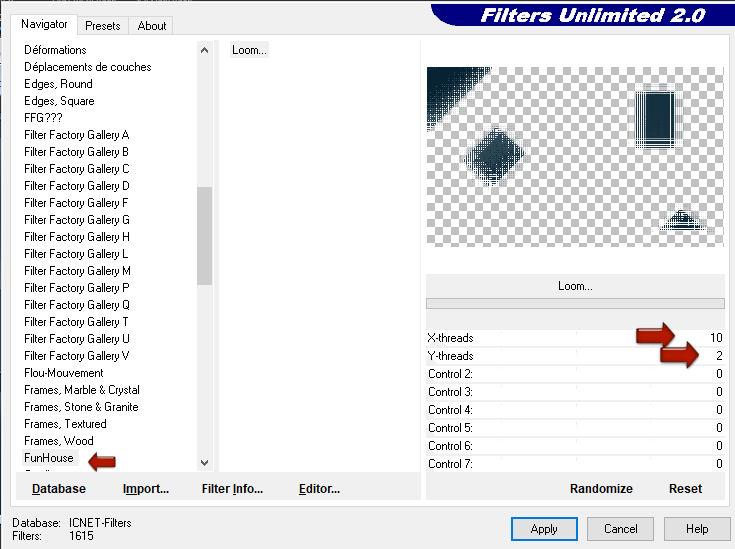
Selections → Select None.
Layers → Duplicate.
Image → Mirror → Mirror Horizontal.
Layers → Merge → Merge Down.
4_. Selections → Load/Save Selection → Load Selection From Alpha Channel: selec 2.
Ative a layer Merged.
Selections → Promote Selection to Layer.
Aplique o preset lost_and_free-perspective-shadown (Eye Candy 5: Impact → Perspective Shadow).
Effects → Plugins → Filters Unlimited 2.0 → FunHouse → Loom, nas mesmas configurações anteriores.
Selections → Select None.
5_. Selections → Load/Save Selection → Load Selection From Alpha Channel: selec 3.
Ative a layer Merged.
Selections → Promote Selection to Layer.
Aplique o preset lost_and_free-perspective-shadown (Eye Candy 5: Impact → Perspective Shadow).
Effects → Plugins → Alien Skin Eye Candy 5: Impact → Glass: preset preset_lost_and_free.
Selections → Select None.
Layers → Arrange → Bring to Top.
Layers → Duplicate.
Image → Mirror → Mirror Horizontal.
Image → Mirror → Mirror Vertical.
Layers → Merge → Merge Down.
6_. Selections → Load/Save Selection → Load Selection From Alpha Channel: selec 4.
Ative a layer Merged.
Selections → Promote Selection to Layer.
Effects → Plugins → Alien Skin Eye Candy 5: Impact → Glass: preset preset_lost_and_free.
Selections → Select None.
Layers → Arrange → Bring to Top.
Layers → Properties → Blend Mode: Luminance (Legacy).
7_. Abra o decor_nmcriacoes_113: Edit → Copy.
Ative a layer Merged e aplique Edit → Paste As New Layer.
Layers → Properties → Blend Mode: Soft Light.
Effects → 3D Effects → Drop Shadow: 1 / 1 / 73 / 10,00.
Effects → User Defined Filter → Emboss 3.
8_. Image → Add Borders → Symmetric marcado: 60 px - cor #FFFFFF.
Abra o decor-lost_and_free_naisem: Edit → Copy.
Edit → Paste As New Layer no seu trabalho.
Dê um colorize a seu gosto.
9_. Aplique o seu tube.
10_. Aplique o nome.
11_. Assine.
12_. Salve em JPG.
OUTRO MODELO
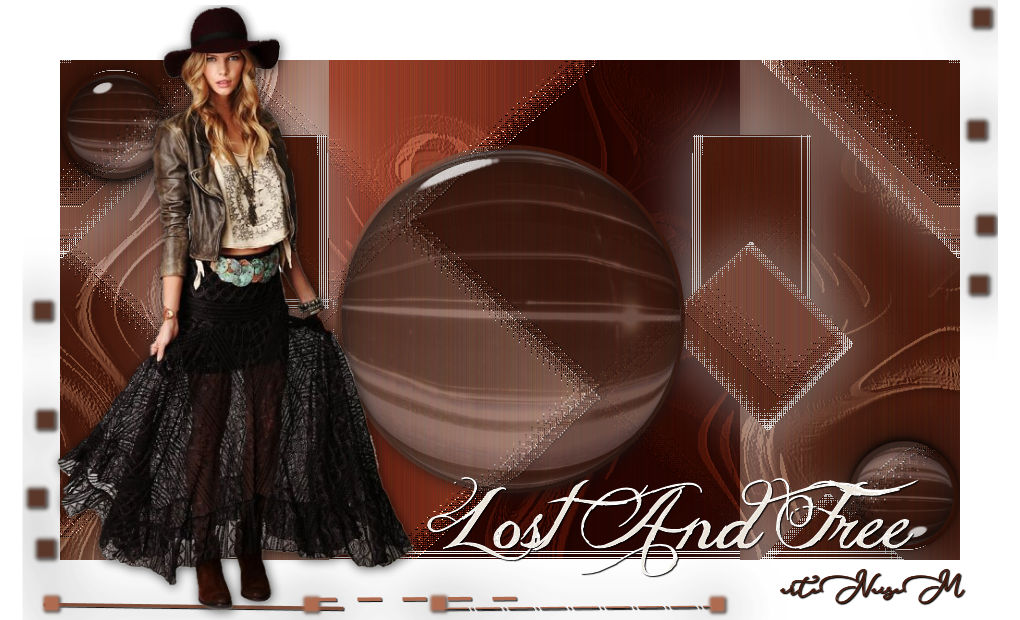
Créditos:
Criação, arte e formatação: Naise Minas
Tutorial criado por Naise Minas - NM Criações
em 22/05/2020.
Copyright ©2012/2026 - Web Design - Naise Minas