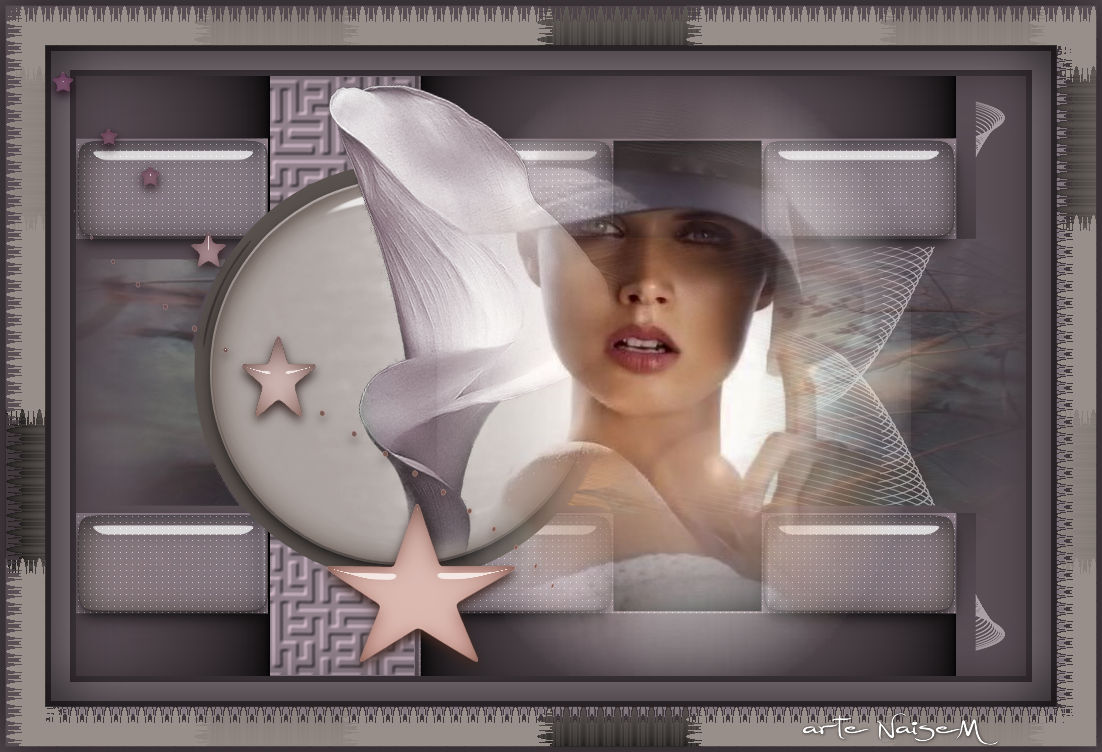

Tutorial elaborado no PSP.
Todos os tutoriais são pessoais.
Qualquer semelhança é mera coincidência. |
MATERIAL

Seleção: Alpha Channel (alpha_lucky-stars)
Tubes de flores: Naise Minas
Misteds: Naise Minas
Decos: deco_lucky_stars
Preset Alien Skin Eye Candy Impact → Glass: preset_luckystars
Textura: texturemate-greyscale06
PLUGINS
Alien Skin Eye Candy Impact → Glass
Carolaine and Sensibility → CS-LDots
DragonFly → Sinedots II
Filters Unlimited 2.0 → [AFS IMPORT] → ZIGZAGGE
 |
Use a seta para marcar a sua linha
Clique no mouse para movê-la
|
Roteiro
1_. Abra a seleção alpha (alpha_lucky-stars) e pinte com uma cor.
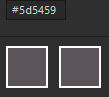
2_. Selections → Load/Save Selection → Load Selection From Alpha Channel: Selection #1.
Selections → Promote Selection to Layer.
Effects → Texture Effects → Weave:
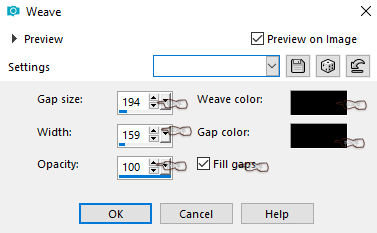
Selections → Select None.
Layers → Duplicate.
Image → Mirror → Mirror Vertical.
Layers → Merge → Merge Down.
3_. Selections → Load/Save Selection → Load Selection From Alpha Channel: Selection #2.
Selections → Promote Selection to Layer.
Pinte com uma cor bem clarinha.
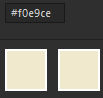
Effects → Texture Effects → Texture: texturemate-greyscale06.
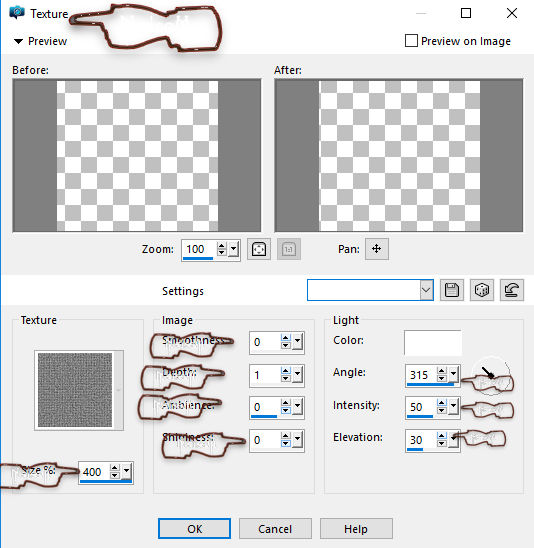
Selections → Select None.
4_. Selections → Load/Save Selection → Load Selection From Alpha Channel: Selection #3.
Selections → Promote Selection to Layer.
Pinte as partes selecionadas com a mesma cor.
Effects → Plugins → Alien Skin Eye Candy Impact → Glass: aplique o preset lucky_stars.
Effects → Plugins → Carolaine and Sensibility → CS-LDots, com as configurações abaixo:
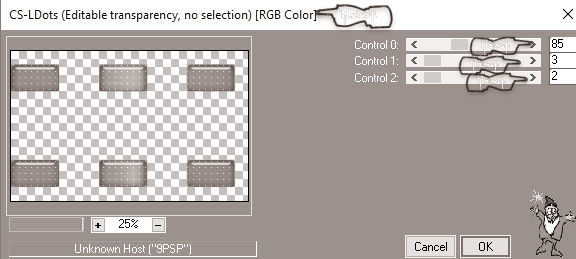
Selections → Select None.
5_. Abra o deco Lucky Stars e aplique um Colorize a seu gosto.
Edit → Copy.
Volte ao seu trabalho: Edit → Paste As New Layer.
Effects → Image Effects → Offset:
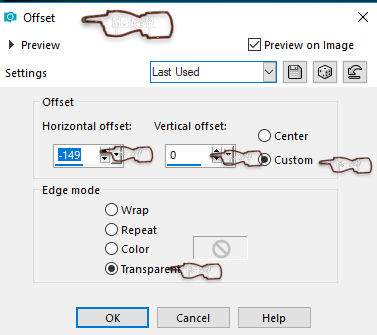
Layers → Merge → Merge Visible.
6_. Selections → Load/Save Selection → Load Selection From Alpha Channel: Selection #4.
Selections → Promote Selection to Layer.
Abra o seu misted: Edit → Copy.
Edit → Paste Into Selection, nesta parte selecionada.
7_. Ainda selecionado: Layers → New Raster Layer.
Effects → Plugins → DragonFly → Sinedots II:
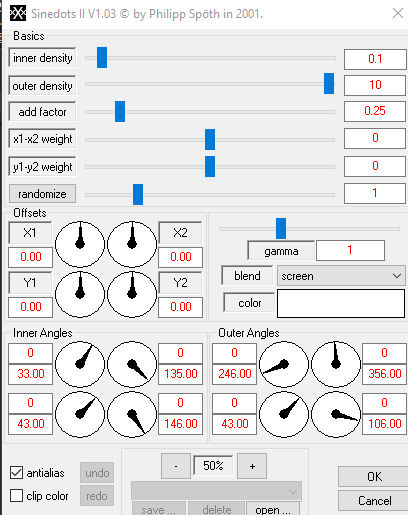
Layers → Duplicate.
Image → Mirror → Mirror Vertical.
Selections → Select None.
Layers → Merge → Merge Down.
Layers → Properties → Blend Mode: Luminance (Legacy) / Opacity: cerca de 38%.
Layers → Merge → Merge Visible.
8_. Abra o seu tube de flor e aplique no centro do deco.
9_. Image → Add Borders → Symmetric marcado:
6 px
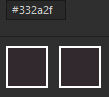
19 px

6 px
39 px
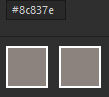
6 px
10_. Com a ferramenta Magic Wand (Fill gaps desmarcado), selecione a borda de 39 px.
Effects → Texture Effects → Weave:
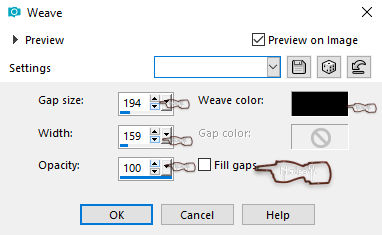
Effects → Plugins → Filters Unlimited 2.0 → [AFS IMPORT] → ZIGZAGGE, com as configurações abaixo:
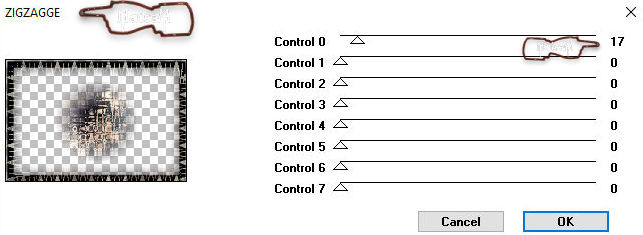
Effects → Edge Effects → Enhance More (se desejar).
Effects → 3D Effects → Drop Shadow: 0 / 0 / 100 / 100.
Selections → Select None.
11_. Aplique o seu tube misted e ajeite a seu gosto.
12_. Abra o deco_naiseminas 0043: Edit → Copy.
Edit → Paste As New Layer.
Effects → Image Effects → Offset, com as configurações abaixo:
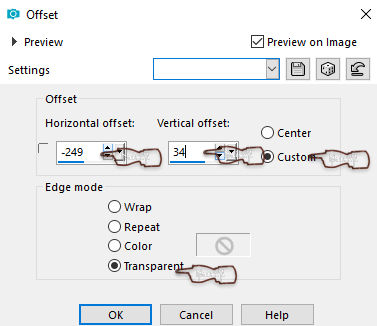
13_. Image → Resize: 1000 px.
14_. Assine e salve em JPG.
OUTRO MODELO
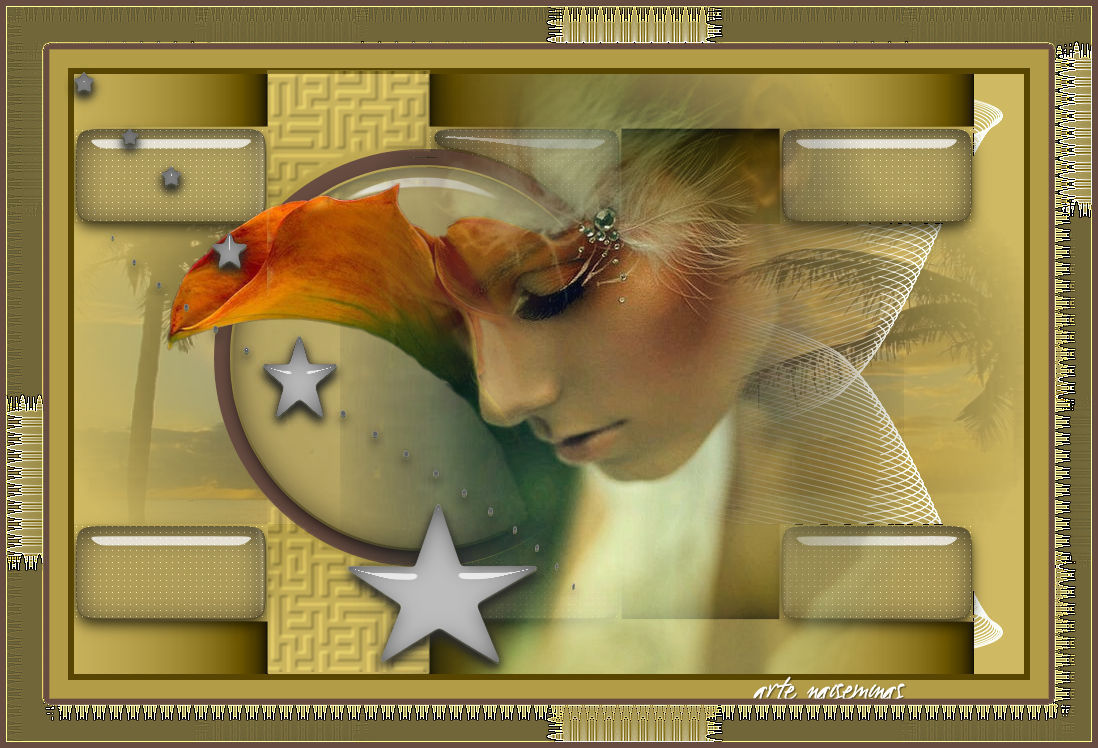
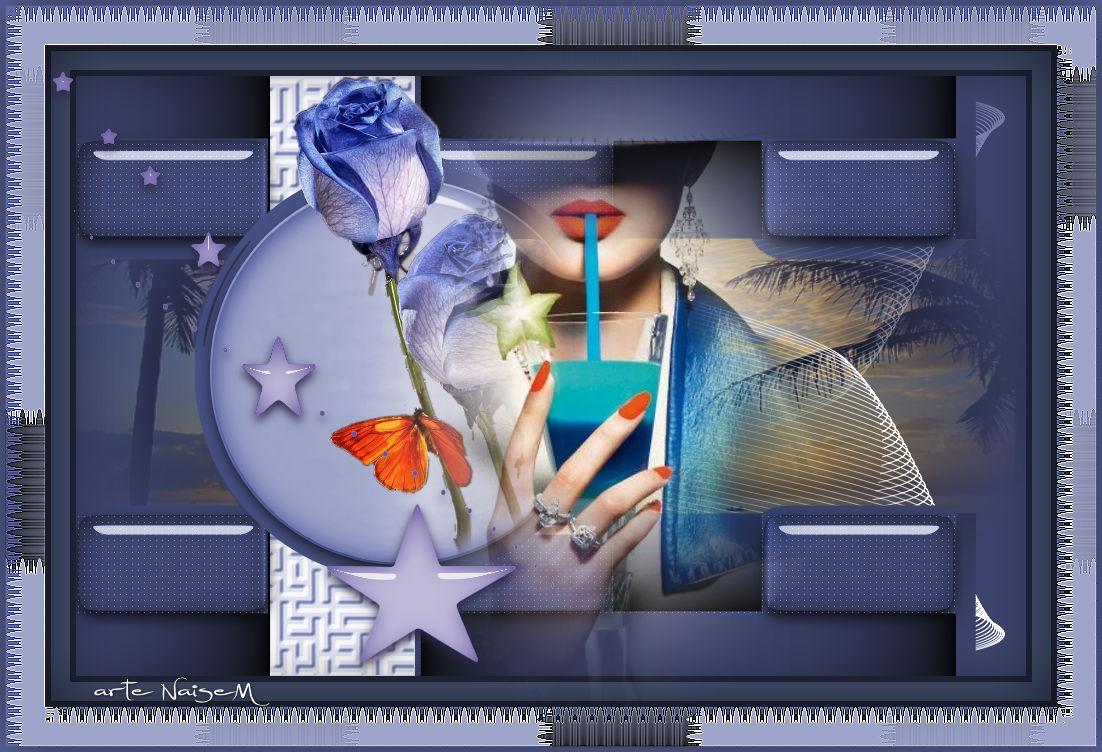
Créditos:
Criação, arte e formatação: Naise Minas
Tutorial criado por Naise Minas - NM Criações
em 21/09/2018.
Copyright ©2012/2026 - Web Design - Naise Minas