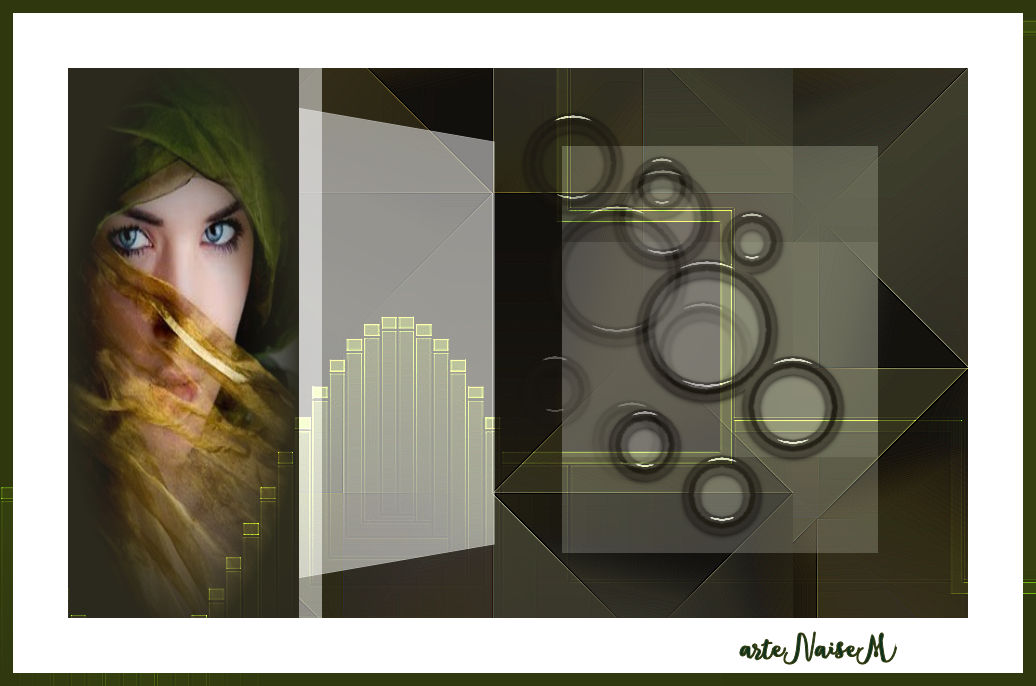
Teu Olhar
Tutorial elaborado no PSP. |
MATERIAL

Ferramentas do PSP
1º tube misted: de minha autoria
2º tube misted: Nicole
Mask sem menção do autor
Seleção Alpha: alpha_teu olhar
Preset: #teu_olhar (clique duas vezes em cima que ele será transportado automaticamente para a pasta do plugin Eye Candy 5 Impact)
PLUGINS
Mehdi → Wavy Lab 1.1
Mehdi → Sorting Tiles
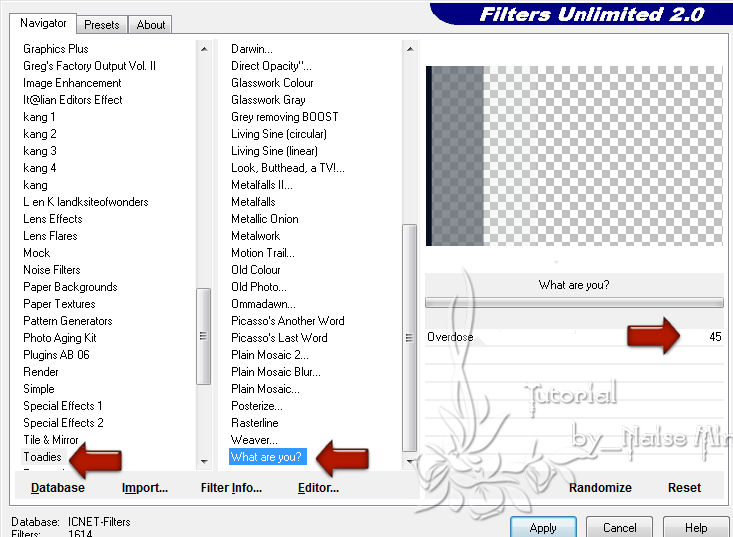
Filters Unlimited 2.0 → Toadies → What Are You?
Alien Skin Eye Candy 5 Impact → Glass
 |
|
Roteiro
1_. Abra a seleção Alpha Channel (alpha_teu olhar).
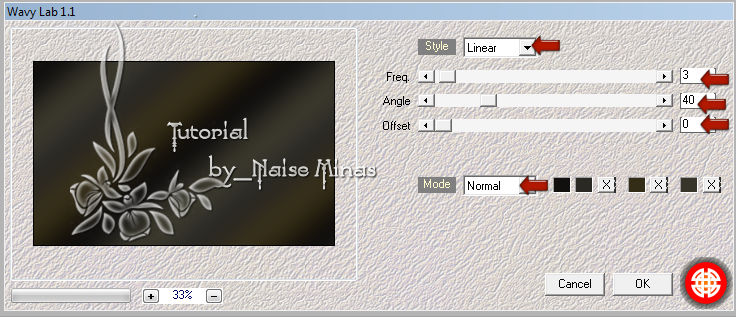
2_. Effects → Plugins → Mehdi → Wavy Lab 1.1.
3_. Effects → Plugins → Mehdi → Sorting Tiles: Plus.
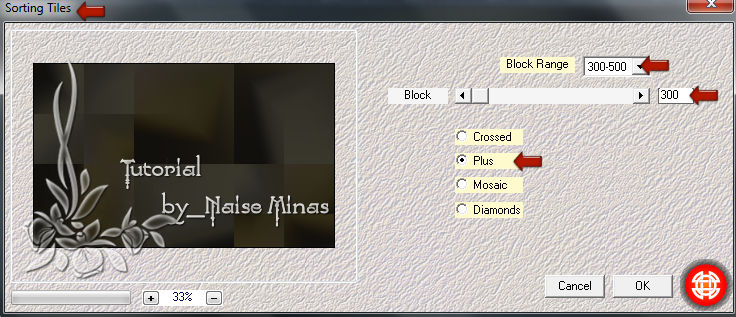
Aplique novamente Effects → Plugins → Mehdi → Sorting Tiles: Crossed.
Effects → Edge Effects → Enhance More.
Layers → Duplicate.
4_. Image → Free Rotate.
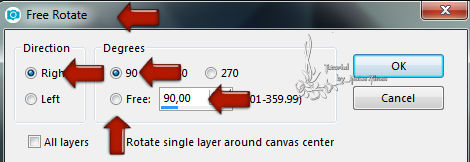
5_. Selections → Load/Save Selection → Load Selection From Alpha Channel: #selections_1.
Layers → New Raster Layer.
Selections → Select None.
Pinte com a cor #ffffff.
Effects → Plugins → Filters Unlimited 2.0 → Toadies → What Are You?: Overdose 45.
Selecione esta parte cinza.
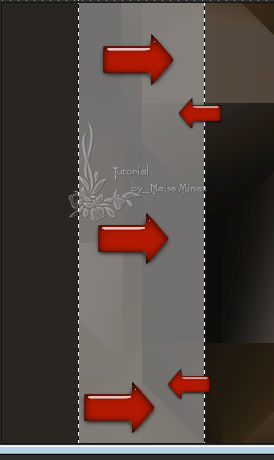
Selections → Promote Selection To Layer.
Selections → Select None.
6_. Effects → Geometric Effects → Perspective - Horizontal com as configurações abaixo.
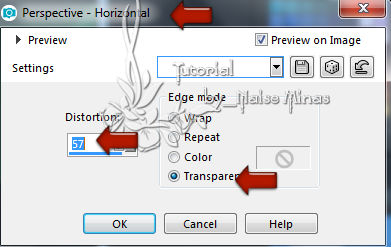
7_. Selections → Load/Save Selection → Load Selection From Alpha Channel: #selections_2.
Layers → New Raster Layer.
Selections → Select None.
Pinte com a cor #2b291d.
Effects → Plugins → Filters Unlimited 2.0 → Toadies → What Are You?, com as mesmas configurações anteriores.
8_. Selections → Load/Save Selection → Load Selection From Alpha Channel: #selections_3.
Selections → Promote Selection To Layer.
Selections → Modify → Select Selection Borders.
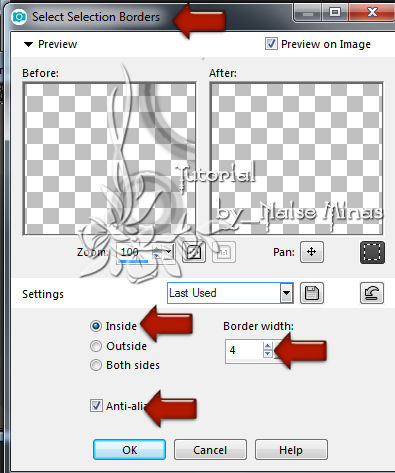
Layers → New Raster Layer.
Preencha com a cor #2b291d.
Effects → Plugins → Alien Skin Eye Candy 5 Impact → Glass: preset teu_olhar.
Selections → Select None.
Effects → Image Effects → Seamless Tiling: Stutter Diagonal.
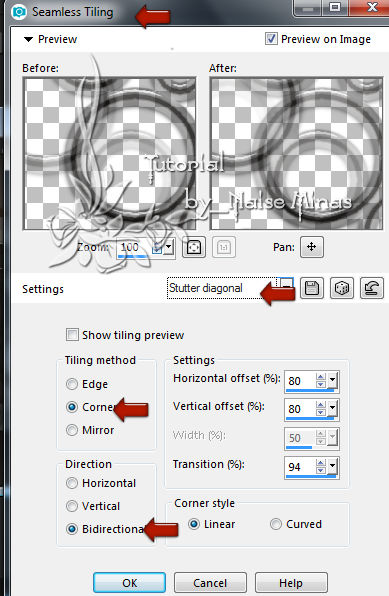
9_. Selections → Load/Save Selection → Load Selection From Alpha Channel: #selections_4.
Layers → New Raster Layer.
Pinte com a cor #2b291d.
10_. Abra o seu misted, Edit → Copy e Edit → Paste Into Selection nesta 4ª seleção.
Selections → Select None.
Layers → Merge → Merge Visible.
11_. Image → Add Borders → Symmetric marcado:
55 px - cor #ffffff
13 px - cor #2f370f
12_. Layers → New Raster Layer.
13_. Pinte com a cor #2f370f.
Layers → Load/Save Mask → Load Mask From Disk e Layers → Merge → Merge Group.
Layers → Properties → Blend Mode: Dodge.
14_. Assine.
15_. Salve em JPG.
OUTRO MODELO
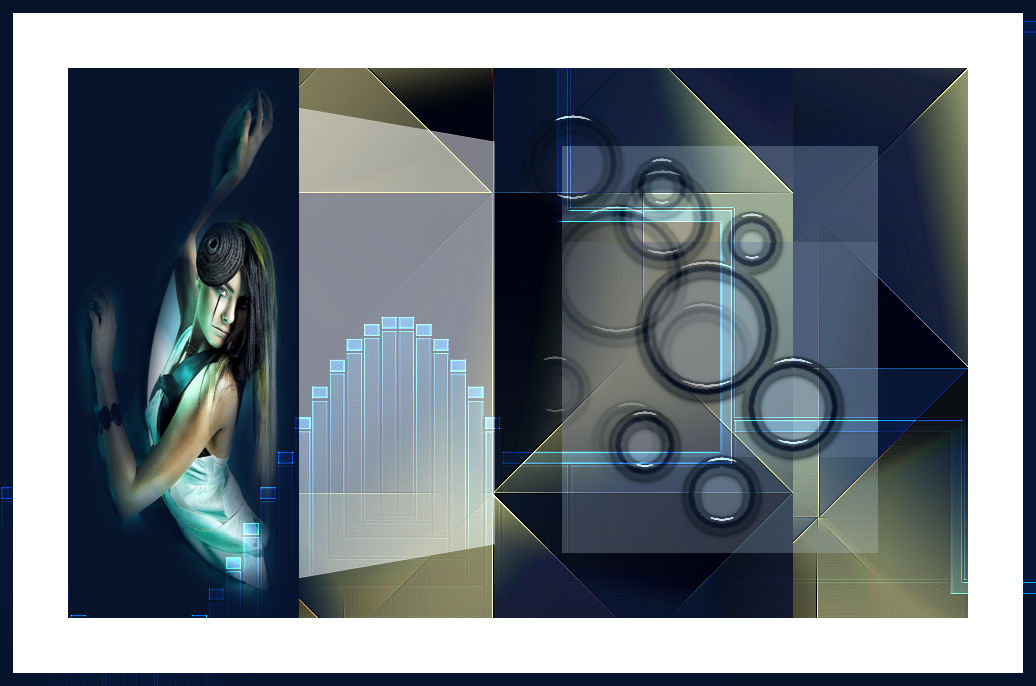
Créditos:
Criação, arte e formatação: Naise Minas
Misteds: Naise Minas e Nicole
Tutorial criado por Naise Minas - NM Criações.
Copyright ©2012/2026 - Web Design - Naise Minas