 |
Use the arrow to mark your line
Click with the mouse to move it
|
1_. Open a tube in PSP, choose two colors and create a Linear gradient: Angle 0 / Repeats 1.
2_. Open a new image of 800 x 600 px and fill it with this gradient.
3_. Layers → Duplicate and close the visibility of Raster 1.
We will work on Copy of Raster 1.
4_. Layers → Load/Save Mask → Load Mask From Disk: sg_sidewipe, Invert unchecked.
Layers → Delete.
5_. Effects → 3D Effects → Drop Shadow: 10 / 10 / 80 / 15.
6_. Effects → Edge Effects → Enhance More.
7_. Layers → New Raster Layer.
8_. Selections → Load/Save Selection → Load Selection From Disk: Home-yvonnespsplessensel1.
9_. Fill the selection with the same gradient.
10_. Effects → Art Media Effects → Brush Strokes.
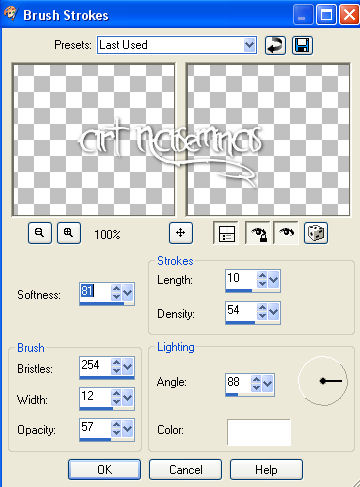
11_. Effects → 3D Effects → Drop Shadow: 5 / 5 / 100 / 15, positive and negative.
Selections → Select None.
12_. Close the visibility of Raster 2.
13_. Activate the layer Copy of Raster 1.
14_. Effects → Distortion Effects → Polar Coordinates.
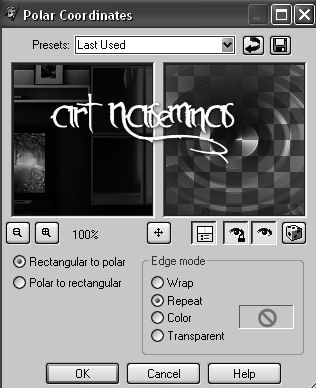
15_. On your misted: Edit → Copy.
Edit → Paste As New Layer.
16_. Effects → Distortion Effects → Polar Coordinates.
17_. Reduce the opacity of the misted, if you think it is necessary.
18_. Open the visibility of the layers Raster 1 and Raster 2.
19_. Image → Add Borders → Symmetric checked: 5 px - dark color.
20_. Image → Add Borders → Symmetric checked: 55 px - light color.
21_. With the Magic Wand tool, select this light border and fill it with the gradient.
22_. Effects → Art Media Effects → Brush Strokes.
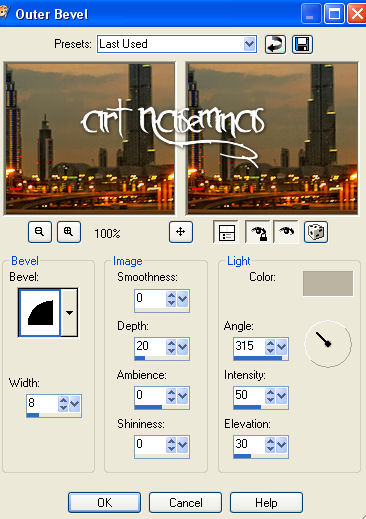
23_. Effects → 3D Effects → Outer Bevel; choose the light color of your work.
24_. Selections → Select None.
25_. Effects → Plugins → Filters Unlimited 2.0 → &<Bkg Kaleidoscope> → 4 QFlip UpperR.
26_. Effects → Plugins → Filters Unlimited 2.0 → &<Bkg Kaleidoscope> → @BlueBerry Pie.
27_. Apply a background image, if you wish.
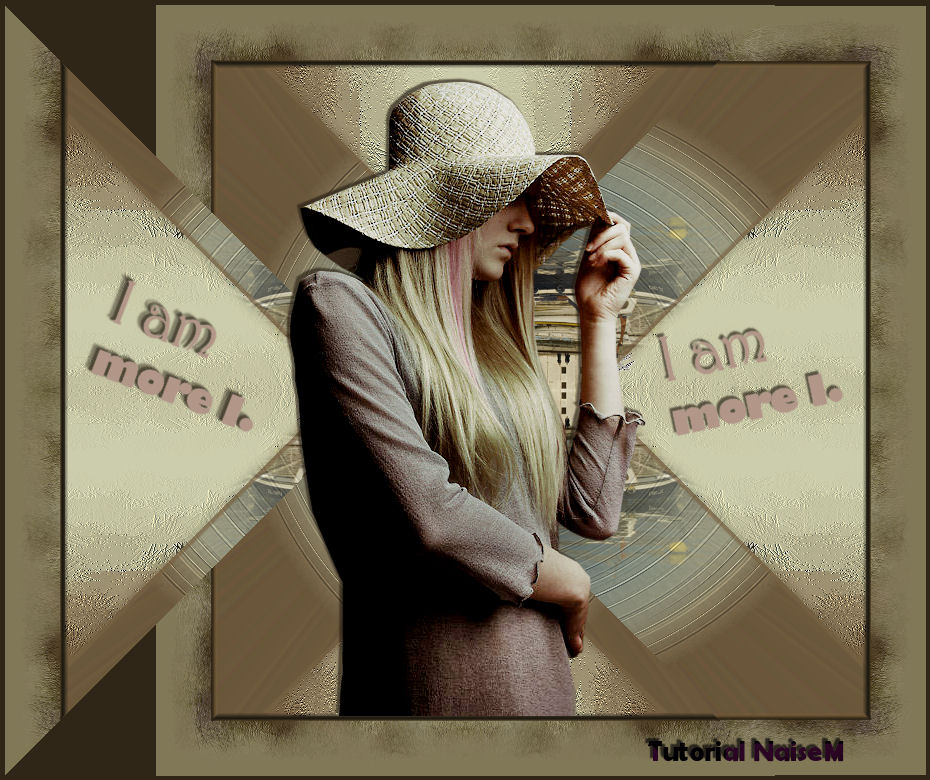
28_. Apply the chosen tube and, if you wish, a brush.
29_. Layers → Merge → Merge All.
30_. Image → Add Borders → Symmetric checked: 5 px - dark color.
31_. Sign your work.
32_. Save as JPG.
 TAG ANNA NETTO