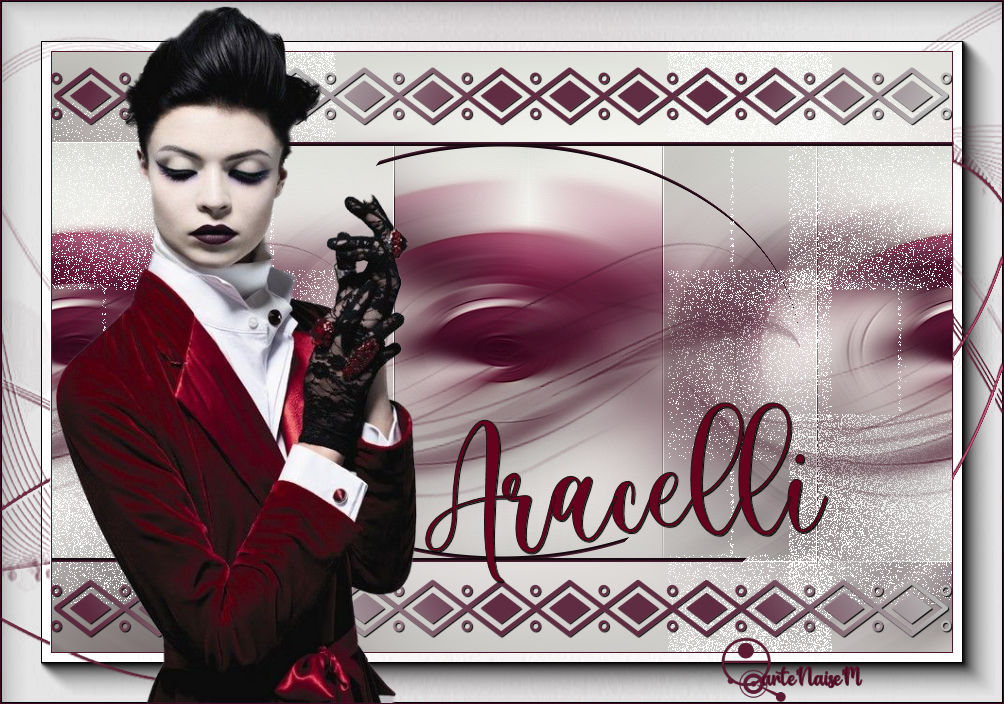
A gift for my dear friend
Materials
Tube (my own creation)
Masks Narah (thank you)
Brush DD Ethnic
Emboss 3

Plug-ins
AAA Foto Frame

Click on the star to follow the tutorial
 |
Use the arrow to mark your line
Click with the mouse to move it
|
1_. Choose an image: Edit → Copy.
2_. Open a new transparent image of 900 x 600 px.
Selections → Select All.
Edit → Paste Into Selection.
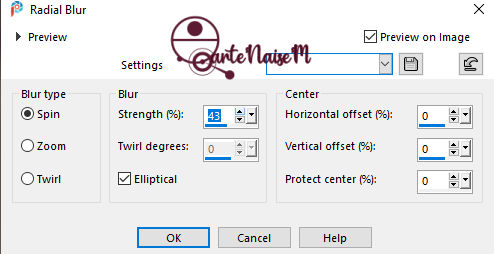
Adjust → Blur → Radial Blur, with the settings below:
3_. Layers → Duplicate.
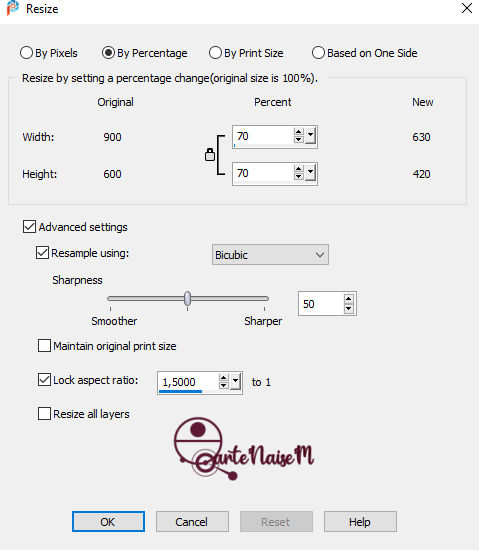
4_. Image → Resize → By Percentage, with the settings below:
Effects → Image Effects → Seamless Tiling: Side by side.
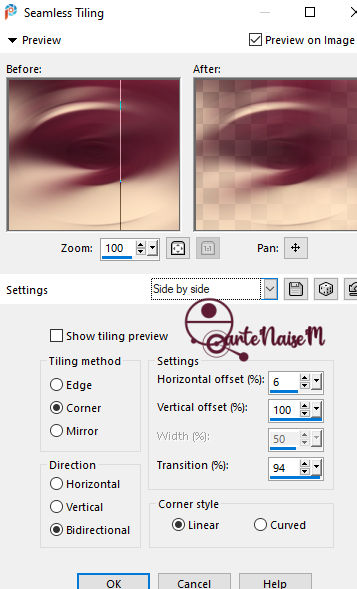
If you wish, Layers → Properties → Blend Mode: Multiply.
5_. Layers → New Raster Layer.
Fill with the solid color #4f162f.
Layers → Load/Save Mask → Load Mask From Disk: Narah_Mask_1239.
Layers → Merge → Merge Group.
Effects → Image Effects → Seamless Tiling: Side by side.
Effects → 3D Effects → Drop Shadow: 1 / 1 / 70 / 1,00.
6_. Activate the layer Copy of Raster 1.
7_. With the Magic Wand tool, select this part, as shown in the print:
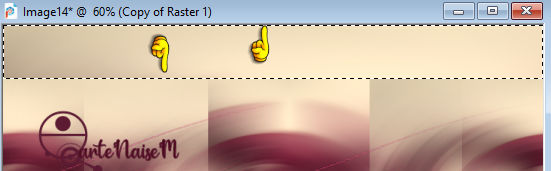
Layers → New Raster Layer.
8_. Effects → 3D Effects → Chisel.
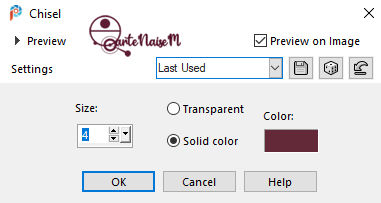
Selections → Select None.
9_. Effects → Image Effects → Offset.
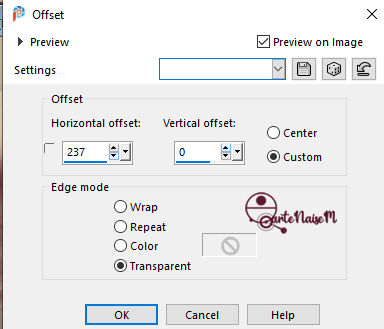
Layers → Duplicate.
Image → Mirror → Mirror Vertical.
Image → Mirror → Mirror Horizontal.
Layers → Merge → Merge Down.
10_. Layers → Duplicate.
Effects → Geometric Effects → Circle.
11_. The layers will look like this:
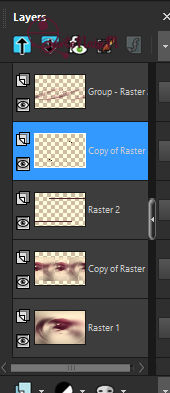
12_. Activate the layer Copy of Raster 1.
Note: if you wish, close the visibility of the upper layers.
Layers → New Raster Layer.
Fill with the color #ffffff (white).
Layers → Load/Save Mask → Load Mask From Disk: Narah_Mask_1123.
Layers → Merge → Merge Group.
Layers → Properties → Blend Mode: Dissolve.
Layers → Arrange → Bring to Top.
13_. Image → Add Borders → Symmetric checked:
1 px - darkest color of your work #3f0a21
50 px - color #ffffff
14_. With the Magic Wand tool, select this white border.
Layers → New Raster Layer.
Fill with the solid color #3f0a21.
Layers → Load/Save Mask → Load Mask From Disk: Narah_mask_0883.
Layers → Merge → Merge Group.
Effects → User Defined Filter → Emboss 3.
15_. Layers → Merge → Merge Visible.
16_. Effects → Plugins → AAA Frames → Foto Frame.
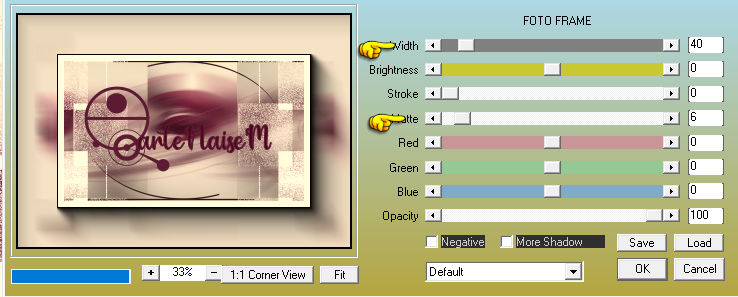
Selections → Select None.
17_. Choose two colors from your work and create a Linear gradient, with the settings below:
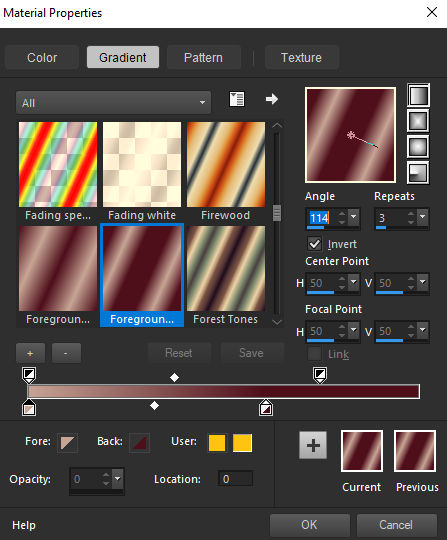
18_. Layers → New Raster Layer.
With the Paint Brush tool, open the brush DD Ethnic 003 and set Size 900.

Apply with the gradient.
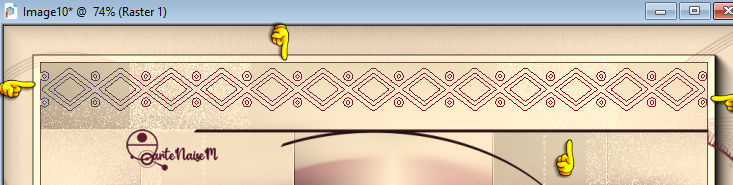
Layers → Duplicate.
Image → Mirror → Mirror Vertical.
Layers → Merge → Merge Down.
Effects → 3D Effects → Drop Shadow: 1 / 1 / 70 / 1,00.
19_. Apply your tube and add a Drop Shadow to your liking.
20_. Image → Add Borders → Symmetric checked: 1 px - dark color of your work.
21_. Sign your work.
22_. Save as JPG.
Another Model
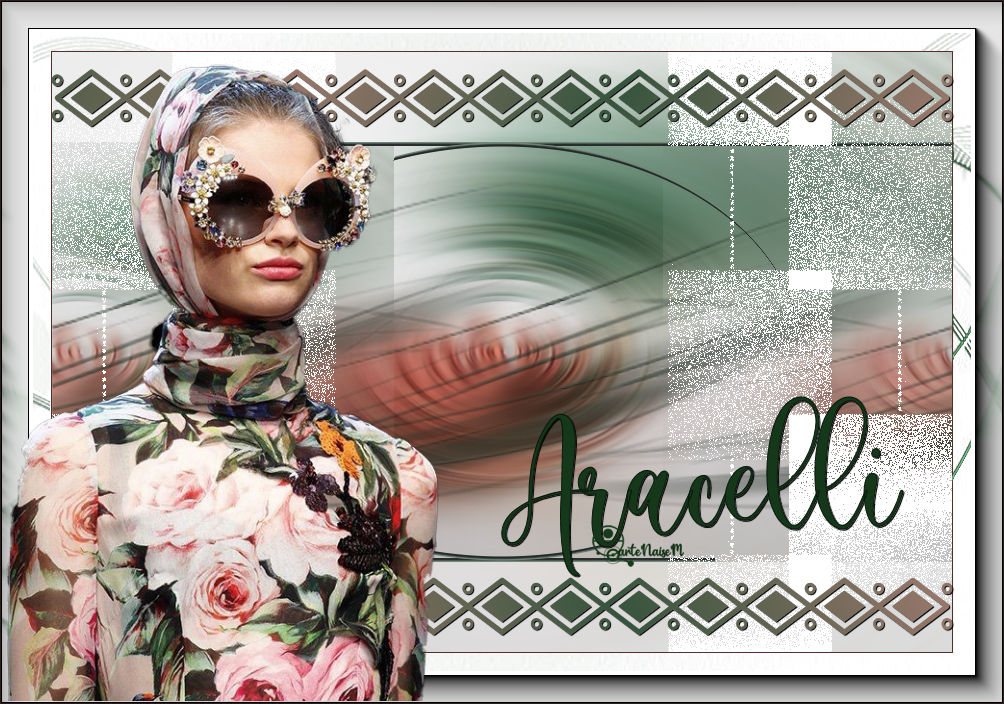
14/01/2021